Monthly Archives: April 2016

Planting Elderberries in the Meadow

Grassy meadow in my backyard.

Our meadow grows great grass!

We call this our meadow. Honestly, it’s really just half an acre of ground we
didn’t want to mow any more.

Lemon balm likes the meadow

Lemon balm took over the old firewood pile.

The idea started when I transplanted some of my mom’s Lemon Balm in an area that had been the firewood pile.                    Lemon balm grows fast and this took off and created an oval that’s about 6 feet wide and 12 feet long. Then milkweed dropped by for a visit and decided to stay, creating a ring around half of the lemon balm bed. The only plants that have tried to interfere were two invasives – Mile A Minute (it grows that fast) and every surface including the back of the leaves has stickers) and Bittersweet Vine.

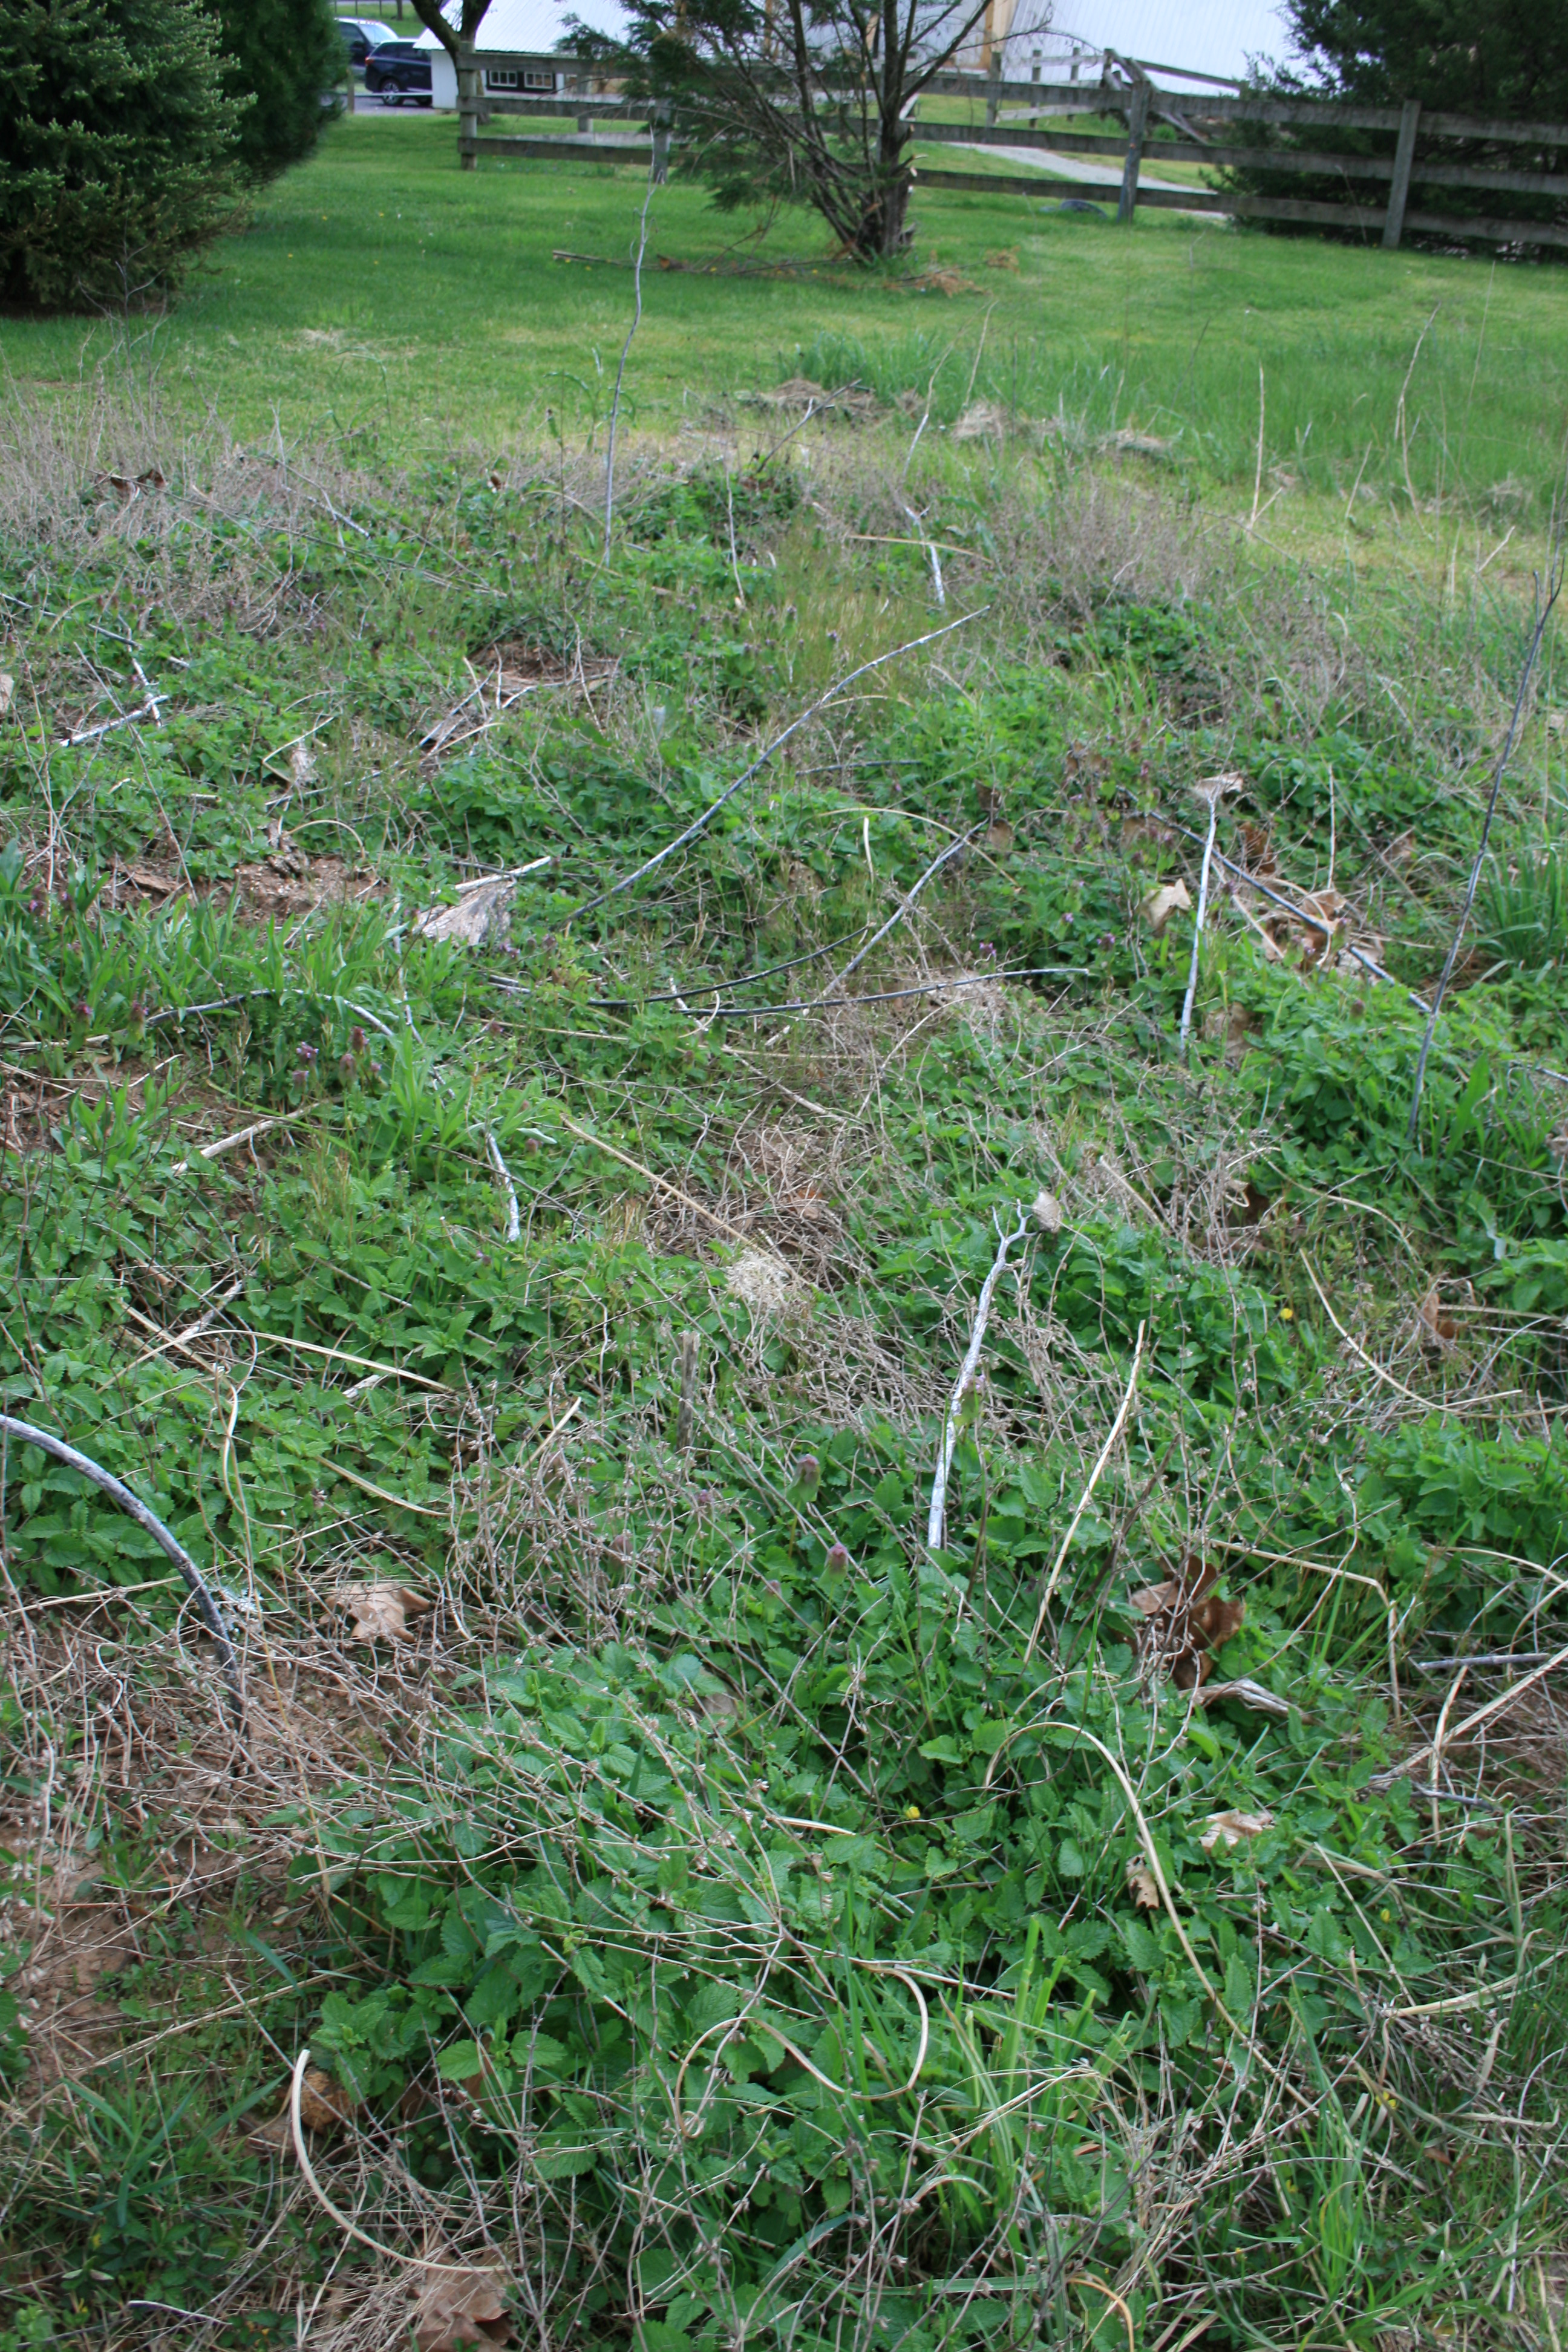
The rest of the half acre is “naturalized.”

Okay, it looks pretty seedy but I have been working on this for a couple of years with little or no success. The grass is MONSTER and its rhizomes are about 1/2″ thick!

I’ve planted 18 perennials out in the meadow…black-eyed susans, shasta daisies, perennial flox, and cone flowers — all supposed to be hardy, to love the sun and to return, year after year. Most of them packed up in the dead of night and moved to the neighbors.

So, now my new approach is to plant bushes.

Transplanted elderberry growing in the meadow.

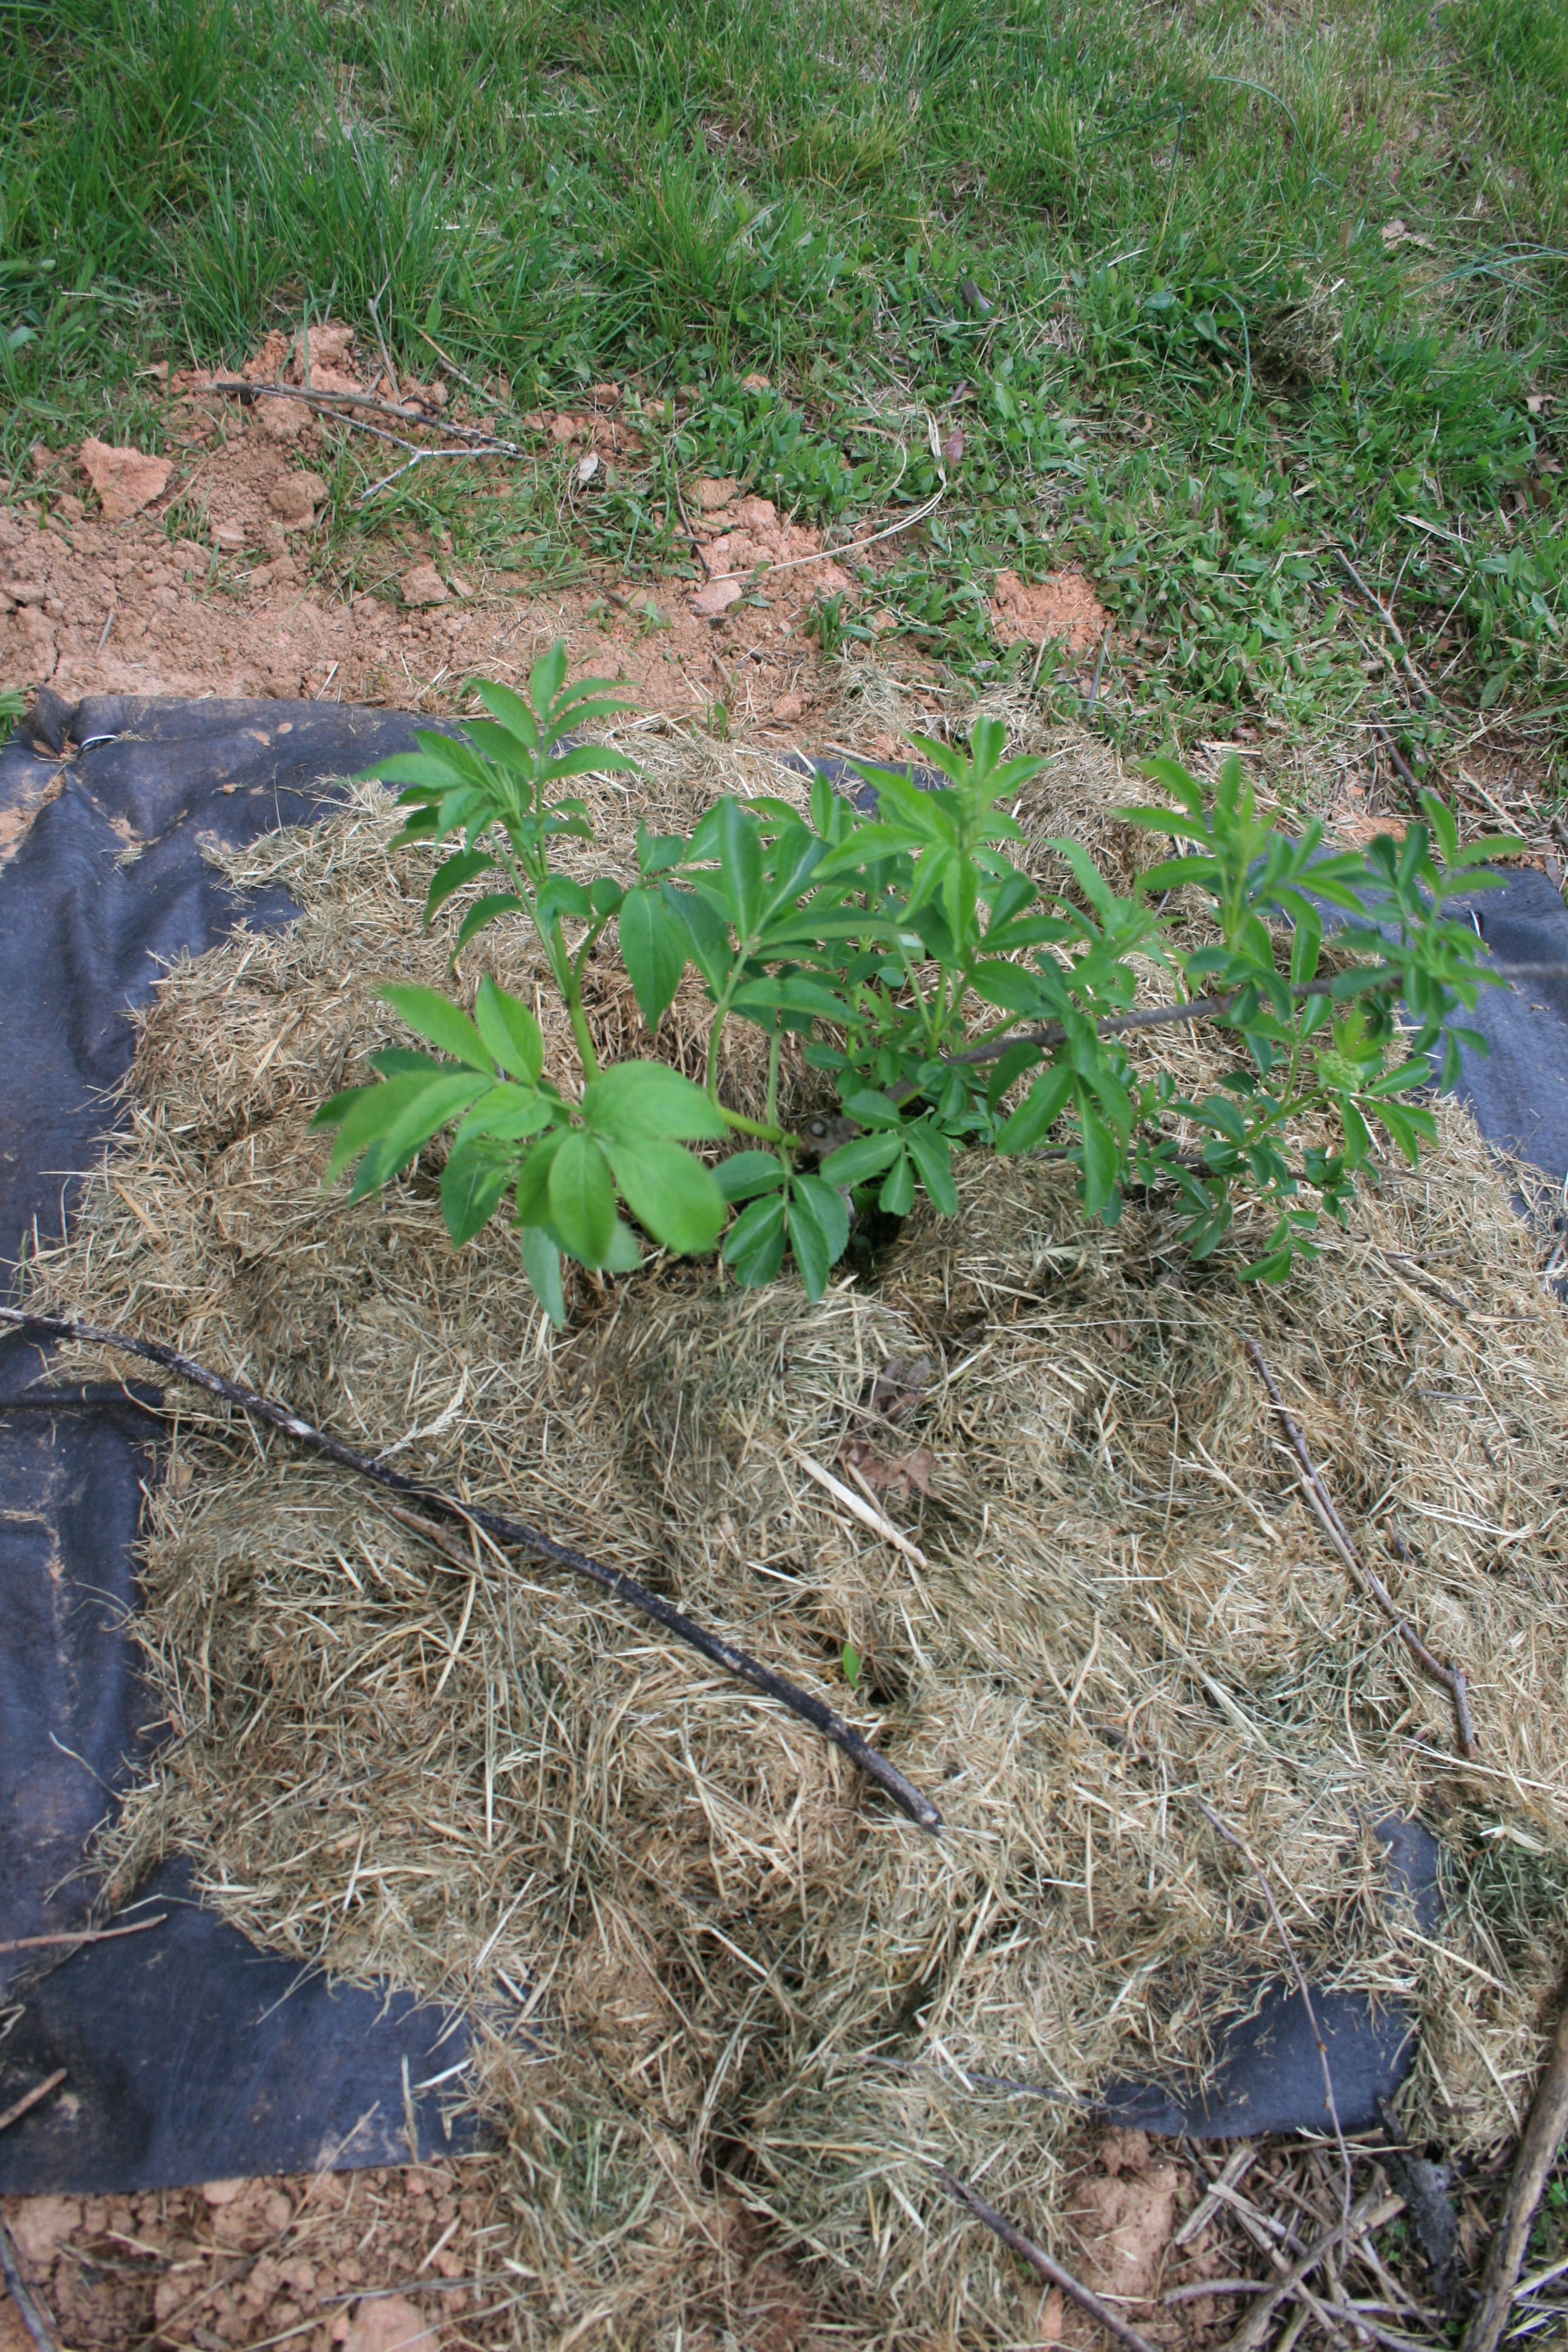
The first elderberry goes into the meadow.

Of course, the bushes have to produce so, I am putting 3 elderberry bushes in and 2 Goji Berry bushes. Just for fun, I picked up a Hazelnut tree at Sugar Bush Nursery and am adding it to the mix.

Luckily, we had dragged branches out to the meadow over the last 2 years, piled them up and left them. Occasionally we would look at each other, look at the pile and say, “We need to clean that up.” That didn’t happen until today.

Sticks moved so I could plant elderberries.

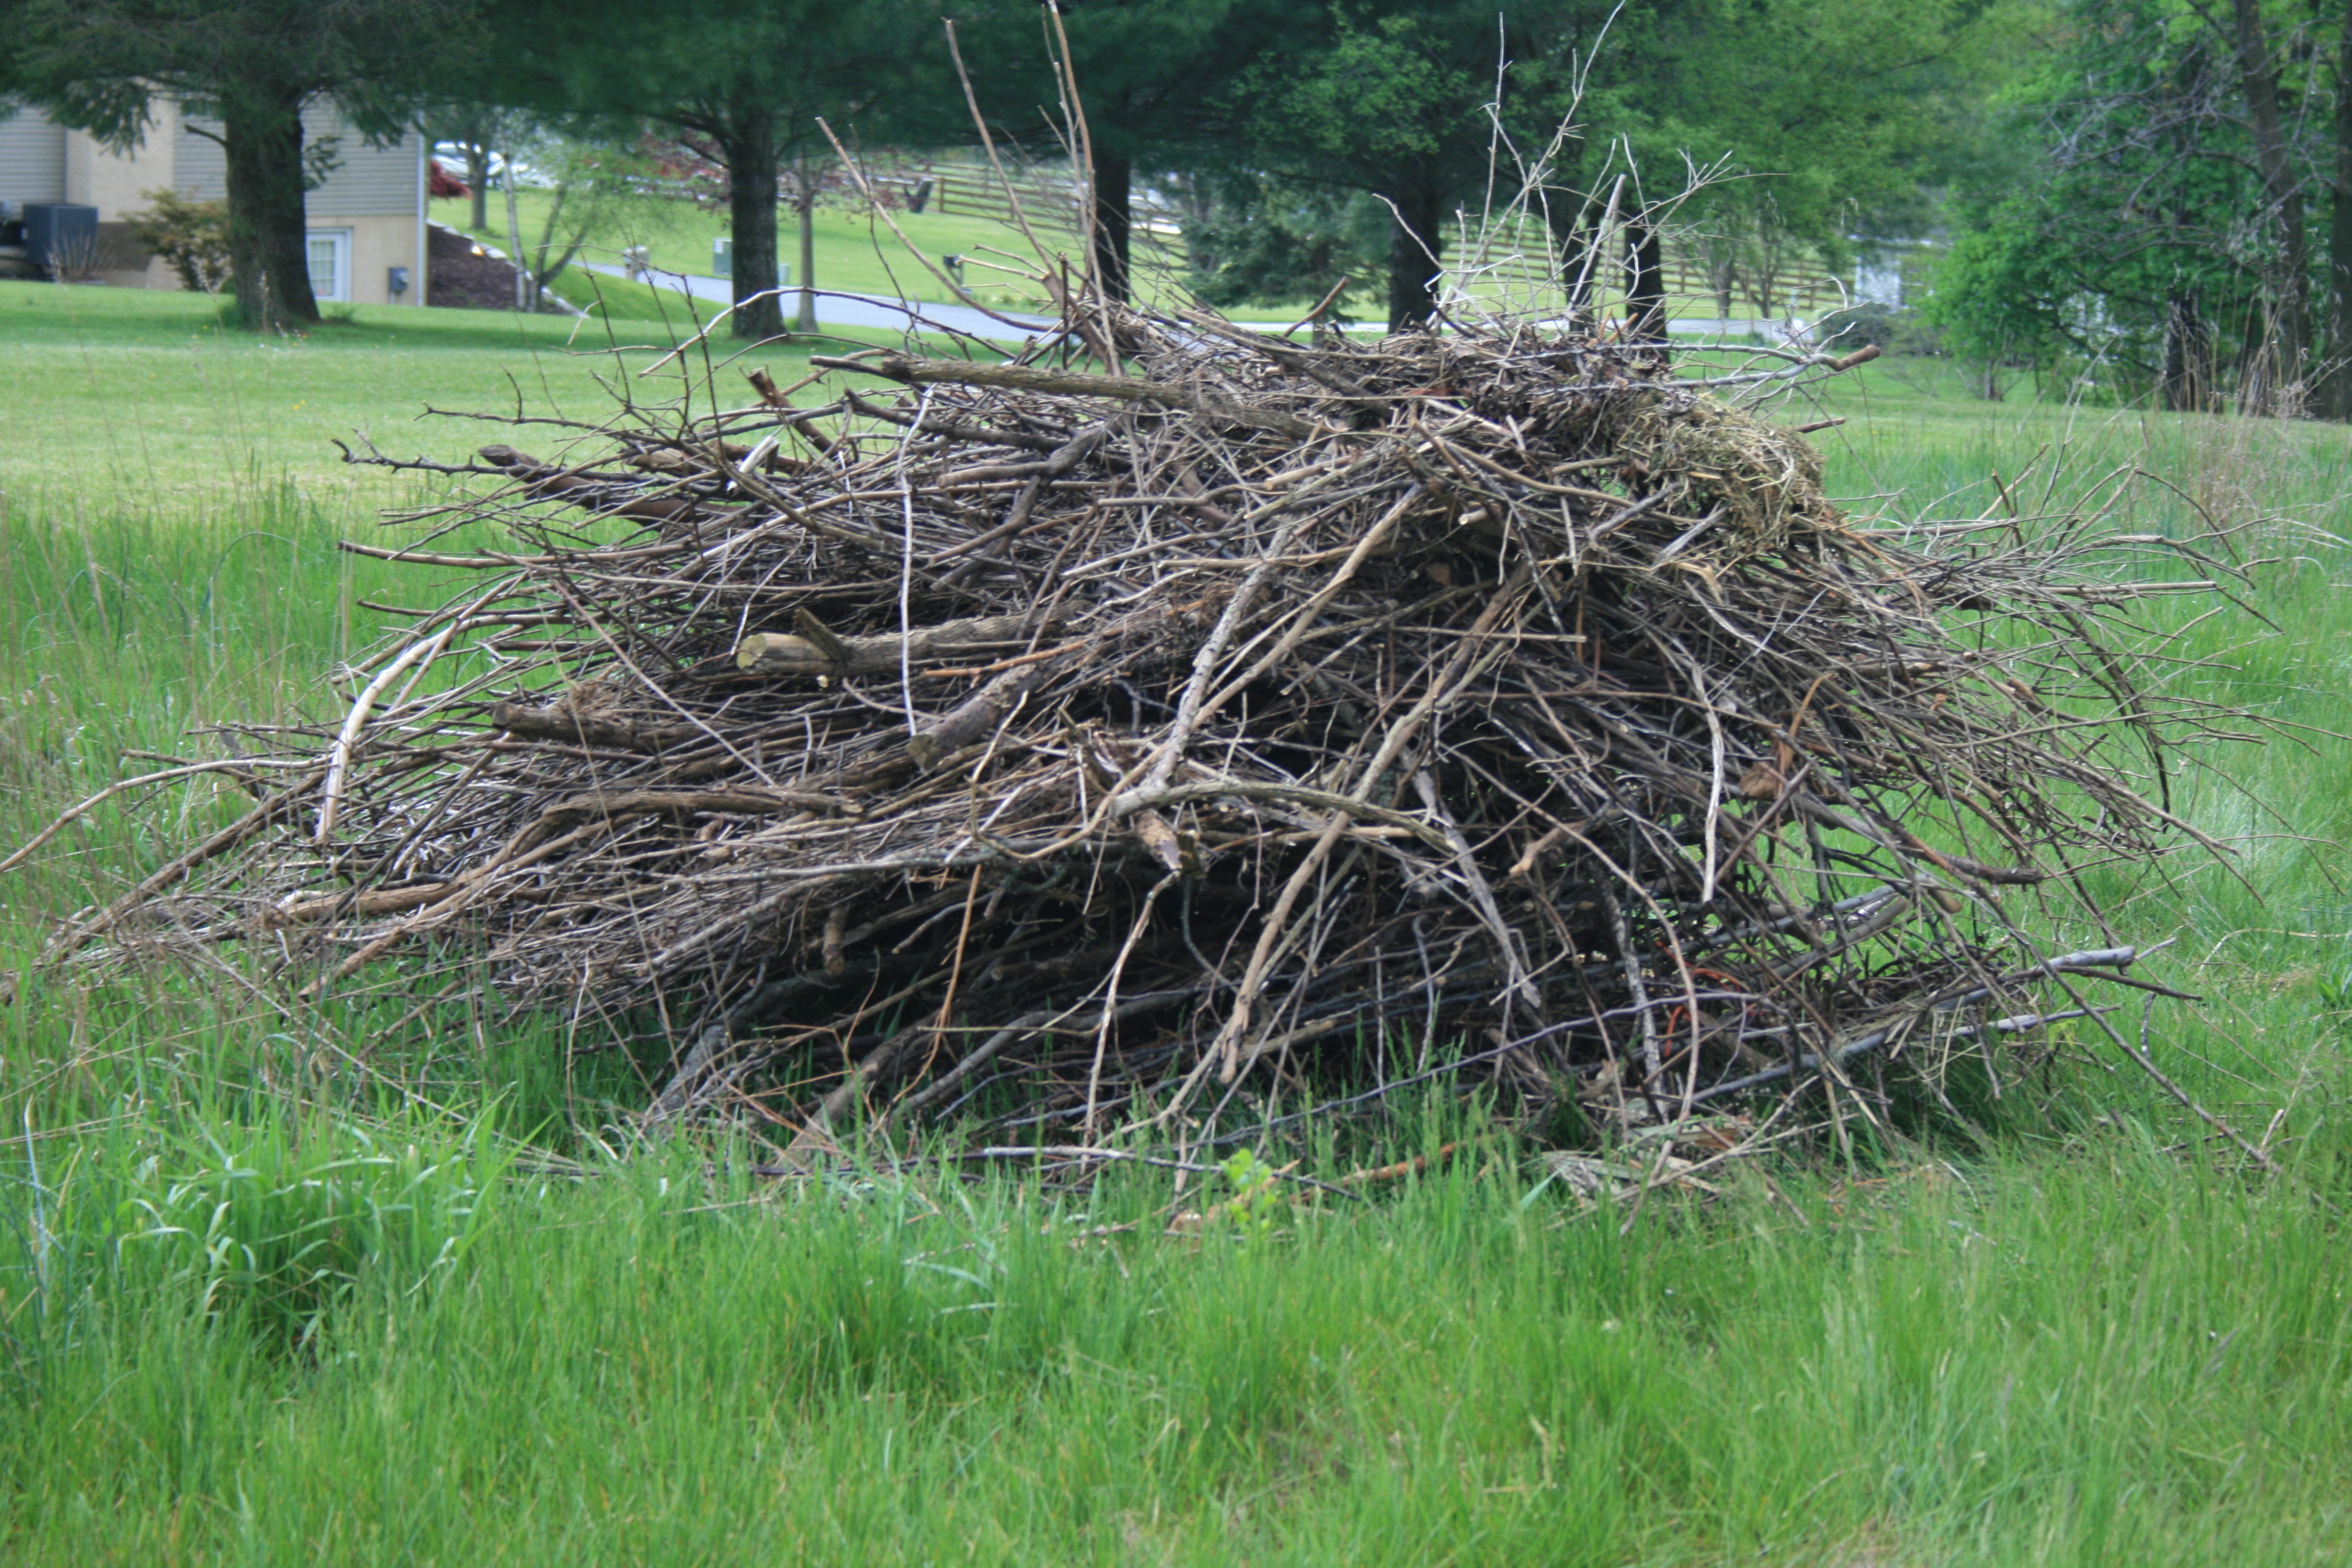
I call this sticks with ticks.

And when I started moving the pile from one bit of the meadow to another, I found absolutely beautiful, grass-free soil and a nice place to plant my berry bushes! (I also found 6 ticks on my neck, arms and head — I’m still itching.)

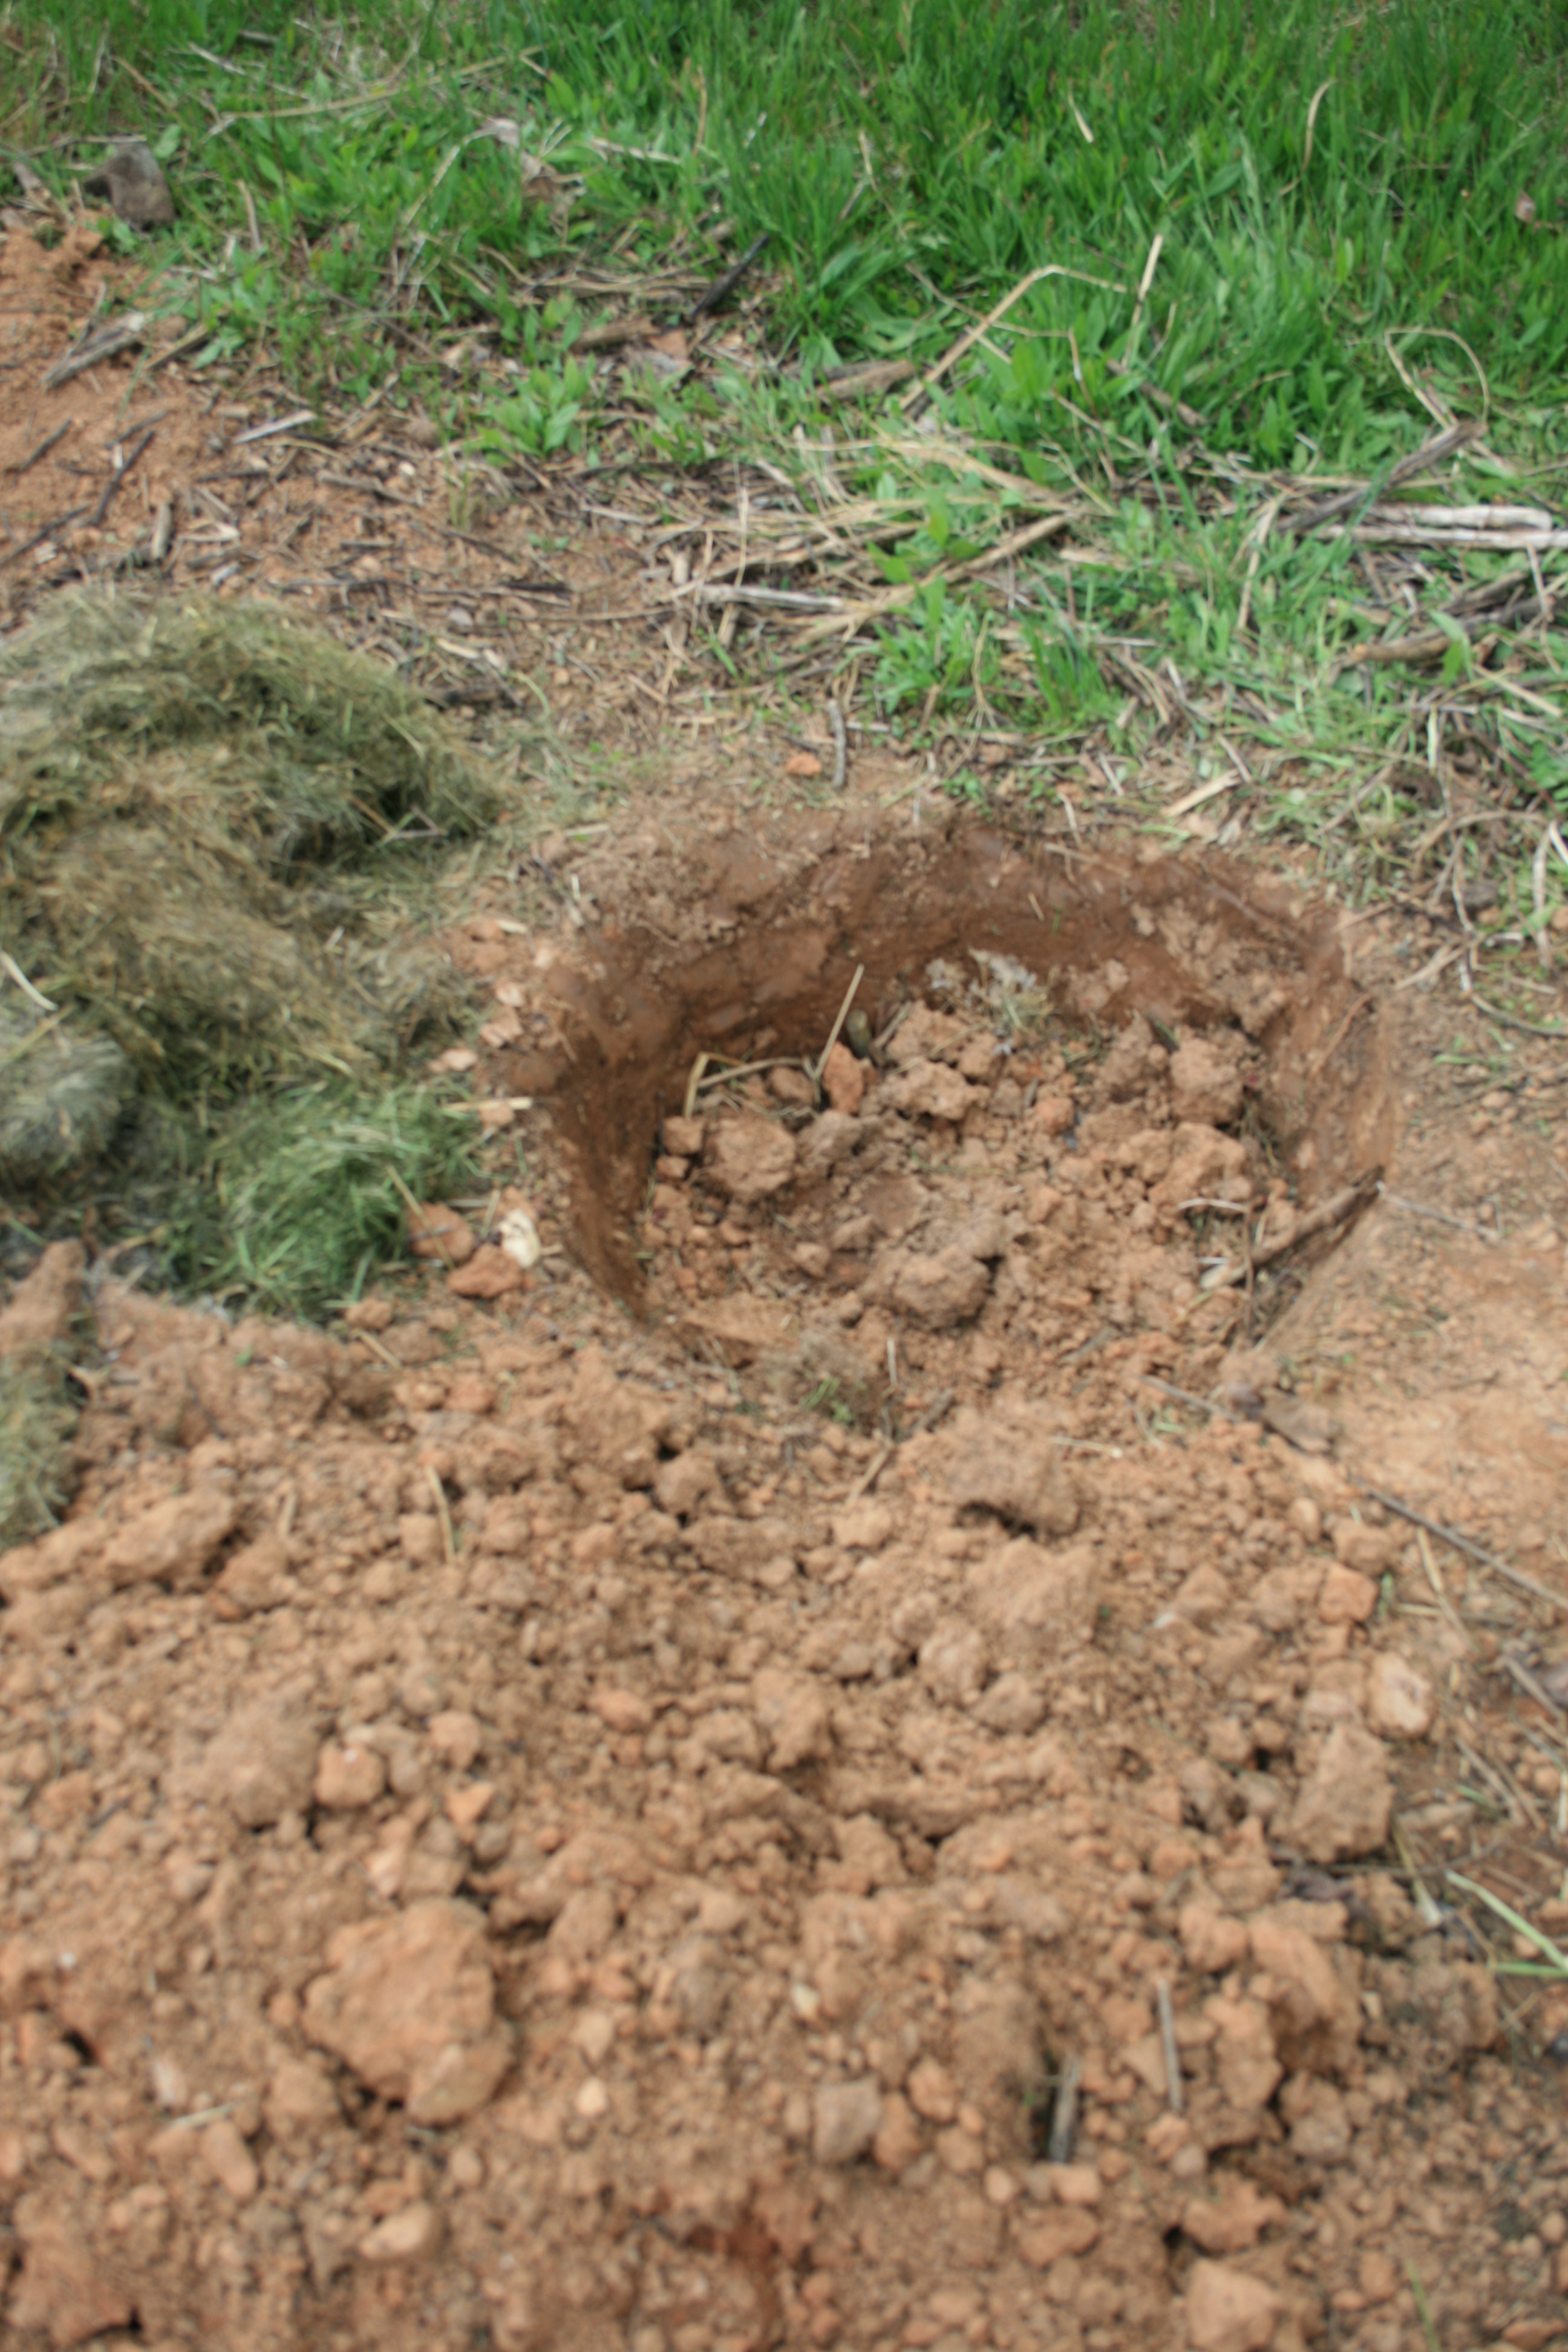
I dug holes for the elderberries, making them about 30 inches deep. Too deep for this bush which is shallow-rooted. But I knew my enemy — the soil.

Freshly dug, properly prepped holes for my bushes.

Freshly dug, properly prepped holes for my bushes.

It grows absolutely fabulous witch grass  and not much else. It would not be good for these berry bushes.

I broke up and added about 3 inches of twigs and branches – jumping on them once they were in the hole to break them even further.

Why branches?  In soil this hard, twigs help with drainage and keep these new bushes from drowning. They also break down slowly, adding nutrients to the soil that will feed the elderberries over time.

This hole is ready for its bush!

This hole is ready for its bush!

I topped the branches with  composted matter that included grass, straw, some well-composted manure and egg shells. On top of that, I put a 2 inch layer of soil. Now the holes are only about 8 inches deep.

The new baby bushes will be tucked in with some worm castings and some of the native dirt from the hole. They will also have ground cover and topped with grass clippings that will act as mulch and food.

Here’s hoping my new plan works and the meadow gives up a little real estate for these new baby elderberries and the Goji berries.

By the way, here’s the view of my garden and house from the meadow – what the bushes get to see when they look at home!

The view from the meadow.

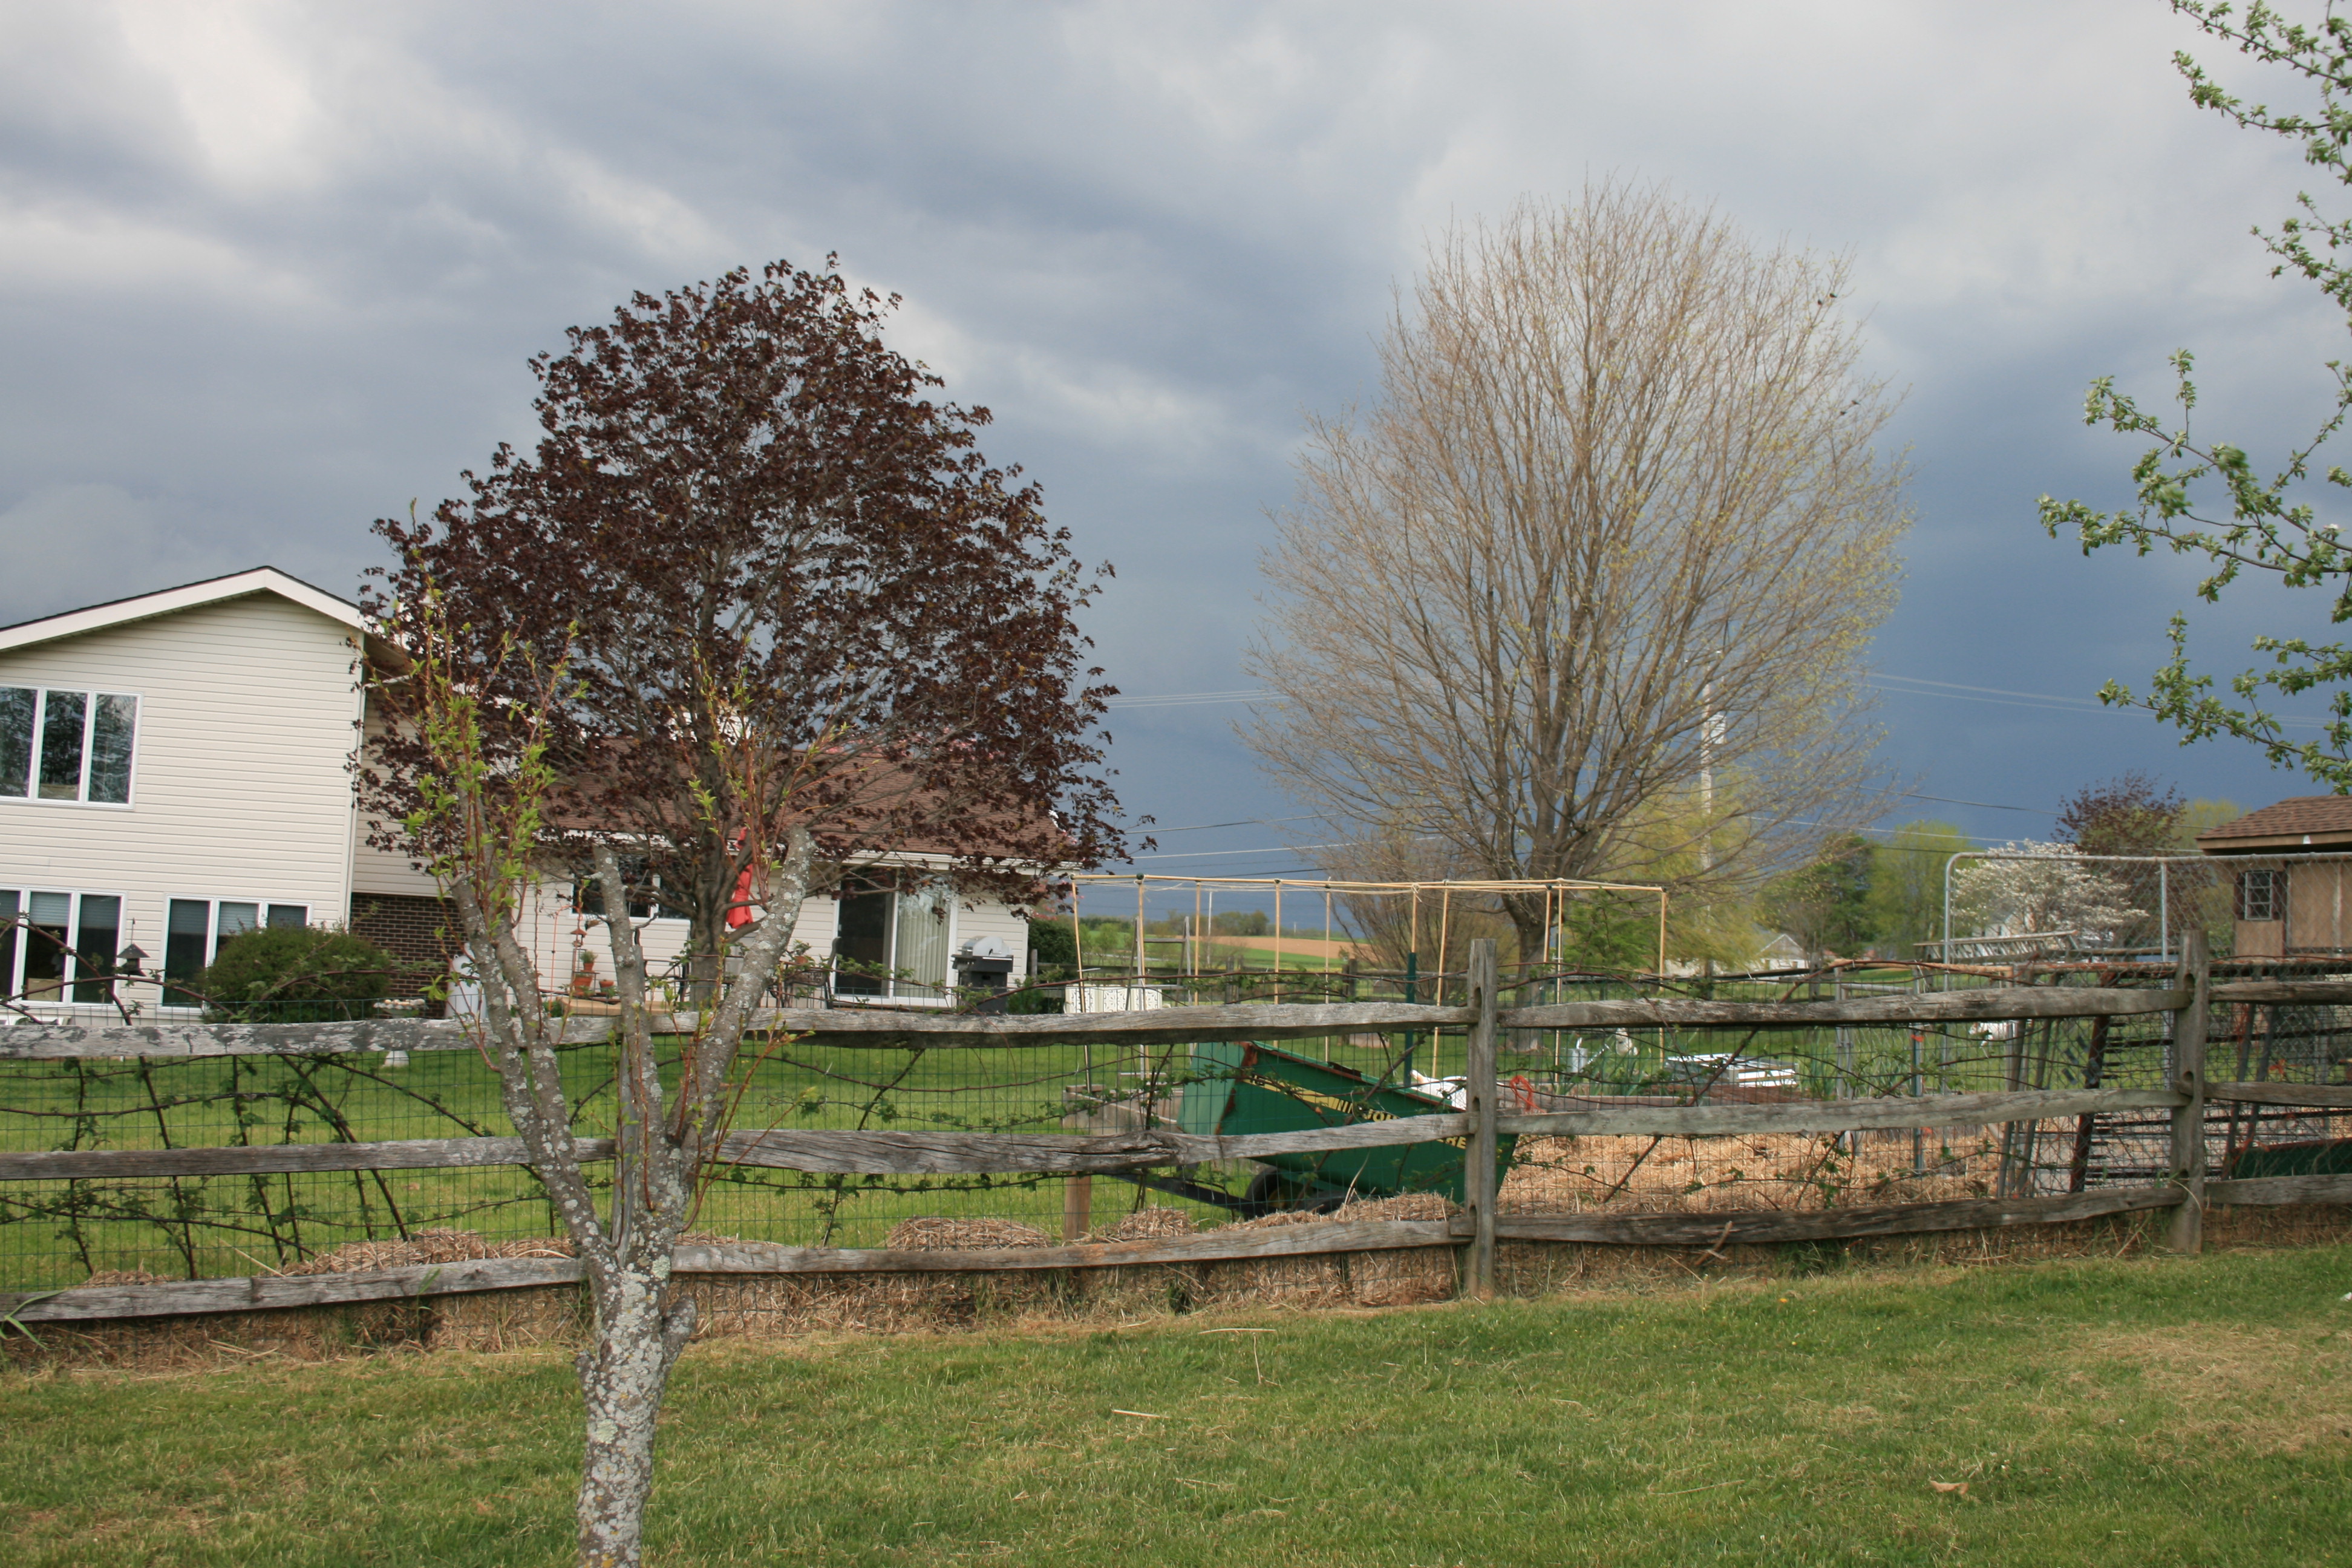
Our house and garden from the meadow.


Advertisement

When To Plant Veggies

It’s that time of year…finally!

I think I can actually start planning on putting out some of my home-grown plants. Weather in zone 6B has finally moderated. No more wild extremes like 81 degrees on Monday and 27 degrees on Friday night!

We’ve been on a roller coaster ride for temperatures and high (and constant) winds in the Mid-Atlantic states. The weather has made gardening more like a series of fits and starts than planning and planting.

Cold temperatures and high winds stunted the garlic.

Garlic stunted by cold and wind.

My lettuce and kale got burned almost to the ground in spite of having been covered by a tunnel of plastic! Wind swept under one end of the tunnel and flipped it off on night. I didn’t catch it until the next morning and by then, the damage was done. Even my garlic took a hit and that’s hard to do.

But now, it looks like we are getting to the time when something other than kale, beets, lettuce, onions and garlic can be put in the ground so here are some tips for getting your babies and their new “digs” ready.

Prep your soil!

If your garden soil has been covered during the winter, uncover it. I pull straw back about 12 inches from the fences I use to support my plants so the soil can warm up.

If you’re going to amend your soil, adding worm castings or compost (or both), now is the time to turn it and add the amendments. I use 1-year-old horse manure so I have to dig down, put manure in the trench, and cover the manure with about 8 inches of soil. I want to feed my babies, not burn their new roots.

Lay down your soaker hoses. It’s so much easier to put soaker hoses on the ground before you put your veggie plants in so take an afternoon to organize and lay them out especially where you’re going to plant tomatoes, which you don’t really want to spray with water.

Harden them off!

Hardening off your plants does NOT involve tools or torture.  It just means that you have to introduce your transplants to the outdoors, gradually.

Five or six days before you want to put them in the garden, start setting them outside for a an hour a day for 2 days, 2 to 3 hours a day for 2 to 3 days, 8 hours a day for 3 days and only then (and only if it’s not hailing or very windy) do they get their first overnight! Keep an eye on them.  Make sure they have water and are not staked out in high sun or high wind.

NOTE:  when hardening off, stop fertilizing.  If the plants have small flowers or fruit on them, pinch both off.  You want to help transplants direct all of their energy to rooting in the soil before trying to set flowers or fruit.

Plant When It’s Warm!

I also used to hurry and plant my babies by May 7th or 8th. Frequently, the ground was too cold for warm weather crops like tomatoes and peppers and they simply stopped growing for a couple of weeks (or forever in some cases).  Putting plants in the ground too early can be deadly so give the soil a chance to warm while you get your plants ready for the great outdoors.

Remember, plants that I call “Mediterranean”like tomatoes, peppers and eggplant like warm earth and warm air. The optimal air temperature for them to go into the ground is 75 to 85 degrees. In my neck of the woods, that means these warm weather babies are typically transplanted the last week of May, especially if the weather is dicey.

So, even though it’s not quite time to start putting your plants in the ground, you can go out and play in the dirt, yourself. Get your garden ready for the big day! Your babies will thank you.

Growing Bradford Watermelons

I am super excited this year because I am going to try to grow watermelons this summer.  Not just any watermelons…Bradford watermelons.

So, what’s the big deal with Bradford Watermelons?

These are supposedly the sweetest watermelons available on the market today. Their Brix is over 12. Their sweetness is one reason this type of watermelon fell into disfavor with growers and disappeared from the marketplace for almost 100 years.

The watermelons were so sweet that they couldn’t be shipped very far before they began to rot. Hardier watermelons with thicker skins were developed just for distribution and the Bradford watermelon faded from public memory.

So, their sweetness attracted me but I think the reason these watermelons are so special is the back story about their revival.  I love the farm, and the way the great, great, great, great, great, great grandson (also named Nat) took up the mantle and brought this legacy watermelon back to life. (Or it could be the watermelon brandy that Bradford is now selling!)

In any case, I going to try growing a few but a couple of things make this new venture a bit tricky for me.

  1. Taste: I tried raising cantaloupe one year. I successfully grew beautiful plants were covered with large melons…that tasted like dirt! No joke, they were virtually inedible. So, I’m thinking perhaps my soil is not suited to raising melons.
  2. Real estate: watermelon like room to grow. They need real estate. I have room in the backyard but I also have a husband who is not all that thrilled by all the new holes I put in the ground every spring and summer.
  3. The seeds come with fairly long, very detailed planting instructions. I never read instructions. Perhaps I should…

I am going to direct sow these seeds – I got 10 for $10 and gave half away – in late May and will provide updates and pictures – good, bad or ugly – as my watermelon adventure gets off the ground!

Kombucha Recipes

Kombucha is one beverage with many uses.  It is a tasty, “healthy” soda – effervescent and probiotic. Kombucha can also be used in cooking and baking, adding a dollop of flavor to hot cereals, pancakes and even steamed vegetables.

Home-brewed kombucha is easy and inexpensive to make

Probiotic kombucha tastes great.

If you make your own kombucha, you’ll probably find a few more ways to use this healthful sparkling beverage.

I like kombucha without any flavoring, at all but I also like kombucha with everything from blueberries to juniper berries added during the final fermentation.

Combinations of herbs, spices, fruits, and juices that can add flavor to your kombucha are almost endless.  Here are some of my favorite blends, but feel free to be creative and add whatever flavors you enjoy!

Easy combinations include:

  1. Blueberry/Vanilla – whole blueberries and vanilla to tast
  2. Tart Cherry Vanilla – organic tart cherry juice and vanilla
  3. Sweet Beet – organic beet juice
  4. Pomegranate – organic pomegranate juice
  5. Hibiscus flower – dried red hibiscus flowers (which I get from Mountain Rose Herbs)

Here are some more ideas for giving your kombucha that extra bit of flavor:

Elderberry, Rosehip, & Cinnamon
A standby, this is the blend that I make really enjoy. Sometimes, I’ll add Hibiscus flowers or use ginger root instead of cinnamon.

1/3 cup organic dried elderberries
1/4 cup organic dried rosehips
1 tsp organic cinnamon chips

Sparkling Ginger Pear
This recipe is simple, yet delicious.   It’s a light, refreshing, and reminiscent of champagne.  Use whichever fruit is in season: raspberries, blueberries, blackberries, apricots, and peaches are all tasty substitutes for pears.

1 Asian apple or regular pear
1 TBSP dried or fresh organic ginger root

Refreshing Herbal Medley
A perfect blend for the summertime!  This medley is cooling, refreshing, and the addition of Yerba Mate offers a little energy boost.

½ cup organic dried hibiscus flowers
2 TBSP dried organic holy basil (Tulsi)
2 TBSP dried organic peppermint
1 TBSP dried organic ginger root
1 TBSP dried organic Yerba Mate

Flavorings your home brew are only limited by your imagination. Experiment, play and enjoy this wonderful fermented beverage for pennies on the dollar.