Tag Archives: organic gardening tips

Defending My Garden!

Dill growing in with tomatoes

2019 garden in progress

My garden feeds 4 families, every year. It feeds my soul every day.

It is a place of refuge for me, the birds and yes, even the rabbits. 

Recently, the husband of a dear friend of mine described my garden as a, “Junkyard.”

He will remain nameless (as his worth dictates) but I must defend the space that I call my garden.


Yes, I have 2 truck beds in my garden. And I love them. Anyone who gardens knows how expensive raised beds are to buy…especially the 3 foot high beds! Well, one of these truck beds was free; the other cost $100.

raised beds from truck beds

Truck beds for raised beds

Both warm up earlier than the ground does so I can plant early. Both keep my crops safe from rabbits and gophers. Both provide a windbreak for transplants which is very important on our property as we are on a hill. Both save my back from bending over to plant, water, pick or bug bust.

See the chain link fence bent in half in the left hand truck bed? I salvaged it from the side of the road and use it as a trellis for crops like cucumbers to grow along.

Found items for the garden

Free barriers

Baskets that were given to me by a friend cover baby plants when it’s cold out. I also use them to keep rabbits from eating tender new leaves on plants or shrubs.

See the yogurt containers on the right? I cut the bottoms out of them (in the foreground) and slide them over vulnerable plants like baby green beans or beets. They are free and they make great collars to keep rabbits and slugs off young plants.

An old screen from the sliding doors we finally had to replace (after 25 years) also provides protection from rabbits, groundhogs and yes, my two West Highland White terriers.

Screen door in the garden

A screen protects beans

Wherever and whenever I can I find and reuse items in my garden and I love being able to do that. I also follow Ruth Stout’s age old advice and use straw to mulch everything from the garden beds and soil to the blueberries, blackberries and herbs.

My garden is not regimented.  Okay, let’s be frank, I am pretty laissez faire when it comes to where some plants show up in my garden.  For example, when my lettuce and spinach start to bolt, I let them grow up and flower. I have 2 ulterior motives – I want the seeds and I want the bees!

Flowers seed themselves

Flowers seed themselves

Borage, dill and bachelor buttons grow together in clumps. Sunflowers grace the back fence. And dill is everywhere! I don’t use dill but it grows where ever its seed landed and I let it grow up and flower.  Why? I want the bees!


Volunteer tomato

Tomato volunteers in the sweet potato bed

If you look closely at this picture, you will see a volunteer tomato growing in the sweet potato bed with…yep, some dill.

Volunteer potatoes are growing around the zucchini which I tucked into blueberry patch along with summer squash.

Will this garden of mine win any awards? Probably not. But I love it and I love the food it puts on so many people’s tables.

I love the joy of just wandering early in the morning, the sweet sound of birds singing from morning til night and the beauty that surrounds me every time I step into my garden.

Fresh beets

Fresh beets

First tiny tomatoes

First tomatoes of 2019

Tiny cucumber

First, tiny cucumber of the 2019 season

Advertisement

2018 Garden is In – But Oy The Weather…

2018 Garden enjoying sun

2018 garden enjoying sun

So, my garden is now, totally in the ground.

This year I planted garlic, onions, lettuce, beets, spinach, tomatoes, eggplant, peppers, cucumbers (still considering zucchini), green beans, asparagus, of course and herbs like basil and Italian parsley.

I finished putting the last Bianca Rosa in the ground Saturday morning.

Bianca Rosa eggplant

Baby Bianca Rosa eggplant

Saturday evening, we got 70 MPH winds, driving hail and torrential rain with a side order of thunder and lightning and the threat of a tornado!

The baby eggplant survived…and seem to be settling in to their truck bed.

But I live outside of Philadelphia…in Pennsylvania! We don’t get tornadoes. Oh, wait, we do now courtesy of the non-existent global warming and the ever increasing turbulence of our weather and of the very earth itself.

It has rained every day since last Tuesday. It is going to rain again tonight. In fact, we are under a flood watch from 4PM today to 2AM tomorrow morning. We might get a day or two of clearing, then all that rain that is currently drowning Floridians will be…here.

Tomato plants hanging on to their trellis

Tomato plants hanging on, literally

Even my tomatoes have toughed it out…although they are looking just a bit “wan.”

As with every year, there are, of course challenges – bugs…rabbits, deer. But this year, it seems that Mother Earth is setting about re-balancing her planet – with or without us.

But there will be vegetables and fruit in my backyard this summer. Most of these plants will survive. And so will I.  I will keep on gardening, keep growing.

My garden will grow

My garden will grow

And I will keep praying that we, the humans who inhabit this planet, slow down a bit, become more aware of the risk and start backpedaling from taking, using, devouring and otherwise destroying this magnificent home on which live and orbit the universe.

Free Organic Gardening Book – How to Grow Beets

One season gardening used to be all I did.  Put in the plants in the spring, harvest in July, August and sometimes in September and clean up in October.  Then the price of organic produce shot through the roof and I started thinking that there had to be a way to get more out of my dirt than tomatoes, cukes, peppers and eggplant. My adventure with growing more and longer began a bit late in my gardening life but I’m glad it did.

Beets ready for transplant

Beets are easy to grow.

Truthfully, I probably will never get as far as master gardeners like Eliot Coleman of Four Season Harvest fame but I am enjoying cool weather crops like fresh lettuce, spinach and beets from March through October.

My mom raised the absolute best beets I have ever eaten.  Every time I drove to her farm in the far end of Virginia, she would somehow know exactly when I was arriving.  There, on the table, steam rising, butter melting, would be a big bowl of sliced beets, just for me.

But I never planted beets in my own garden.  Not before she died, not after she died.  Then, one day, while browsing through GrowItalian.com, I saw Chioggia beets.  Beautiful, round and ruby red on the outside but when you cut them open, there are concentric white bands all the way through each slice.

I was in love with beets, again especially since I know how easy it is to grow them.

Baby beets grown indoors from seed.

Starting beets indoors is easy

I’ve had beets in my garden now for the last 10 years and think they are among the easiest plants to grow.  But if you Google “growing beets,” you will literally get more than 11 million entries.

Don’t be scared!

There are only a couple of things you need to know to raise not just 1 but at least 2 crops of beets every year. (That’s how many I can grow in Zone 6.)  WARNING: if you ignore what you are about to read, you will get red marbles…that will not cook or eat easy.  I know.  My first crop was used in a game of ringer.

The Dirt
This is one of the most important requirements of beets.  It’s also the bit of information I didn’t have when I raised my first crop of red marbles.  Beets really, really like loose, well-drained soil. They will put up with soil that’s not rich but it has to be loose.

So do some soil prep if you can. It may take a bit of time and effort but it’s worth it; I know.  And if you get the soil right, it’s smooth sailing to harvest time.

Remove stones since they will hinder growth.  If you’re growing in clay, add compost to loosen the soil and keep the soil from crusting after watering or rainfall.  And make sure your soil is acidic – beets like a pH range of 6.2 to 6.8.

Climatic Requirements
Don’t plant in the middle of your summer season.  Beets won’t like it.  They are a perfect cool weather crop.  Although they can live through the heat (like the rest of us), they prefer a temperatures of 60 to 65 F and bright sunny days. They can also survive cold weather as long as they don’t get caught in a freeze.  So, beets are a great, “long-season” crop.

Planting the Seeds
Beet seeds are outdoor babies from the get go.  As soon as your soil can be worked in the spring, you can plant them.  The seeds aren’t really just one seed – each of these little jewels contains a couple of beet seeds.

Sow the seeds 1/2-inch deep and I drop each seed about 3 inches away from the other seeds.  I also plant in rows about 12 inches apart.

Beet seeds are pretty slow to germinate so make sure you keep the bed moist until you see their little heads peeking out of the soil.  I usually water a bit, every day.  Once they start to pop up through the soil, I keep watering but usually every other day.

Once they are established, just make sure that you don’t let them dry out.  But don’t over water either.  Too dry or too wet and your beets will not be happy.

Transplanting
TIP:  I don’t thin; I transplant.

Most advice online and in books says you have to thin beets rather than transplant. Wrong! Despite what people will tell you, you can transplant beet seedlings and almost double your crop. And it’s easy to do. Just wait until the leaves on the plants are about 2 inches long before transplanting.

Beets and lettuce are cool weather crops

Baby beets ready to grow.

The night before the big move, I water the bed thoroughly.  Then, early in the morning, armed with a #2 pencil, I head to the raised bed where my beets live.

I look for beet plants that are too close together. Because I’m not be most patient person when dropping seeds in soil, I usually find 3 or 4 beet babies clumped together.

DON’T PULL THEM OUT ONE BY ONE!

Once I’ve found the baby beet clump I want to move, I gently dig around the whole clump and bring up a shovel full of soil with the beet roots intact.  Then I push my pencil into the ground, making holes spaced about 3 inches apart, for each of the babies.

Teasing the roots apart, gently, (a trick I learned from my Amish neighbors) I drop each beet baby into its own hole, pack dirt gently around it and move on to the next clump.

I have not lost one beet baby using this method and I practically double my yield.  Oh, and beets are a twofer in my garden – I also eat beet greens in salads.  Wait until the leaves are 3 to 4 inches high, then cut a couple off each beet plant.  The beets will keep growing and you’ll have some truly delicious greens for lunch or dinner.

Care & Feeding
Like I said, beets are easy peasy.

I have never fertilized my beets and they grow like champions.  It could be because I enrich my raised beds with a bit of compost every spring.  I do put a bit of mulch – straw – down around the plants once I divide and transplant them.  It helps hold moisture during the hotter, summer days.

Keep The Beets Coming
I plant in March, April, May then hold off until early August when I start putting in seeds, again.  I do that to avoid asking the beet seeds to germinate when the daytime temperature is above 80 degrees.  They don’t like it.  Plant in early August and within 55 to 70 days, you should have your next crop.

Nowadays there are so many varieties of beet to choose from — Early Wonder, Detroit Dark Red, and Red Ace.  You can even add some color to your beet dishes with the lovely striped Choggia (which started me on my life of beet crime) or Burpee Golden and Albino White

By the way, one of my favorite resources when I am trying to get solid, informed, basic growing information is the so-called “land grant” colleges like Penn State and Ohio State.  They usually offer fact sheets like the one on beets that was posted by Ohio State. http://ohioline.osu.edu/hyg-fact/1000/1604.html

Try beets. No matter how you slice them…they’re a great addition to any garden.


Practical Organic Gardening – Free Book – Chapters 4 & 5

Today we look at weeding and feeding!  Again, this is so simple I wonder why EVERYONE doesn’t do it. And, if you have some initiative, feeding your soil won’t cost you a dime!

Zucchini, cucumbers, peppers and eggplant being baked in the sun.

Raising your own food is easy.

FYI – this is the groundwork. Next week, we get started with  starting and growing your own food!

Weeding
Weeding is one thing that any gardener swiftly grows to hate.  And the older you get, the less fun it is to land on your knees, bend over and dig the little blighters out.  But not weeding can lead to a whole lot more pain than a sore back or a knee with twinges.

Weeds grow fast and set seeds even faster.  If you see one weed, you can bet that it’s invited about 500 of its closest relatives to join it in the ultimate comfort of your garden.  A lot of people reach for the handy spray bottle of herbicide conveniently sold at their local, big box, home improvement store.

Herbicides are fast and deadly.  But they don’t just kill weeds.

Research is beginning to unravel the reasons behind the death of millions of

bees, beekeeping, organic gardening benefits

My bees in my backyard.

honey bees, worldwide and it looks like the root of the problem is products containing neo-nicotinoids – weed-killing products readily available in this country and in Europe.

The debate over cause and effect is in full swing right now but I’m old enough to remember a similar debate about two weed-killing agents – 2-4-D and 2-4-5T.  Supposedly so safe that as little children, we were give the job of filling weed wands with this chemical adding water and running through our very big yard, barefoot, killing weeds.

So far, both my brothers have succumbed to brain cancer and my older sister is battling kidney cancer.  So that’s one reason why I don’t recommend using any herbicides in any form.

I also live in the country.  Everyone has wells.  Do you really want to poison your neighbors, downstream?  There are days when I consider it (joking) but polluting the water supply just doesn’t seem like a nice thing to do.

What to do to get rid of weeds?
I confess that in the early days of my organic gardening life, when I was still gainfully employed, I bought a flame thrower.  No, really, I bought a flame thrower and used it to burn weeds out.  But it was expensive, the propane tank was heavy, bulky and an added cost.  And frankly, I never really killed the weeds, just singed them enough to make them angry and hardy!  And I lit my house on fire…but that’s a story for another day.

Straw is an easy weed cover.

Straw virtually stops weeds.

When I found the method developed by Ruth Stout, a pioneer in organic gardening and, even more importantly, a pioneer in making it so easy, I jumped on board with both feet.  Here’s how she described her system in an interview done by Mother Earth News.

“My no-work gardening method is simply to keep a thick mulch of any vegetable matter that rots on both my vegetable and flower garden all year round. As it decays and enriches the soil, I add more. The labor-saving part of my system is that I never plow, spade, sow a cover crop, harrow, hoe, cultivate, weed, water or spray. I use just one fertilizer (cottonseed or soybean meal), and I don’t go through that tortuous business of building a compost pile.”  (You can read the full article on Mother Earth News.)

Stout’s method may sound ridiculously simple but it works so well that that most years I only spend a total of 10 hours weeding.

Every fall I cover my entire garden with wet newspaper and straw – about 8 inches of it piled up on top of the paper.  Weeds (and all their seeds) are buried alive and prepping the garden for the next spring and summer is done.  And guess what?  While you are killing weeds and saving your back and knees, you are also feeding your soil.  All that mulch breaks down and enriches the dirt beneath it. 

Sure, some weeds might poke their beady little heads up from time to time but they are so few and far between that I actually welcome the chance to break out my other secret weapon – Fiskar’s Big Grip Garden Knife – the single, best tool I have ever bought and used in my garden.  No weed gets away and because of its design, it’s easy on my hands.  Made of aluminium, this knife comes with a lifetime guarantee and does that job efficiently and effectively.

What an amazing system – no weeds, enriched soil and a back that doesn’t ache!

Feeding
Successful composting always sounded like it required a lot of work and a pretty good dose of luck.  In fact, I was so scared to try composting, I didn’t!

Then I read a small ad in our local paper.  Our county was offering Master Composting classes, for free.  What did I have to lose except this nagging fear that I really was not cut out to compost.  So I signed up.

For 4 nights, I got the chance to spend a couple of hours in the company of other, like-minded gardeners.  And I learned just how easy composting can be.

Free materials and free compsot

Composting is easy and free.

In fact, the first thing I learned was the formula for making compost.  As a Master Composter, I was told not to share it but this was probably the most significant bit of information I picked up. This formula removed all barriers and fears and let me loose in my backyard to compost.  Here it is.

Green Yard Waste + Brown Yard Waste + Water = Compost

Now you know the secret to composting and here’s one more.  I don’t even water the pile.

Composting is not a mystical process that requires an advanced degree.  It is the most natural thing in the world.  Everything becomes compost over time.  Think about that for a minute.  Where do all the leaves and twigs, pine needles and grass that fall to the forest floor go?  Does someone rush out, rake them up in a pile and watch the pile start to smolder?  Not in my neighborhood.

Want to compost?  Here are the steps:

  1. Start collecting garbage (veggie and fruit scraps, coffee grounds, tea leaves but no dairy or meat of any kind) in a bucket.
  2. Troll your neighborhood in the fall and take some of the leaves your neighbors nicely bagged up for you.
  3. Rake up grass clippings and weeds you’ve pulled up (knock the dirt off the roots or they may keep growing in the pile).
  4. Dump all three in a pile.
  5. Wait…about a year.

That’s all you need to know to make compost – black gold – as most organic gardener’s (and marketing mavens) call it.  Here are a few other gems I took home from this class:

There is no rigid method that will open up the pearly gates to composting heaven.  Sure, you want to try to balance brown stuff with green stuff but even if you don’t, you will still get composted soil.

Composting is free!  You do not have to race out and buy accelerators, fancy, rotating tubs, or a compost thermometer.   You don’t even need a bin!

Magic tools and additives are not required to make compost.  You only need them if you are in a real hurry and can’t wait for nature to take its course.

Depending on how fast or slow you want to turn out compost, you don’t even have to rotate your compost – flip it over and bring the oldest stuff to the top — unless you want to speed up the process.

I like to let God do all the work so I have three bins made out of old dog kennel fencing.  I just toss all the brown and green in one of them and leave it alone for a year or two.  When I need some composted soil to beef up my garden or feed my new transplants, I just lift the stuff that didn’t break down over the wall into the next bin.

At the bottom of the pile, I always find 6 to 8 inches of beautiful dark brown, loamy soil.  I dig it out, use what I need and plant something in the bin that I just emptied.

Like everything else in the organic gardening world, composting is always treated as a mystical process; it isn’t.  It’s really just the natural process of decay.  And you can just let it sit and do its thing while you work around the yard.  When you need it, the compost will be there, waiting for you.

NOTE: if you want to start gardening right away, you can buy composted soil in bags just make sure it’s organic. Read the label. Talk to the seller. Do some research and don’t just buy from big box stores or big manufacturers like Scott’s or Miracle Gro. There is way too much latitude in what’s “allowed” in these soils.

Be cautious. Find a reputable, usually family-owned and small, nursery or garden center and ask for help.


Practical Organic Gardening – Free Book – Chapter 3

Only one chapter today because it’s a long one. It you want to garden, DO NOT invest a lot of money in tools…just read on to find you how you can get started for next to nothing…

So, what makes organic gardening practical?  Just this. You can grow a whole lot of healthy, tasty food, literally, for pennies. What’s the trick?

Green and organic garden in summer.

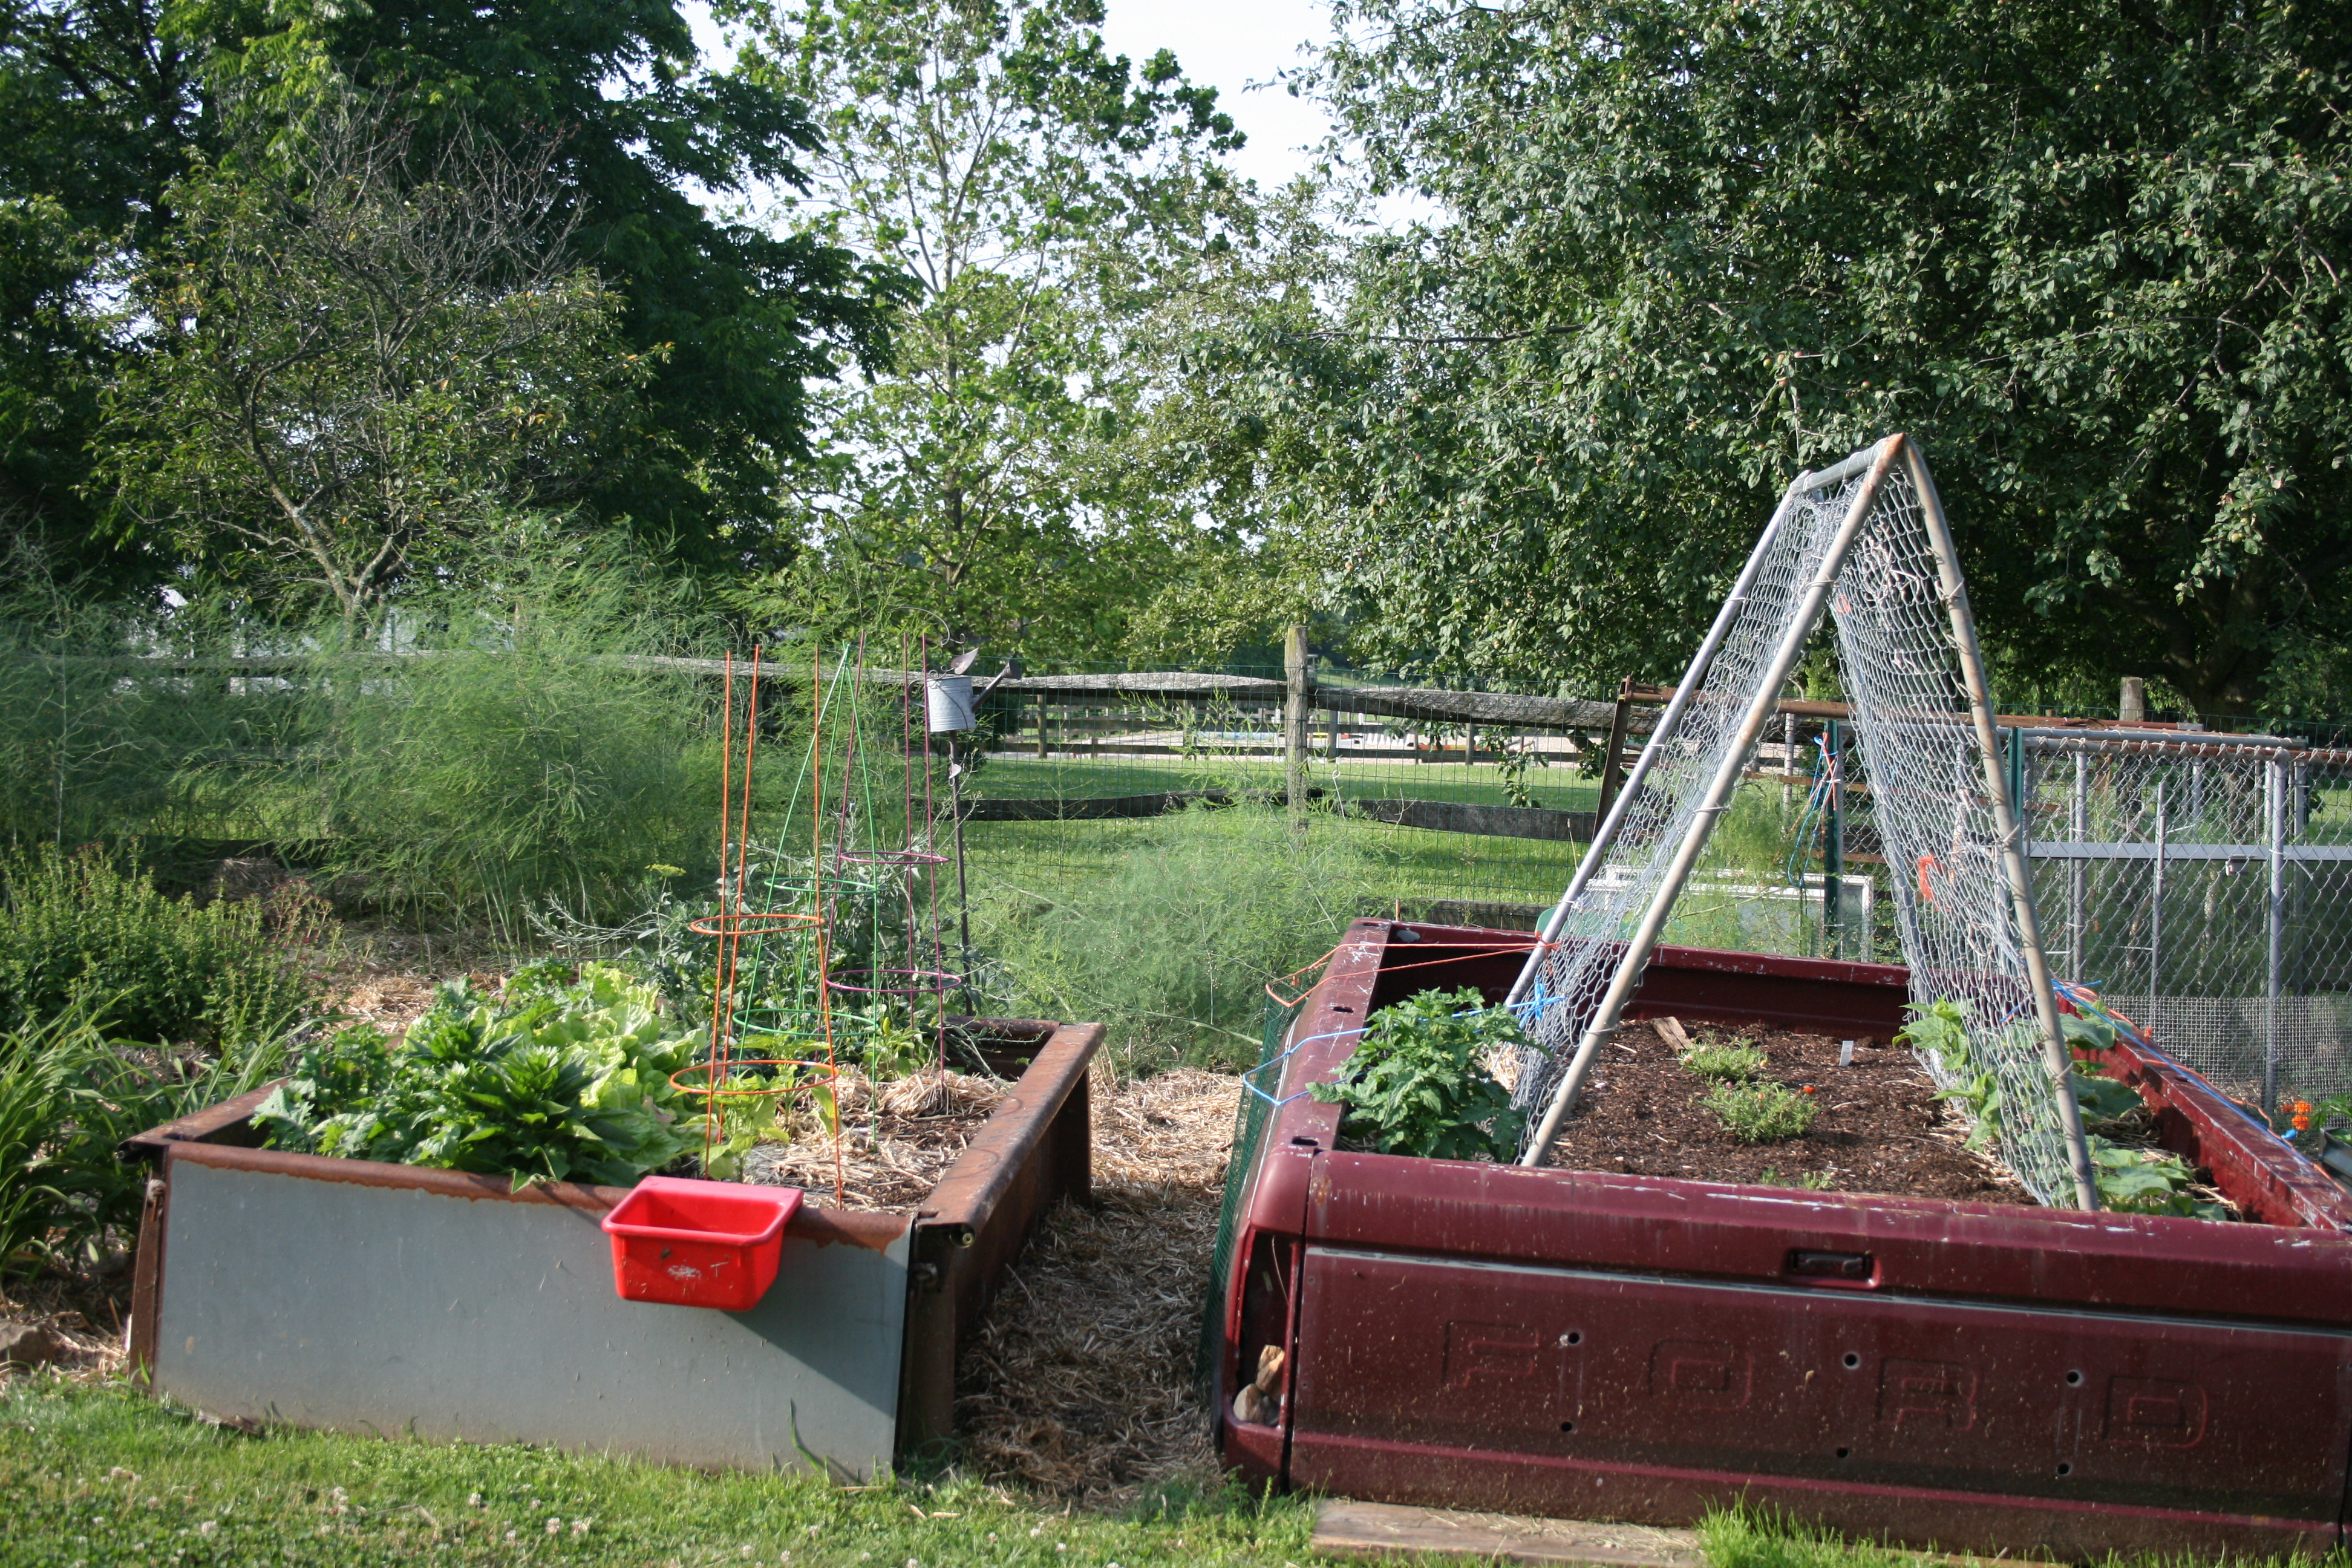
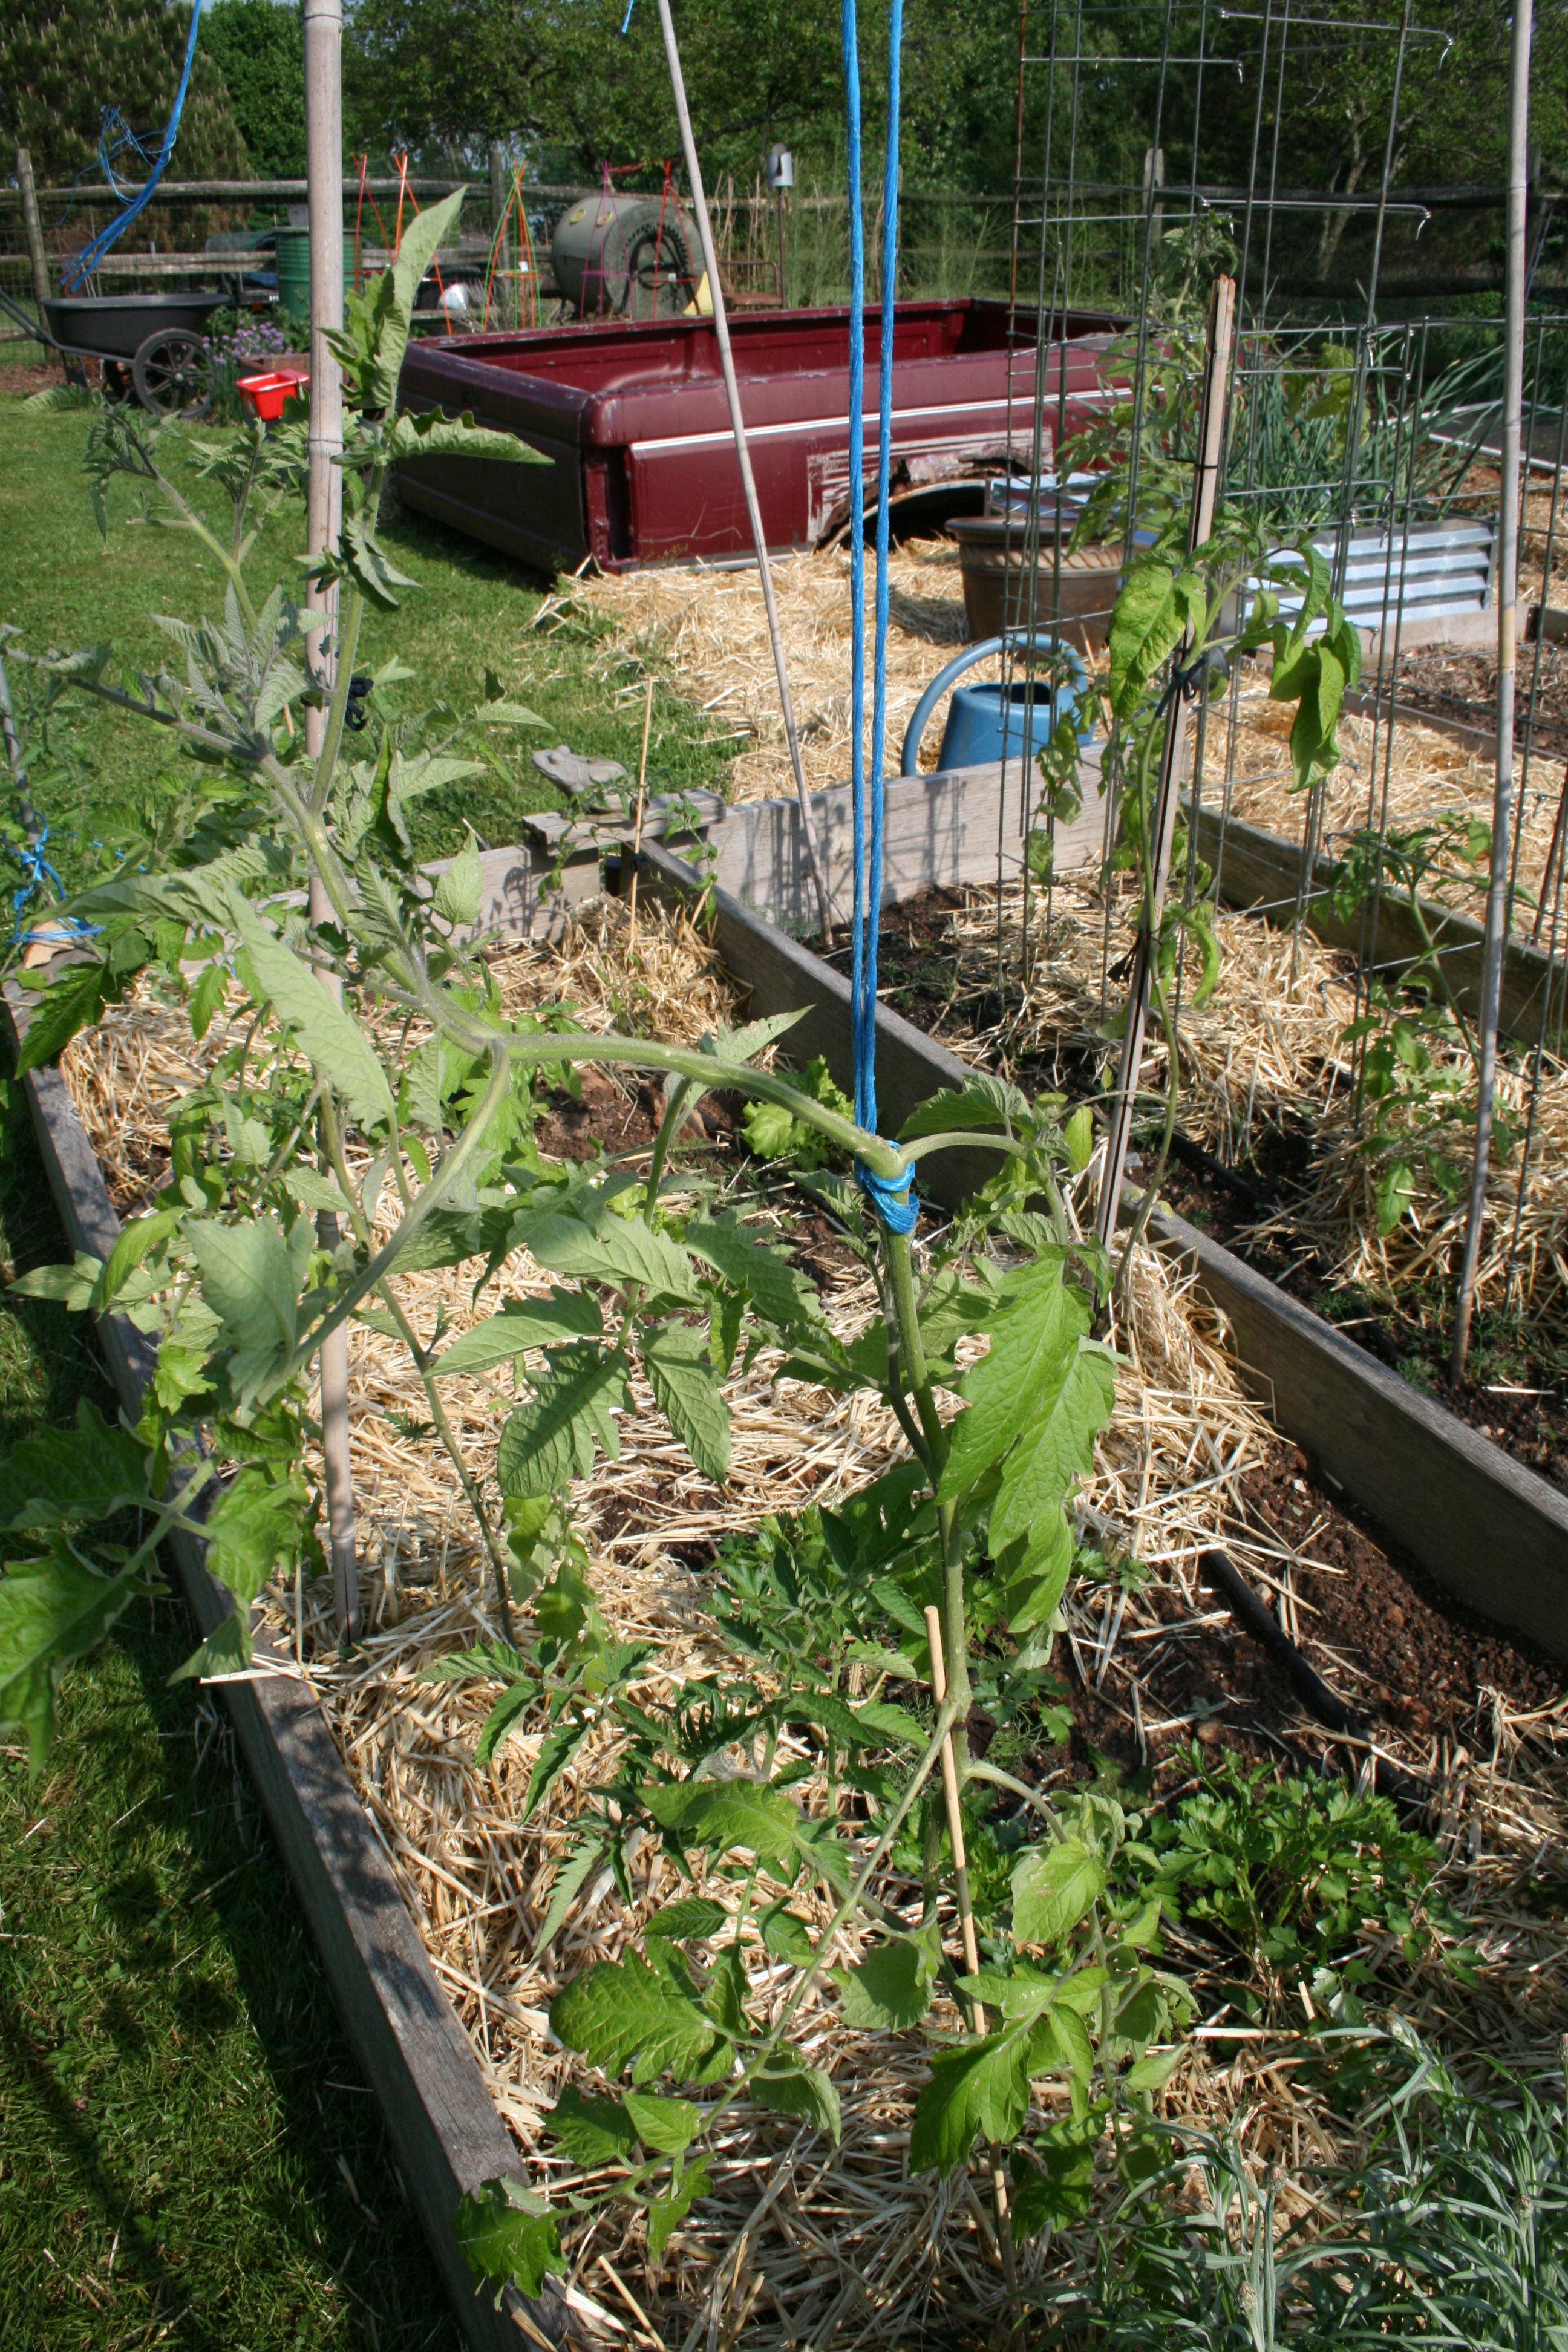
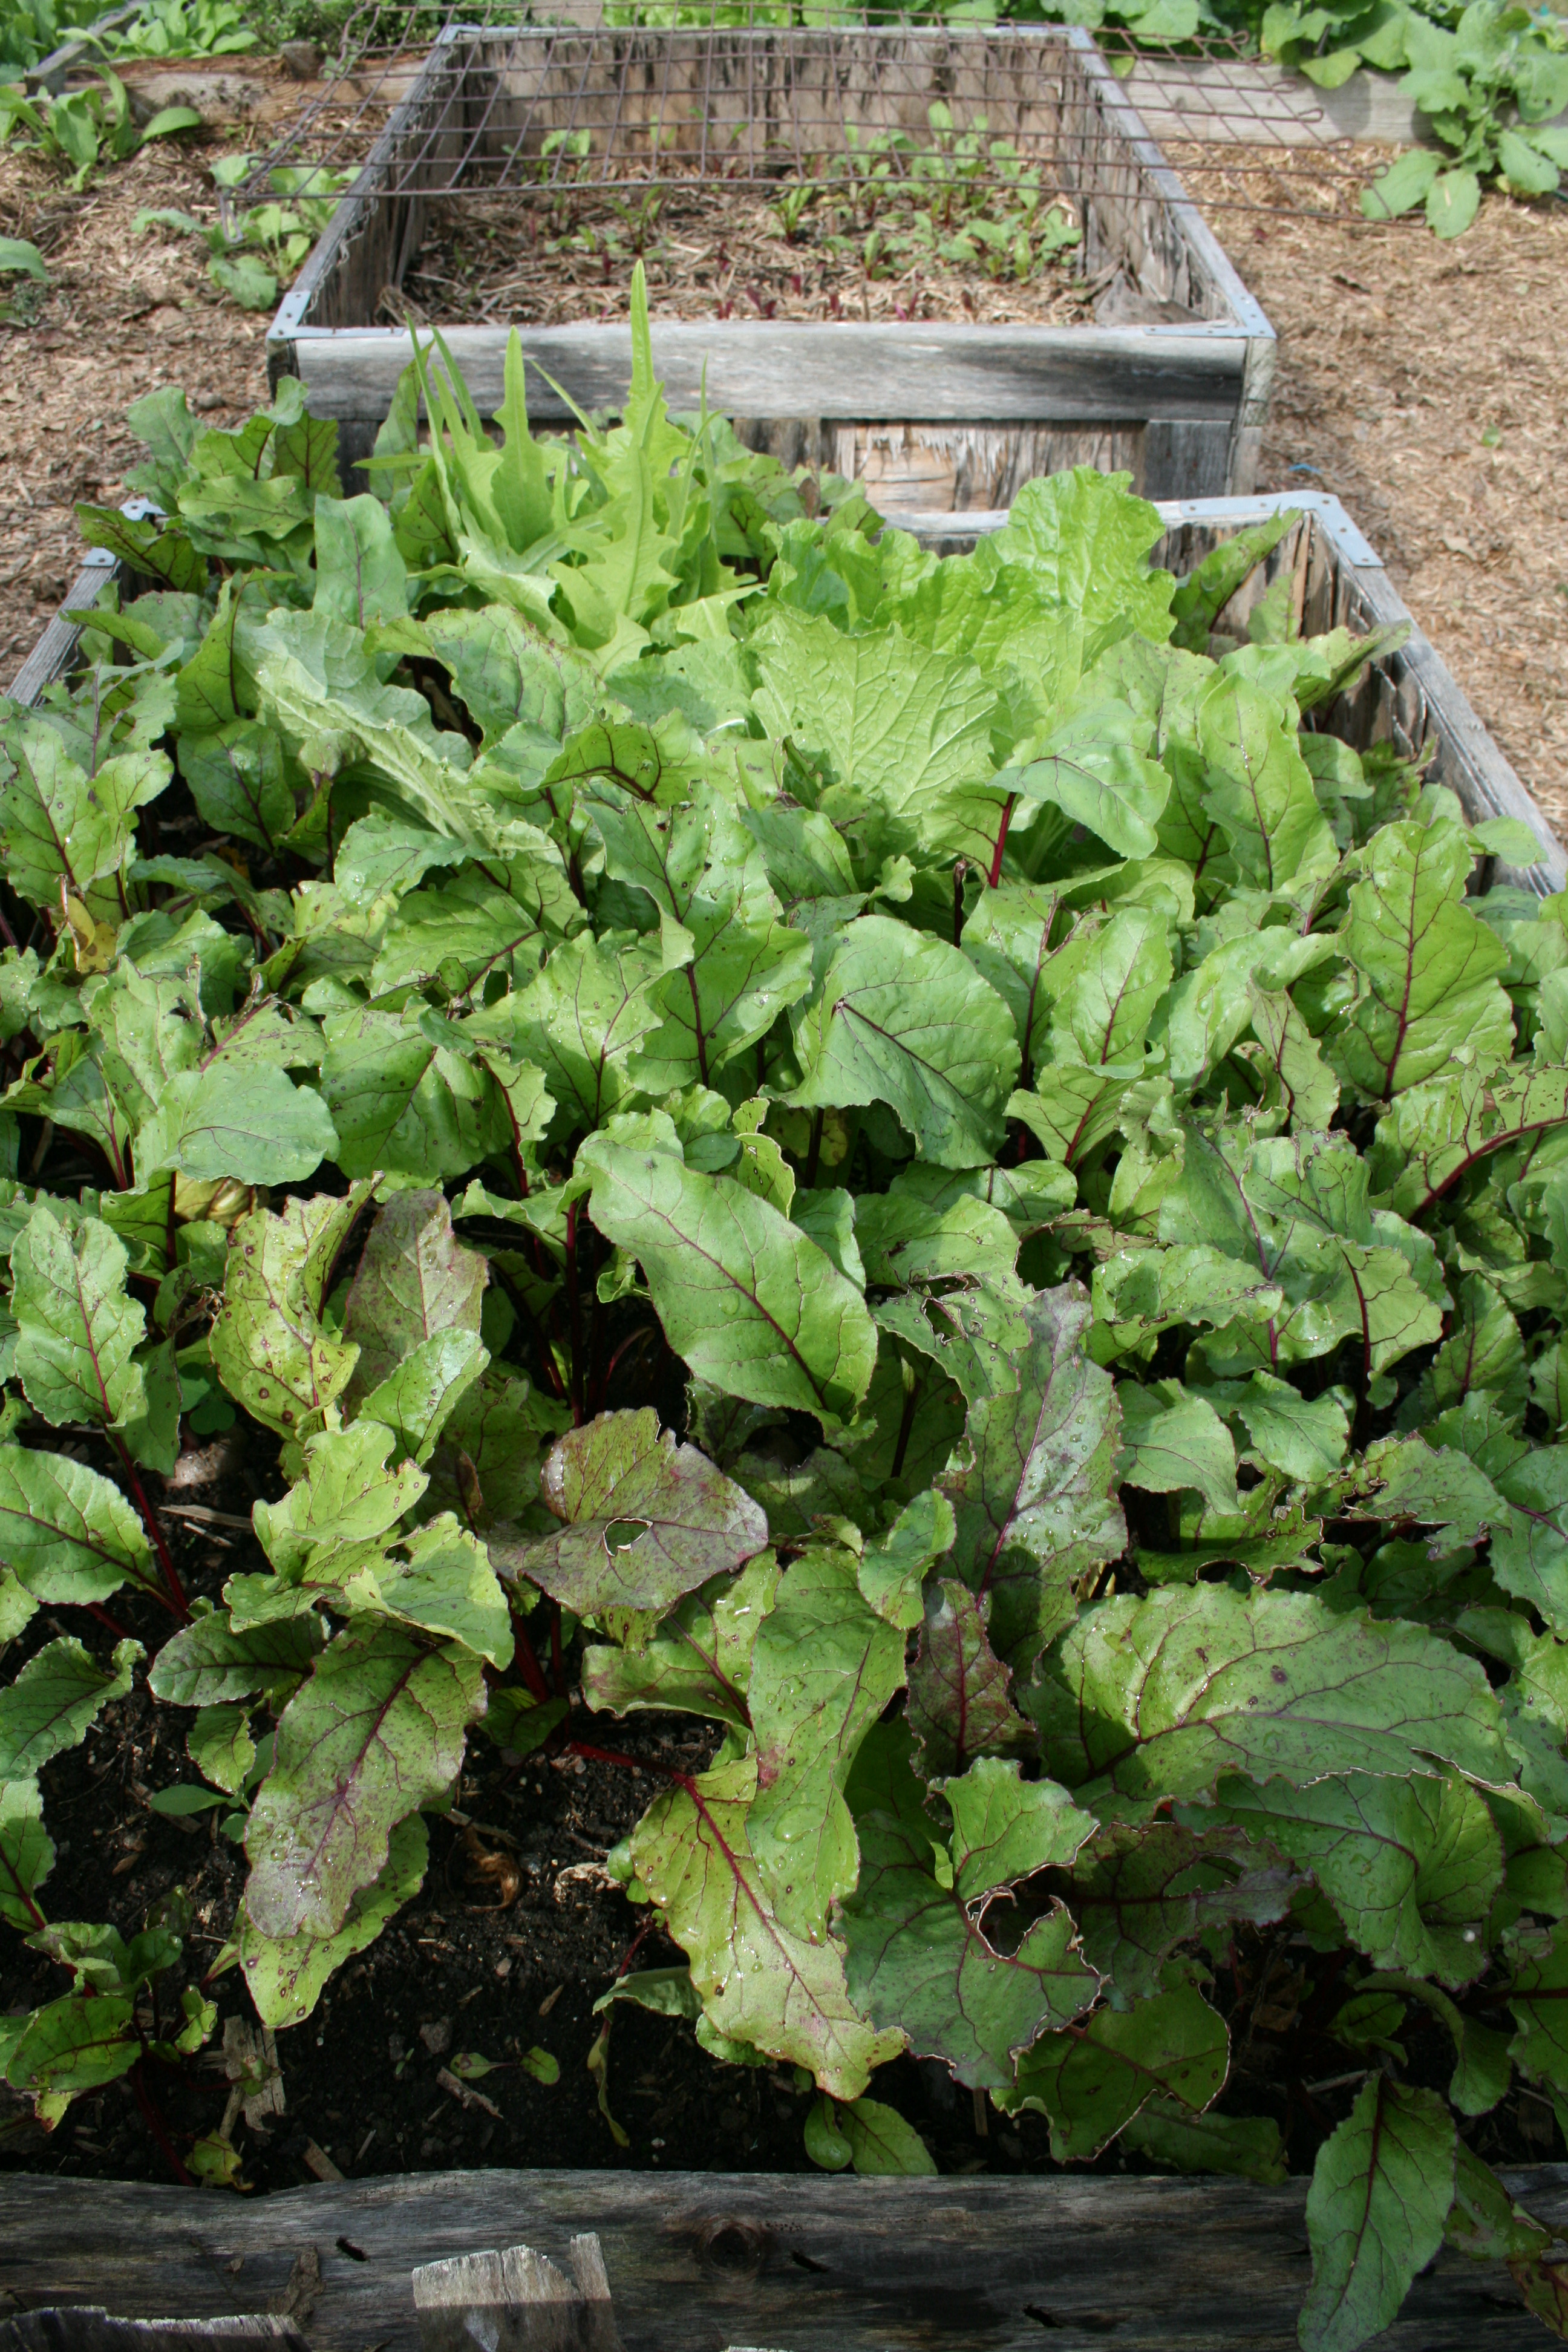
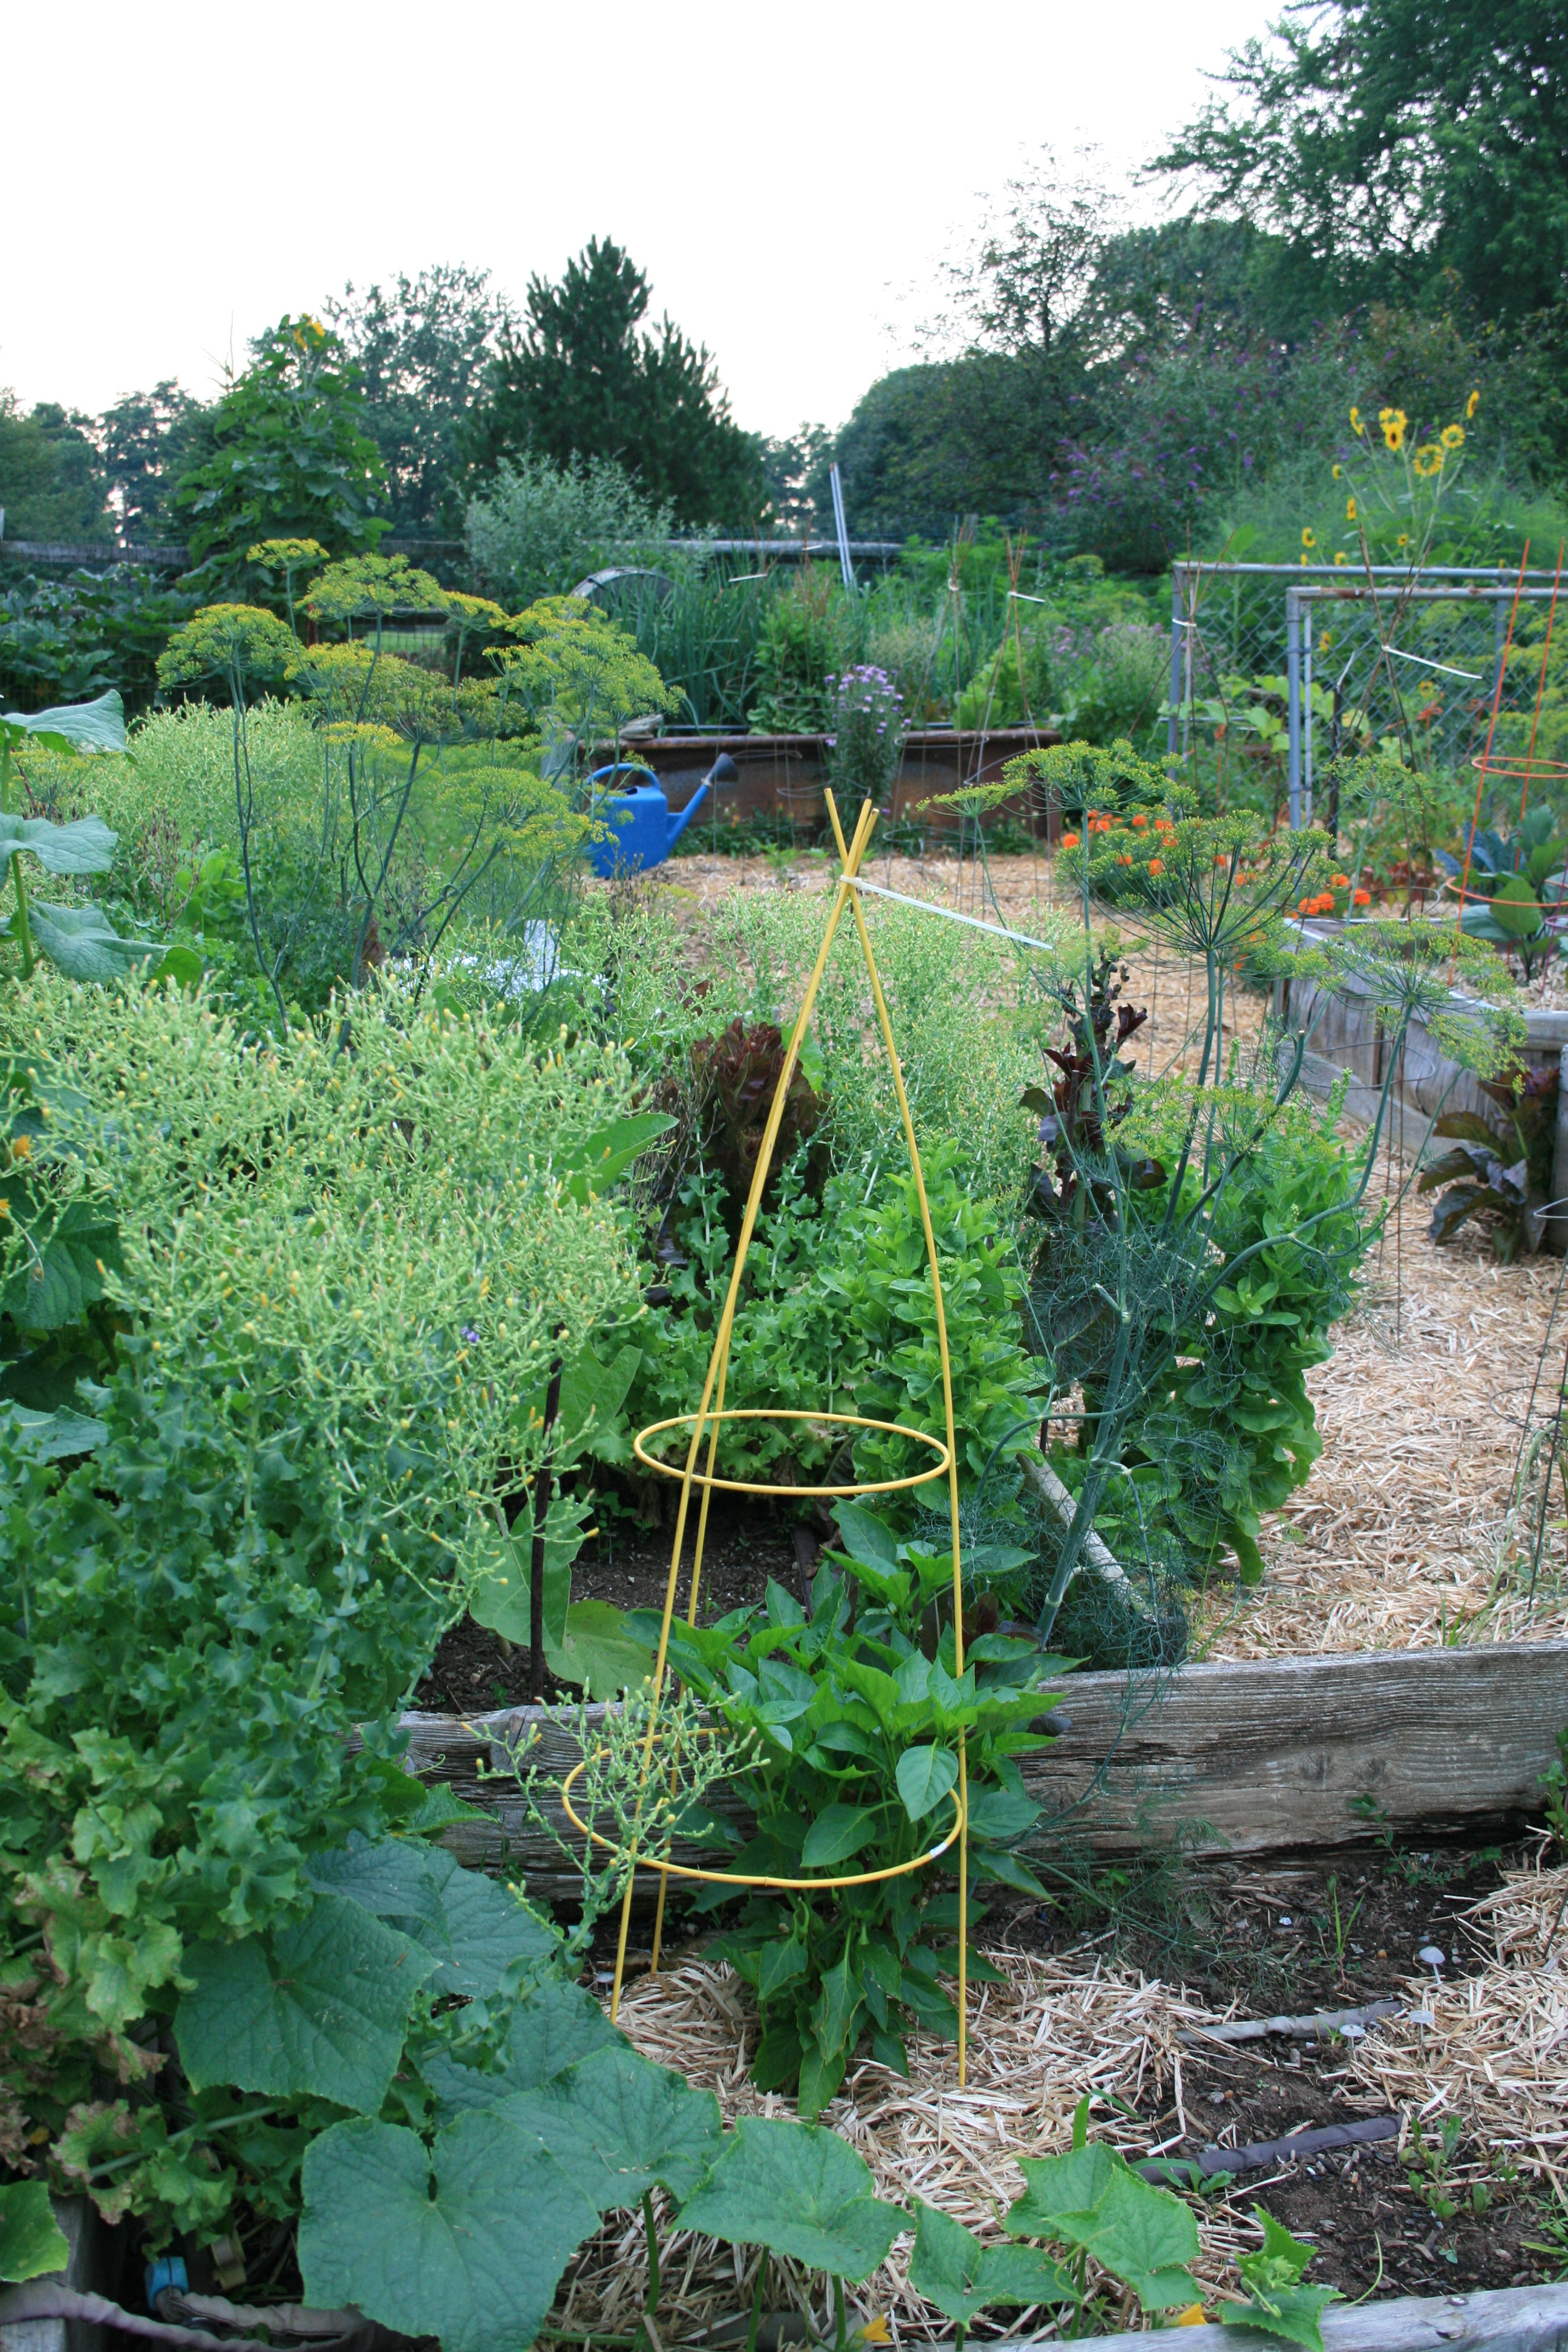
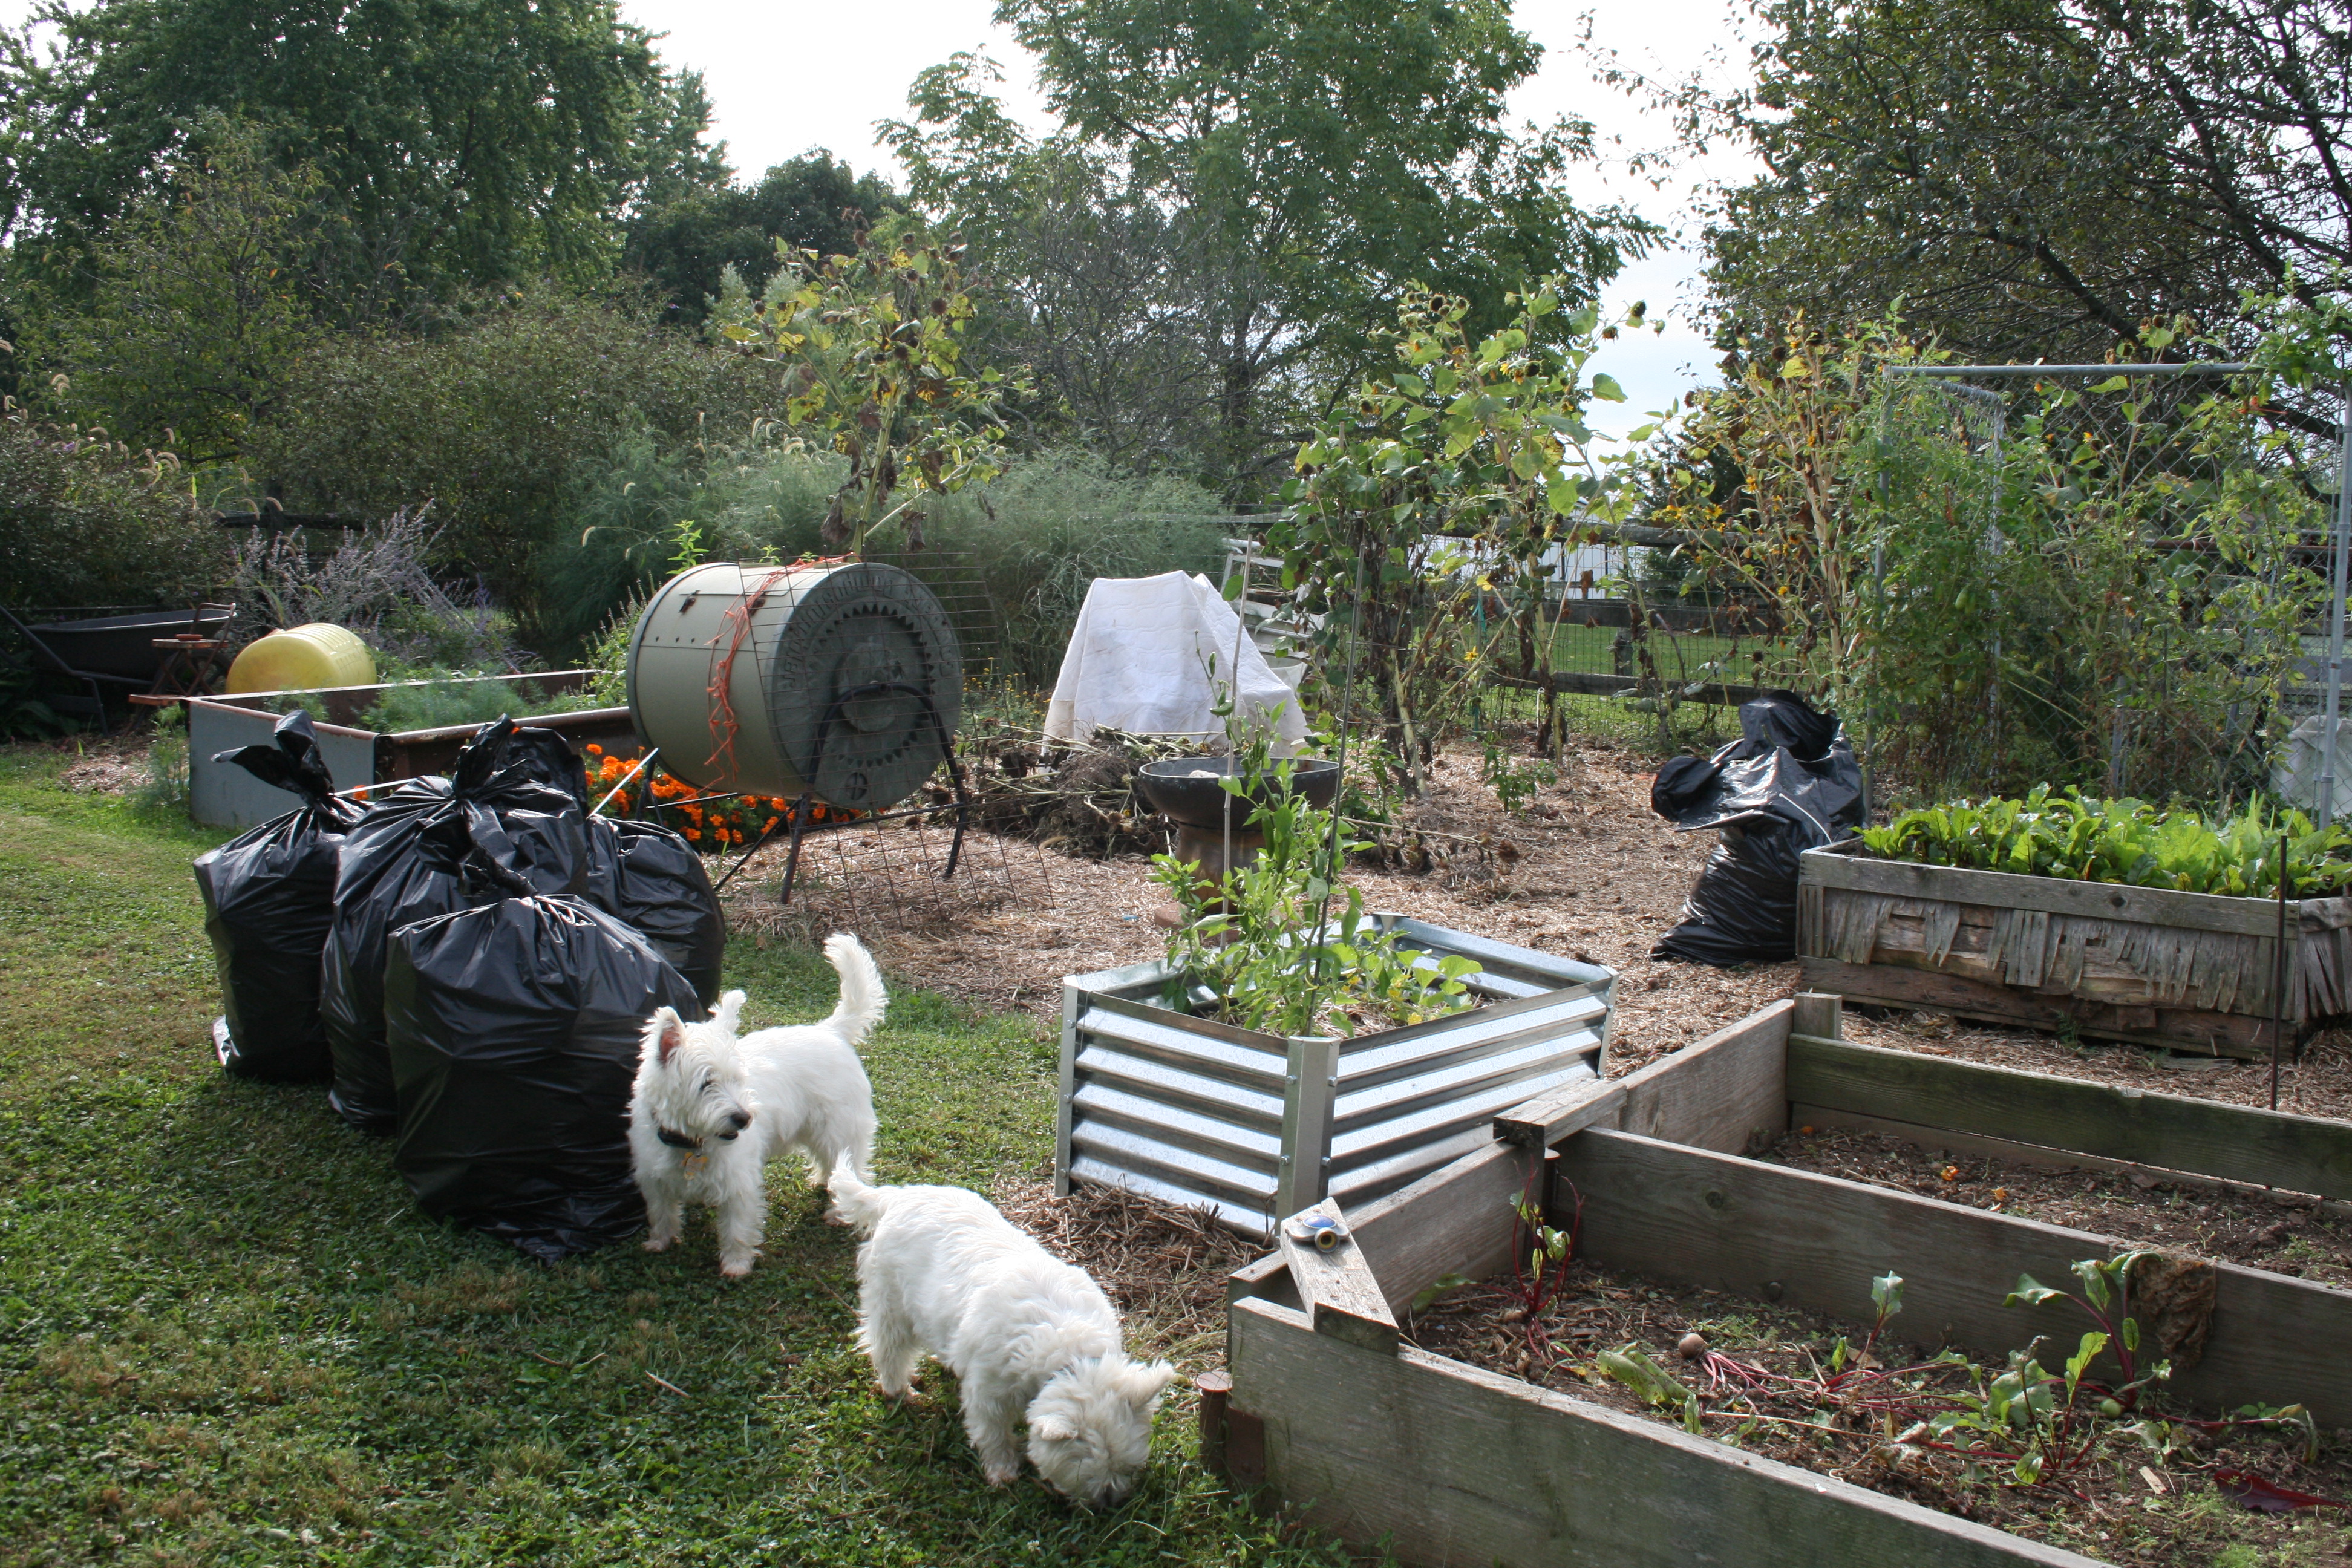
My garden laden with organic veggies.

Unlike traditional gardening, if you go organic, there are a lot of things you will NEVER have to buy.

For instance, you don’t have to buy chemicals or herbicides.  You don’t have to have fancy sprayers or a rototiller – not even one of those small ones named after the bug that prays.

In fact, if you pay a bit of attention, you already own just about everything you might need to get started.

What you don’t own, you can usually get, free. How does this work? A little planning and a bit of forethought are all it takes!

Here’s my list of what you need to be an organic gardener:

Dirt – free.

Seeds – cheap to buy and even cheaper if you save some for next year’s garden.

A big spoon or small shovel – something to dig holes with when transplanting.

Newspaper – free if you ask your neighbors and co-workers for them.  You can use it for mulch and make transplant pots with it, too.

Straw – free if you find a farmer who has old or moldy straw which works just as well as the golden yellow stuff.

Cucumber trellis from a head board.

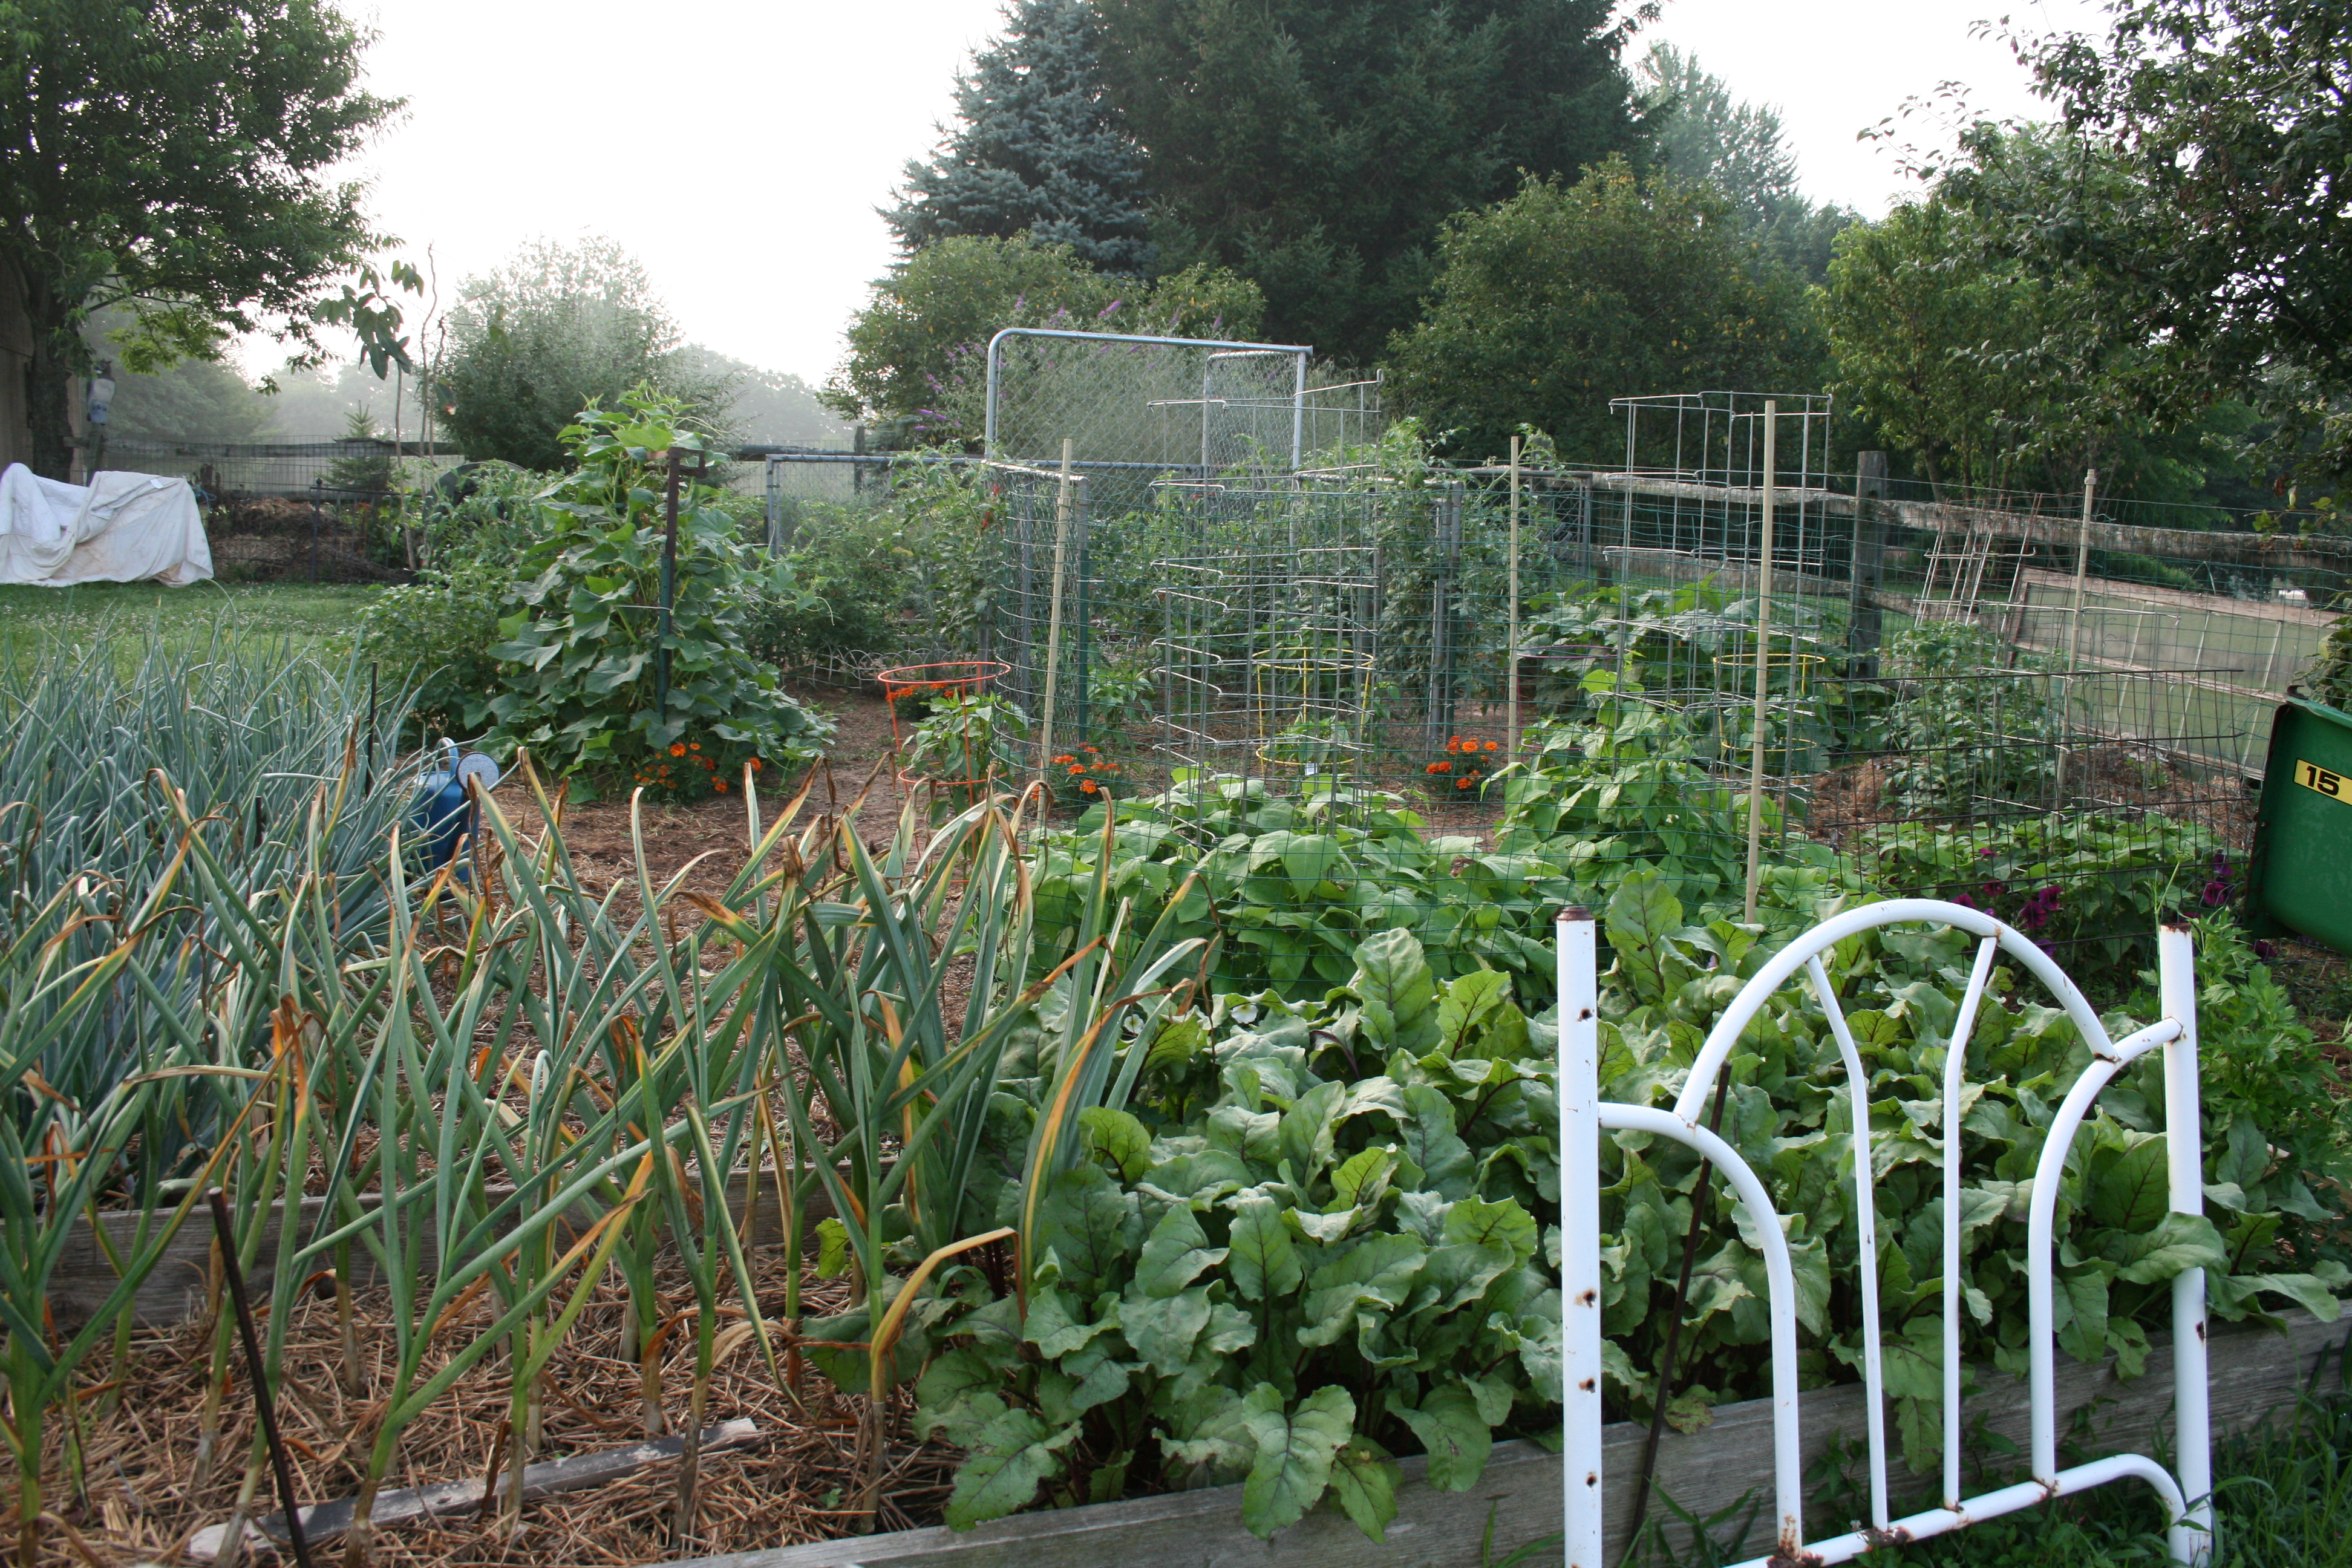
Headboards make great trellises.

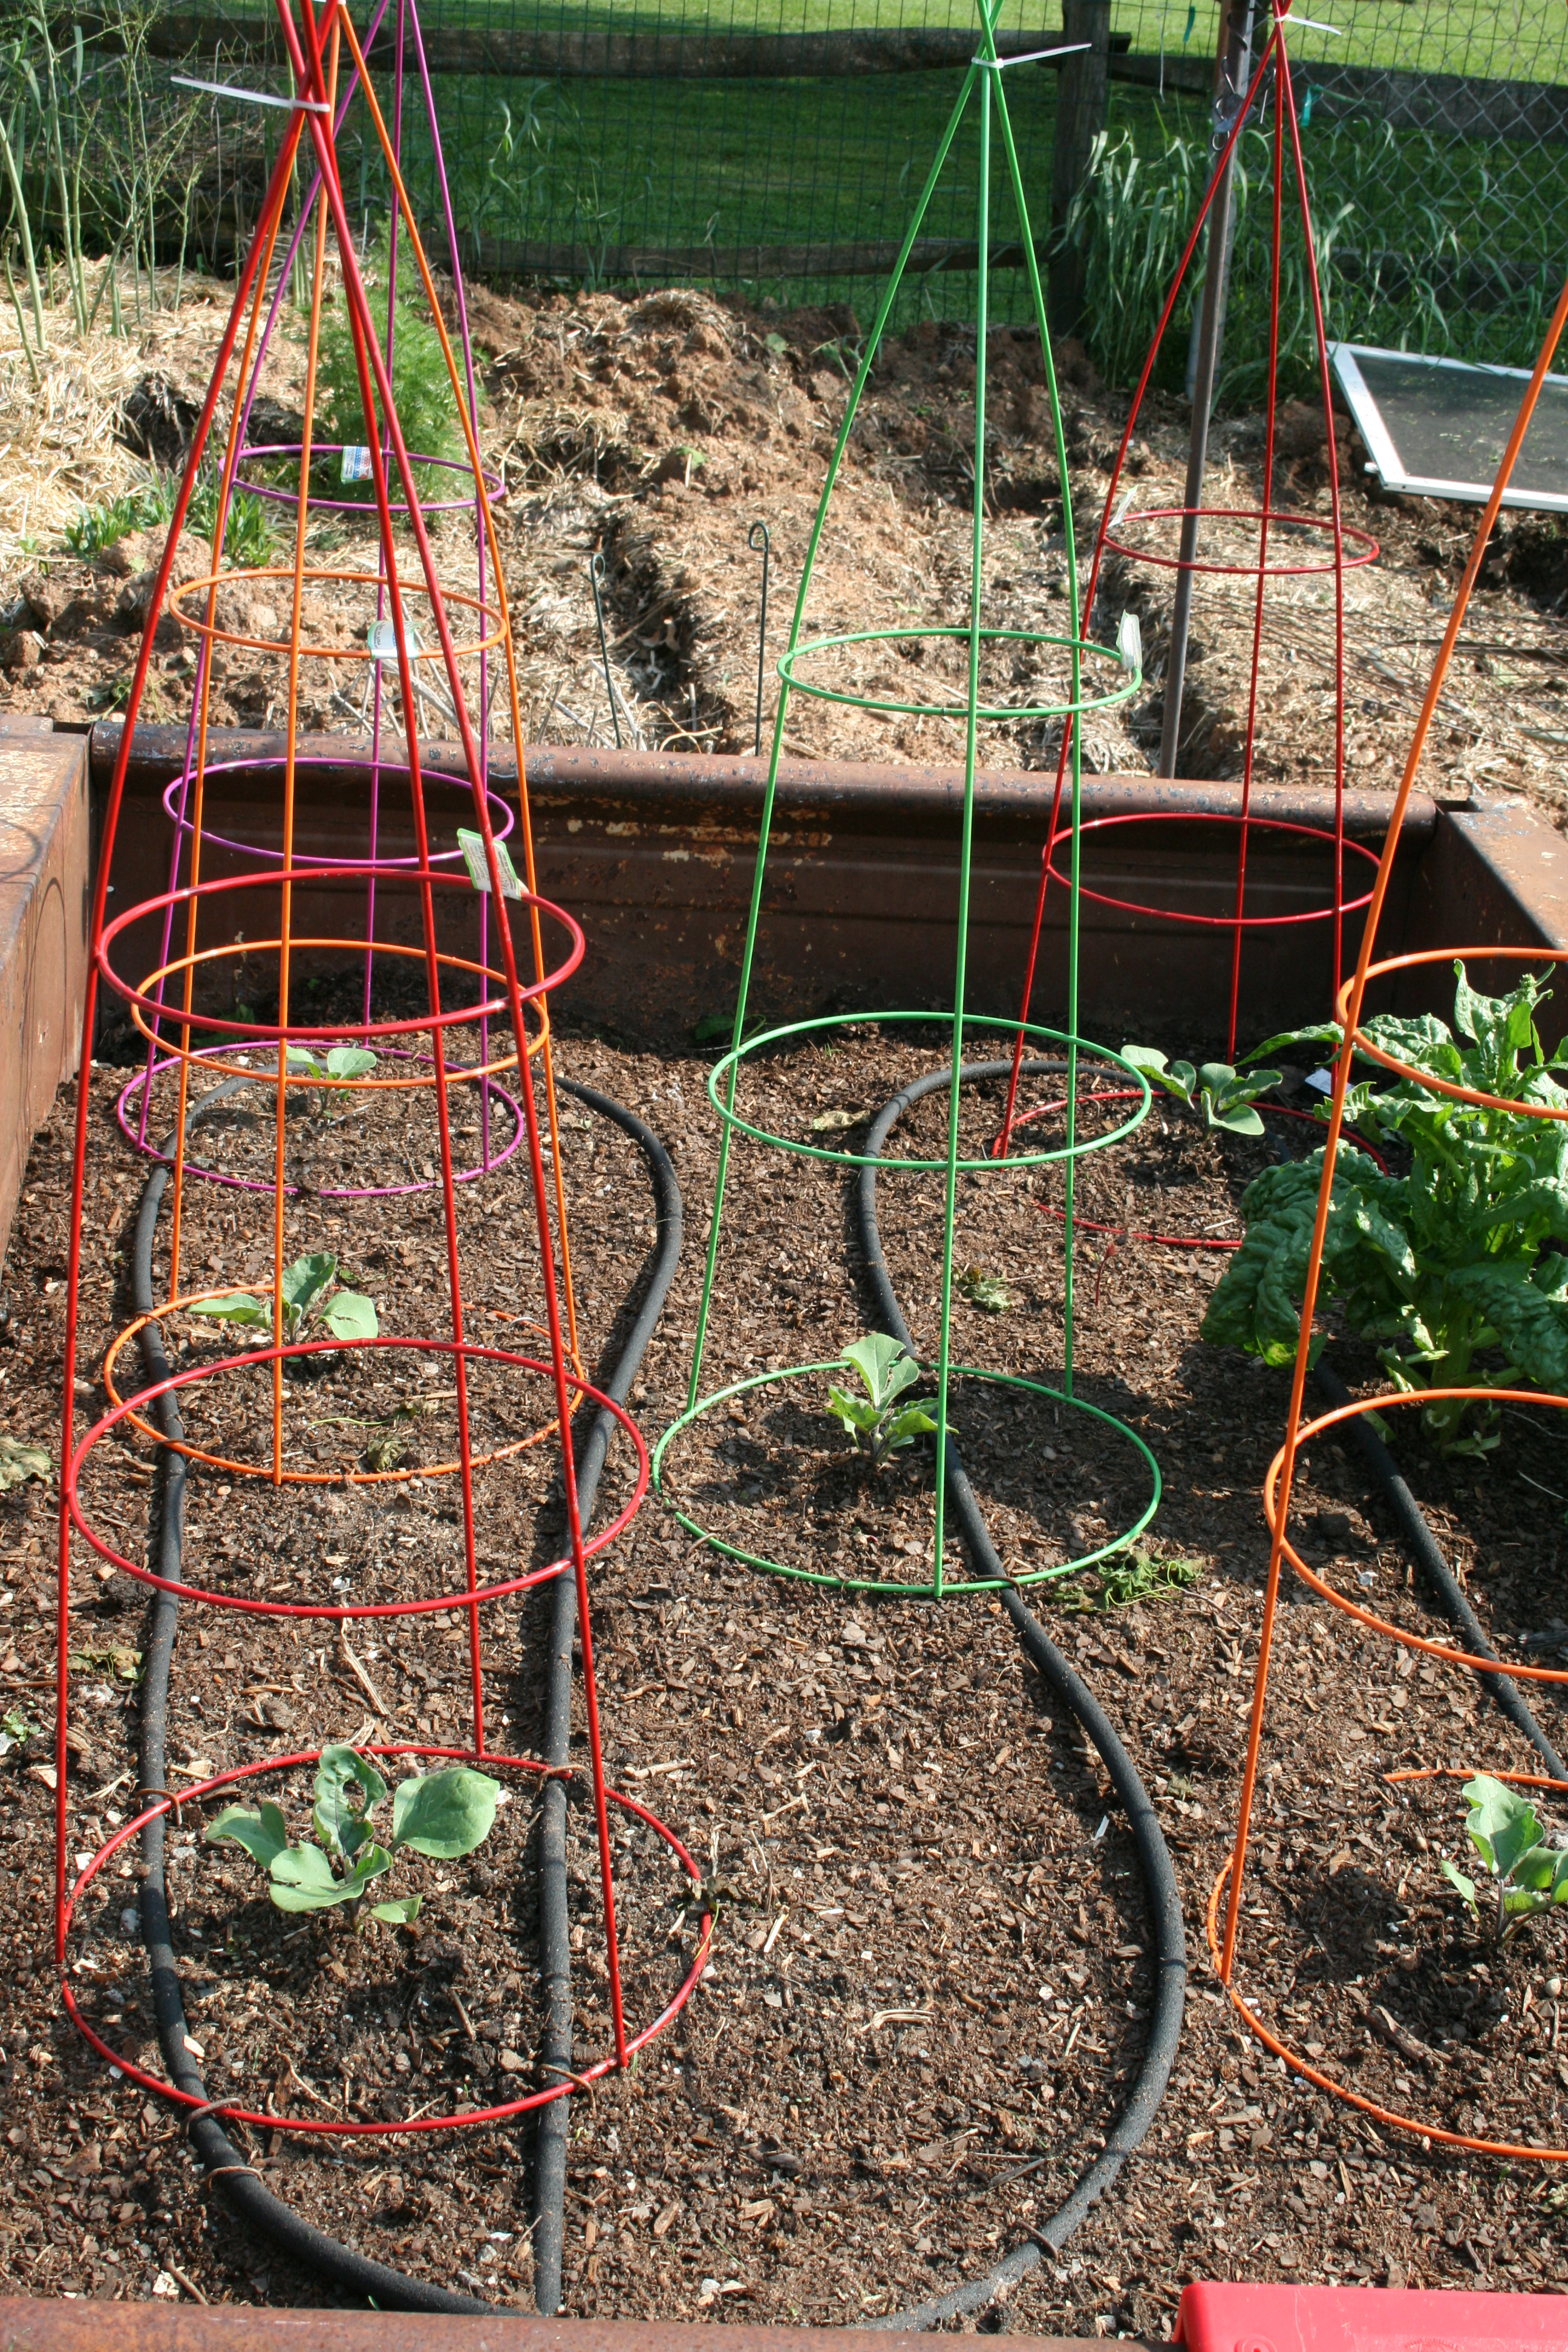
Trellises – made from some found items, your cukes, tomatoes and peppers will love climbing up or grow on these.

When I say found, I mean things like this old headboard from a day bed that I found on the side of the road. I use for climbing vegetables like cucumbers.

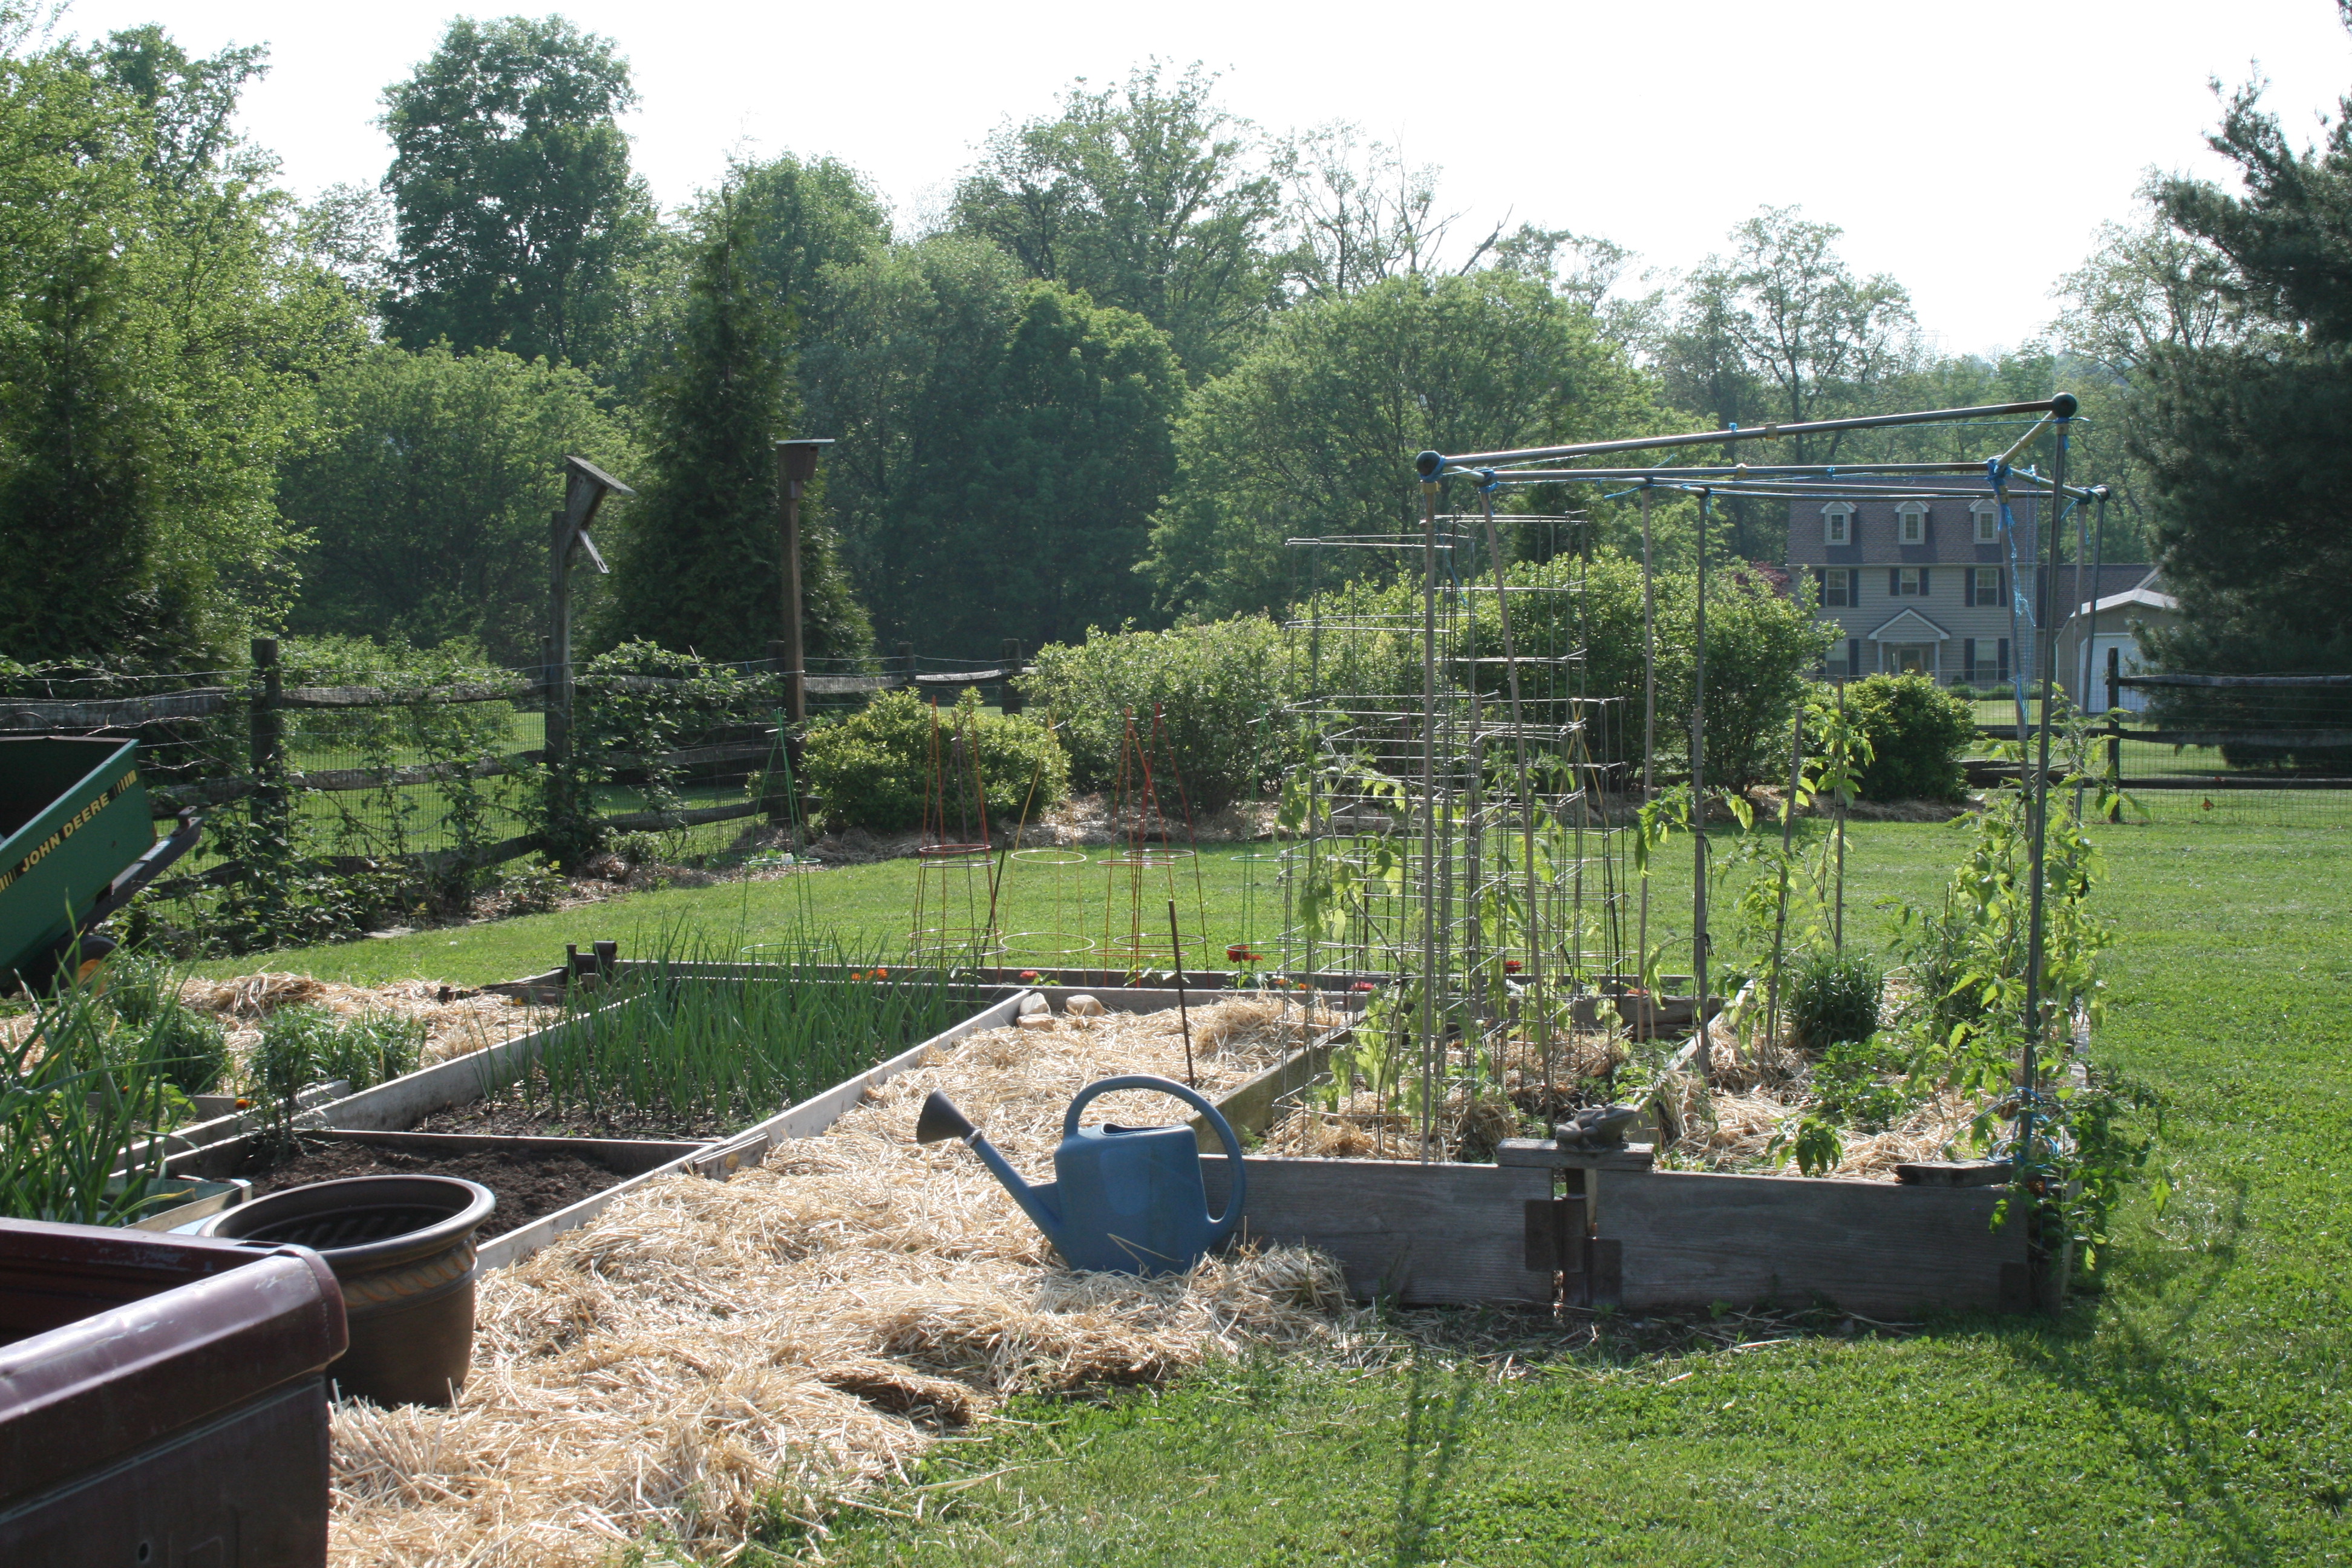
Or how about chain link fence sections and hay bale ties for growing tomatoes or training peppers or eggplant? I got these fence sections for free, too. And I have been using them for over 20 years!

Free fence sections grow great veggies

Fence sections supporting tomatoes

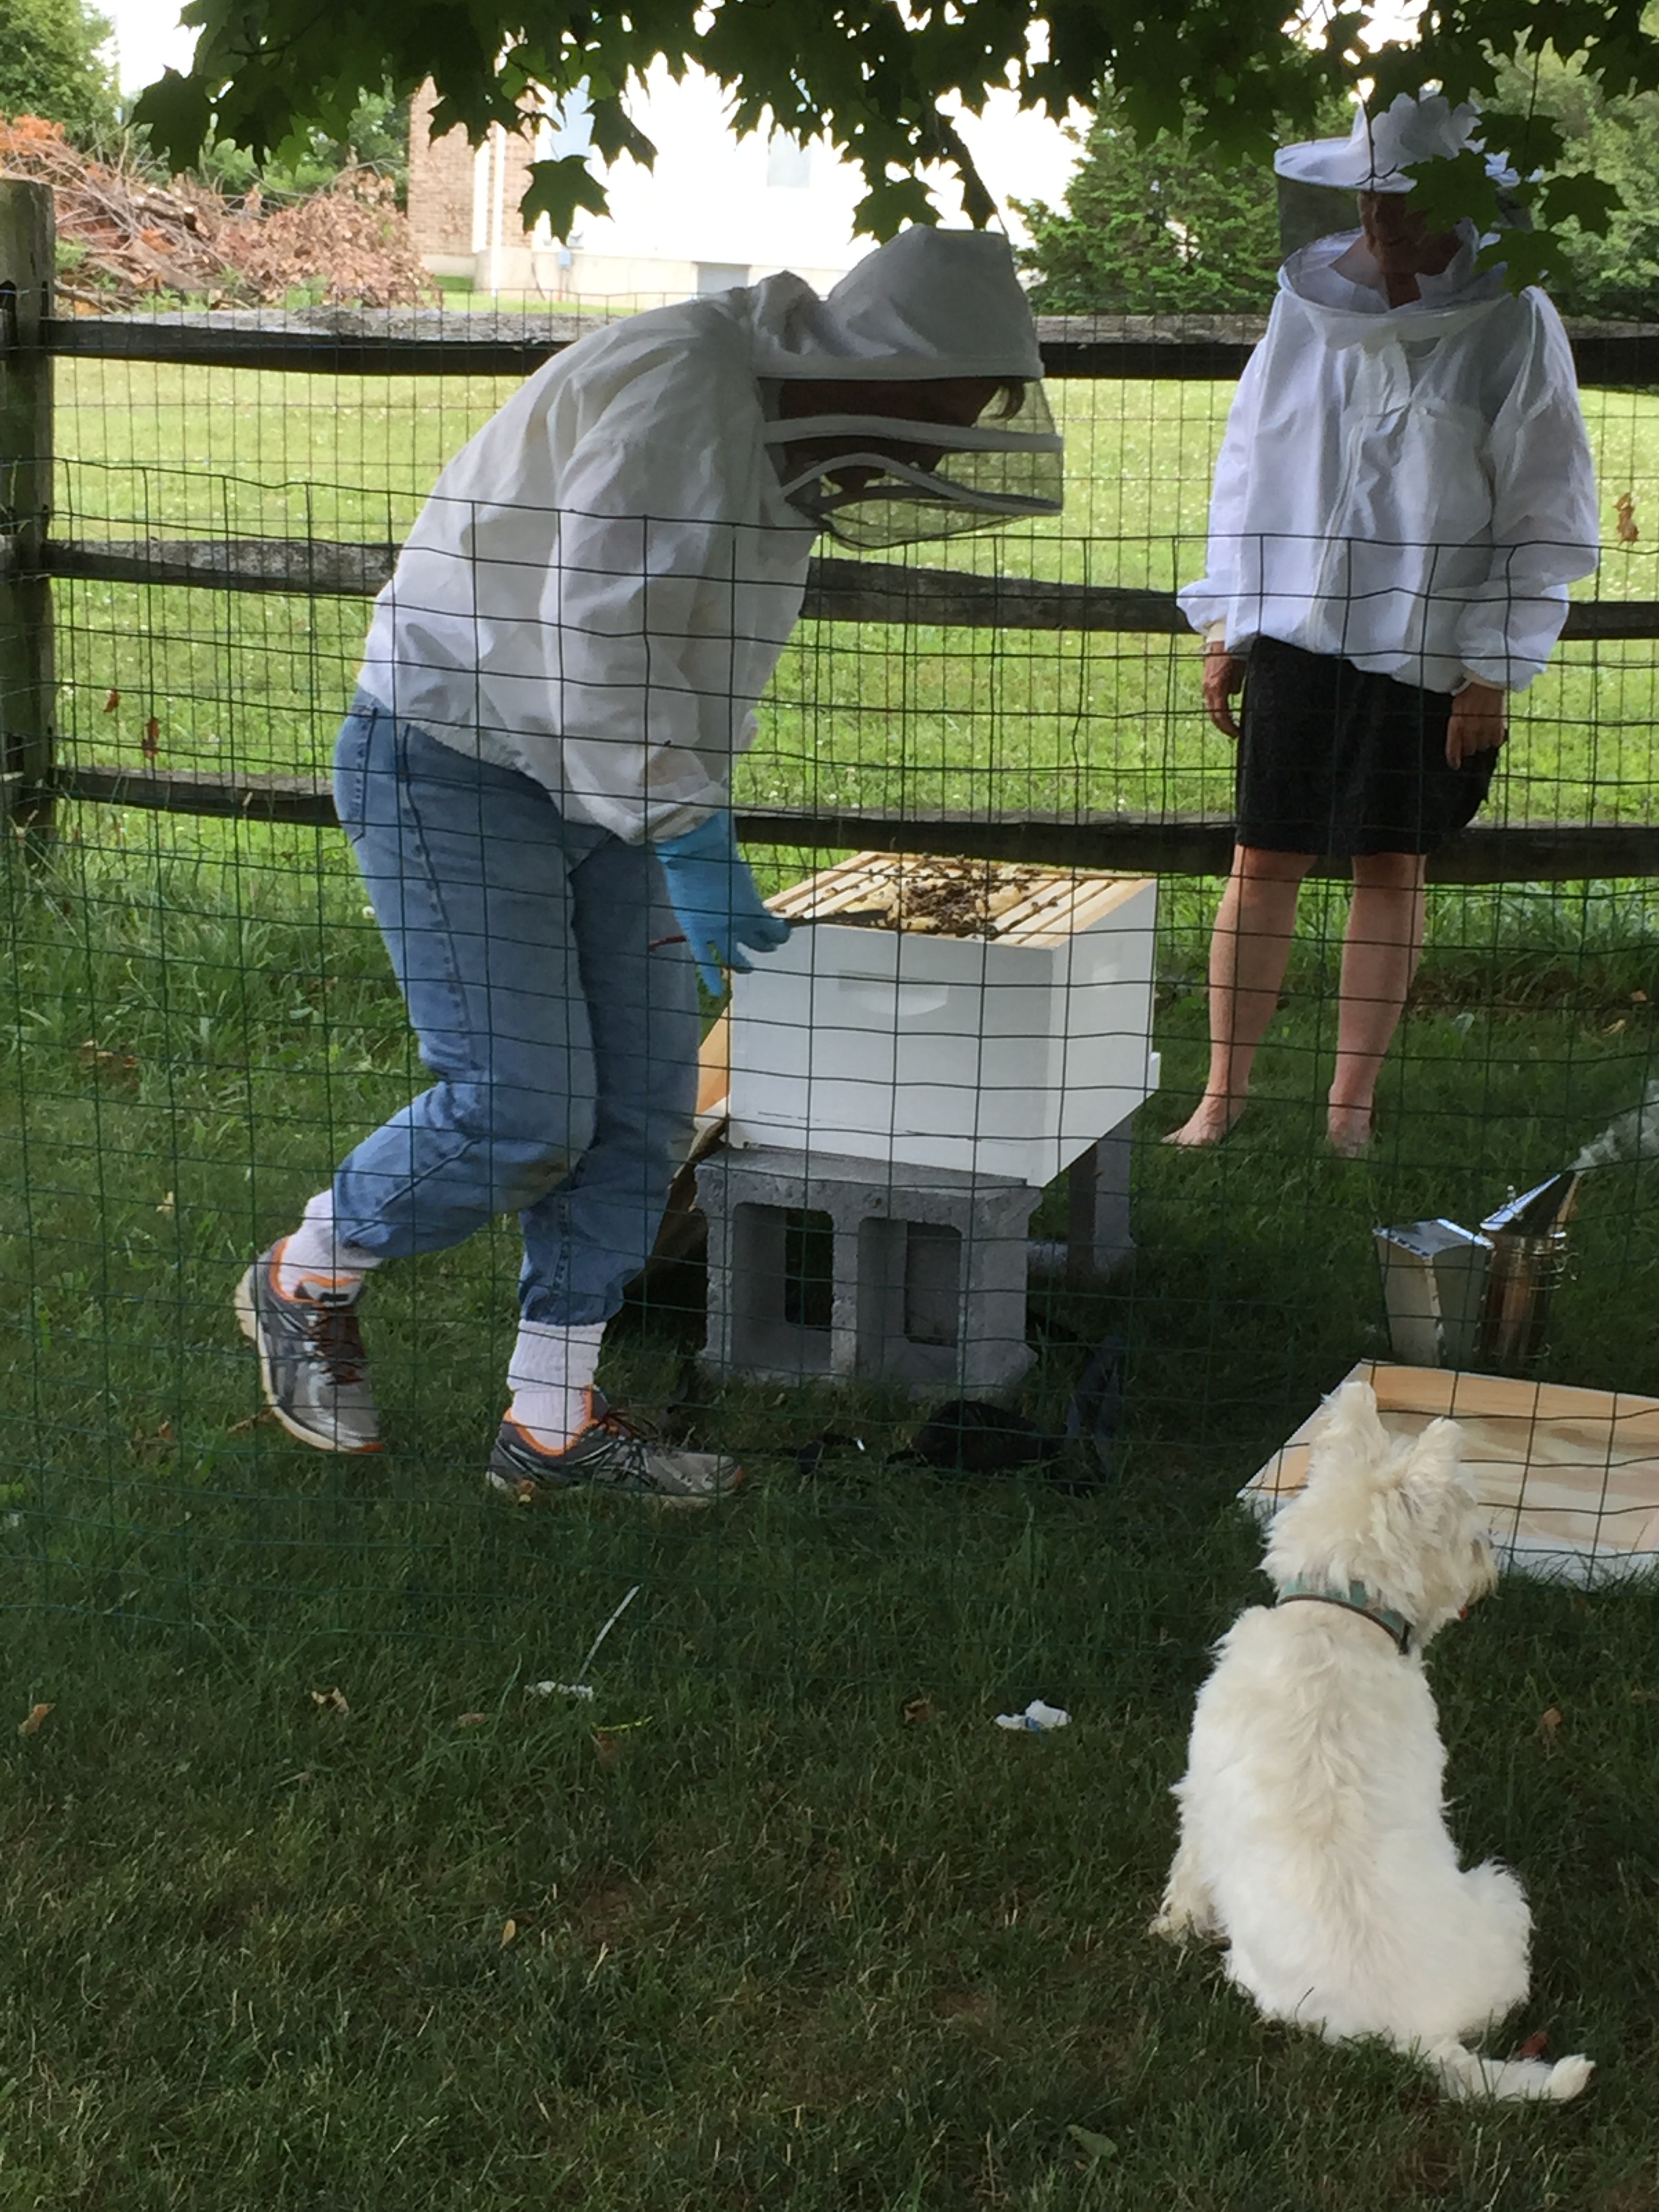
By the way, the dog isn’t free and he doesn’t do too much supporting! He can, however, pick his own tomatoes and blueberries.

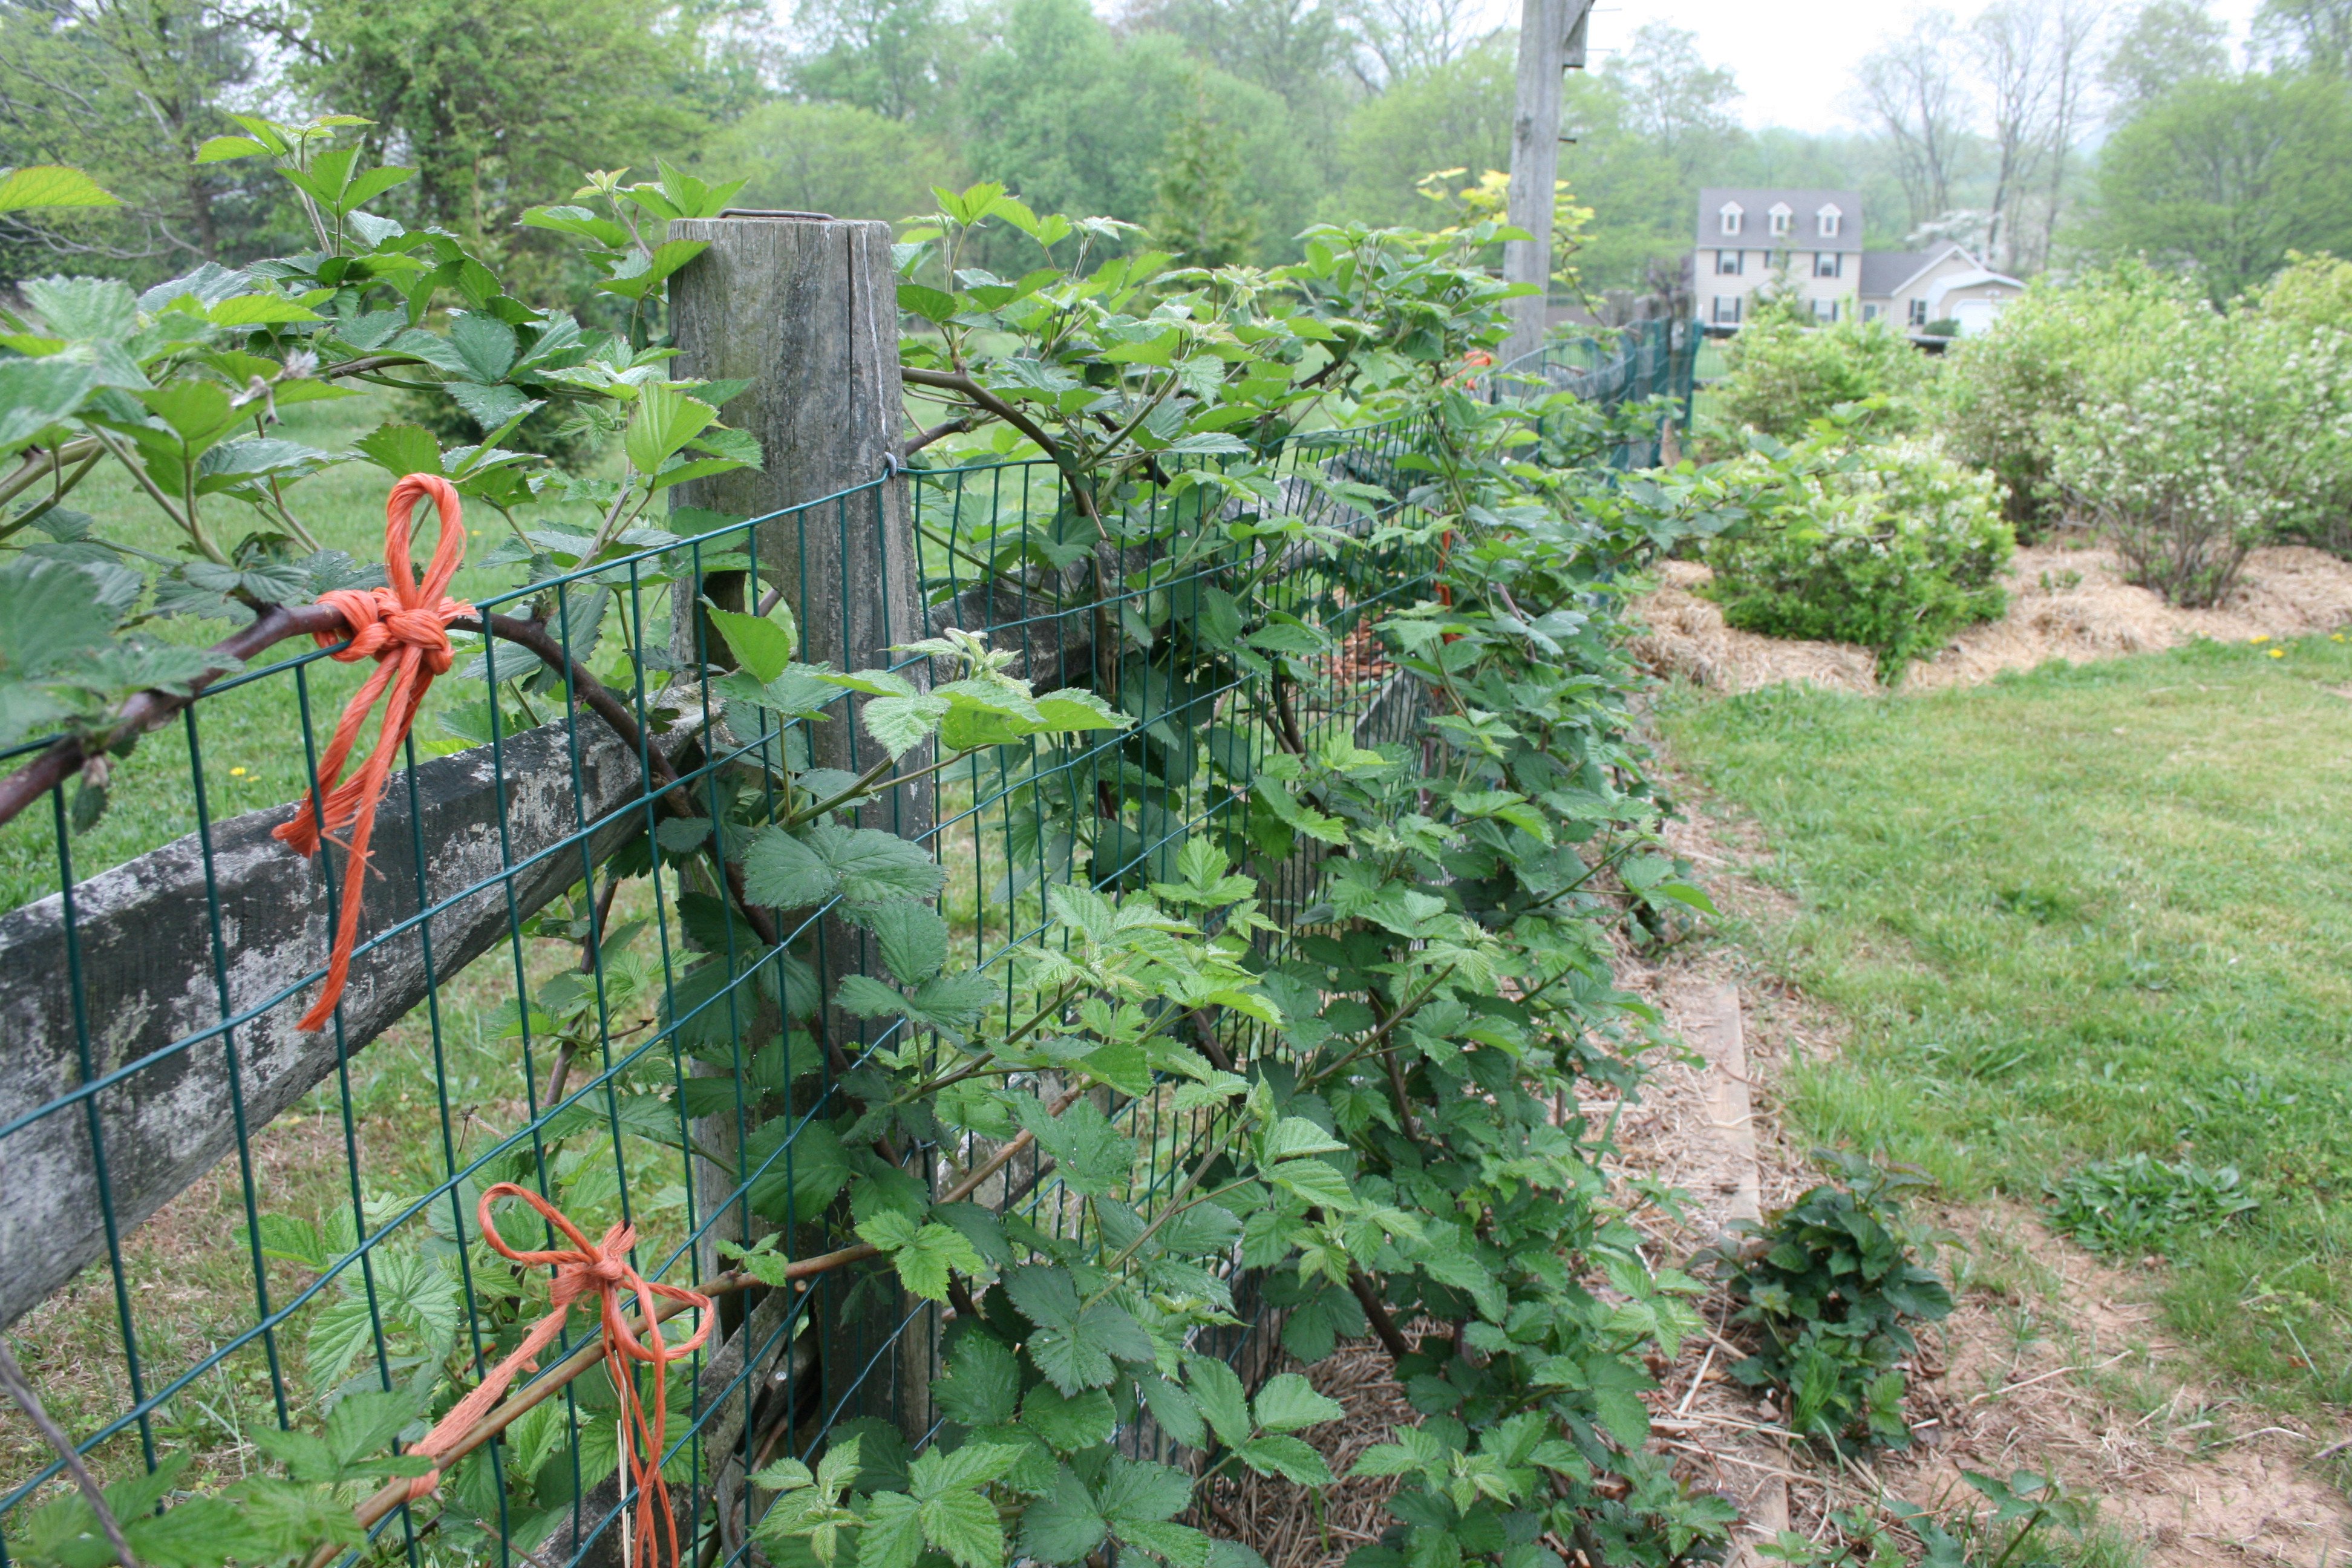
And the decorative fence – my attempt to slow him down just a bit, was free, too.

Epsom salts – dirt cheap in half gallon milk shaped containers.

A bucket – free if you can get a hold of a kitty litter container or a dog food bucket.

A mug – free if you liberate it from your kitchen and use it to deliver water or fertilizer right to the roots of your plants.

Twine – free if you buy straw by the bale, save the baling twine and use it to tie up plants.  You can also get tons of baling twine in any horse barn.  NOTE:  Do NOT use green baling twine.  It has been treated with strychnine to kill mice and rats.

free curtains and free frames

Free curtains, free frames, free from frost

Old, sheer curtains, old bed sheets and even old mattress covers – free if you save yours or ask relatives and friends to give their old ones to you.

They don’t look as pretty as commercial row covers but they will keep frost off your baby plants. and, they’re free.

Access to a public library – free and there are always books and magazines about organic gardening ready for you to browse through, borrow and take notes from.  Oh, and libraries have computers and internet connections. Using them is free. And online is just FULL of ideas, tips and advice on organic gardening.  All you have to do is put in your search terms and hit Go.

An old 3-ring binder and some paper – can be free if you ask co-workers to save used copy paper and write on the back.  NOTE:  I consider this a requirement for my gardening.  If I don’t write down a tip or a “lesson learned”, I can easily forget what I learned and end up repeating my mistakes again and again and again.

A bit of inventiveness, a dollop of gumption and enough courage to try, fail and try again.

Here’s what would be nice to have if you move beyond dabbling in organic and decide to grow most of your produce every spring, summer and fall.  Bit of advice?  Before you buy any of these items, look on http://freecycle.org  or http://craigslist.org  to see if you can get them for free or cheap!

Peat pots – I use 2” and 4” peat pots and hate paying the price for them.  But they make transplanting easier for me and less stressful for the baby plants so I pay but I try to get them online rather than in a big box store where the price is always higher.

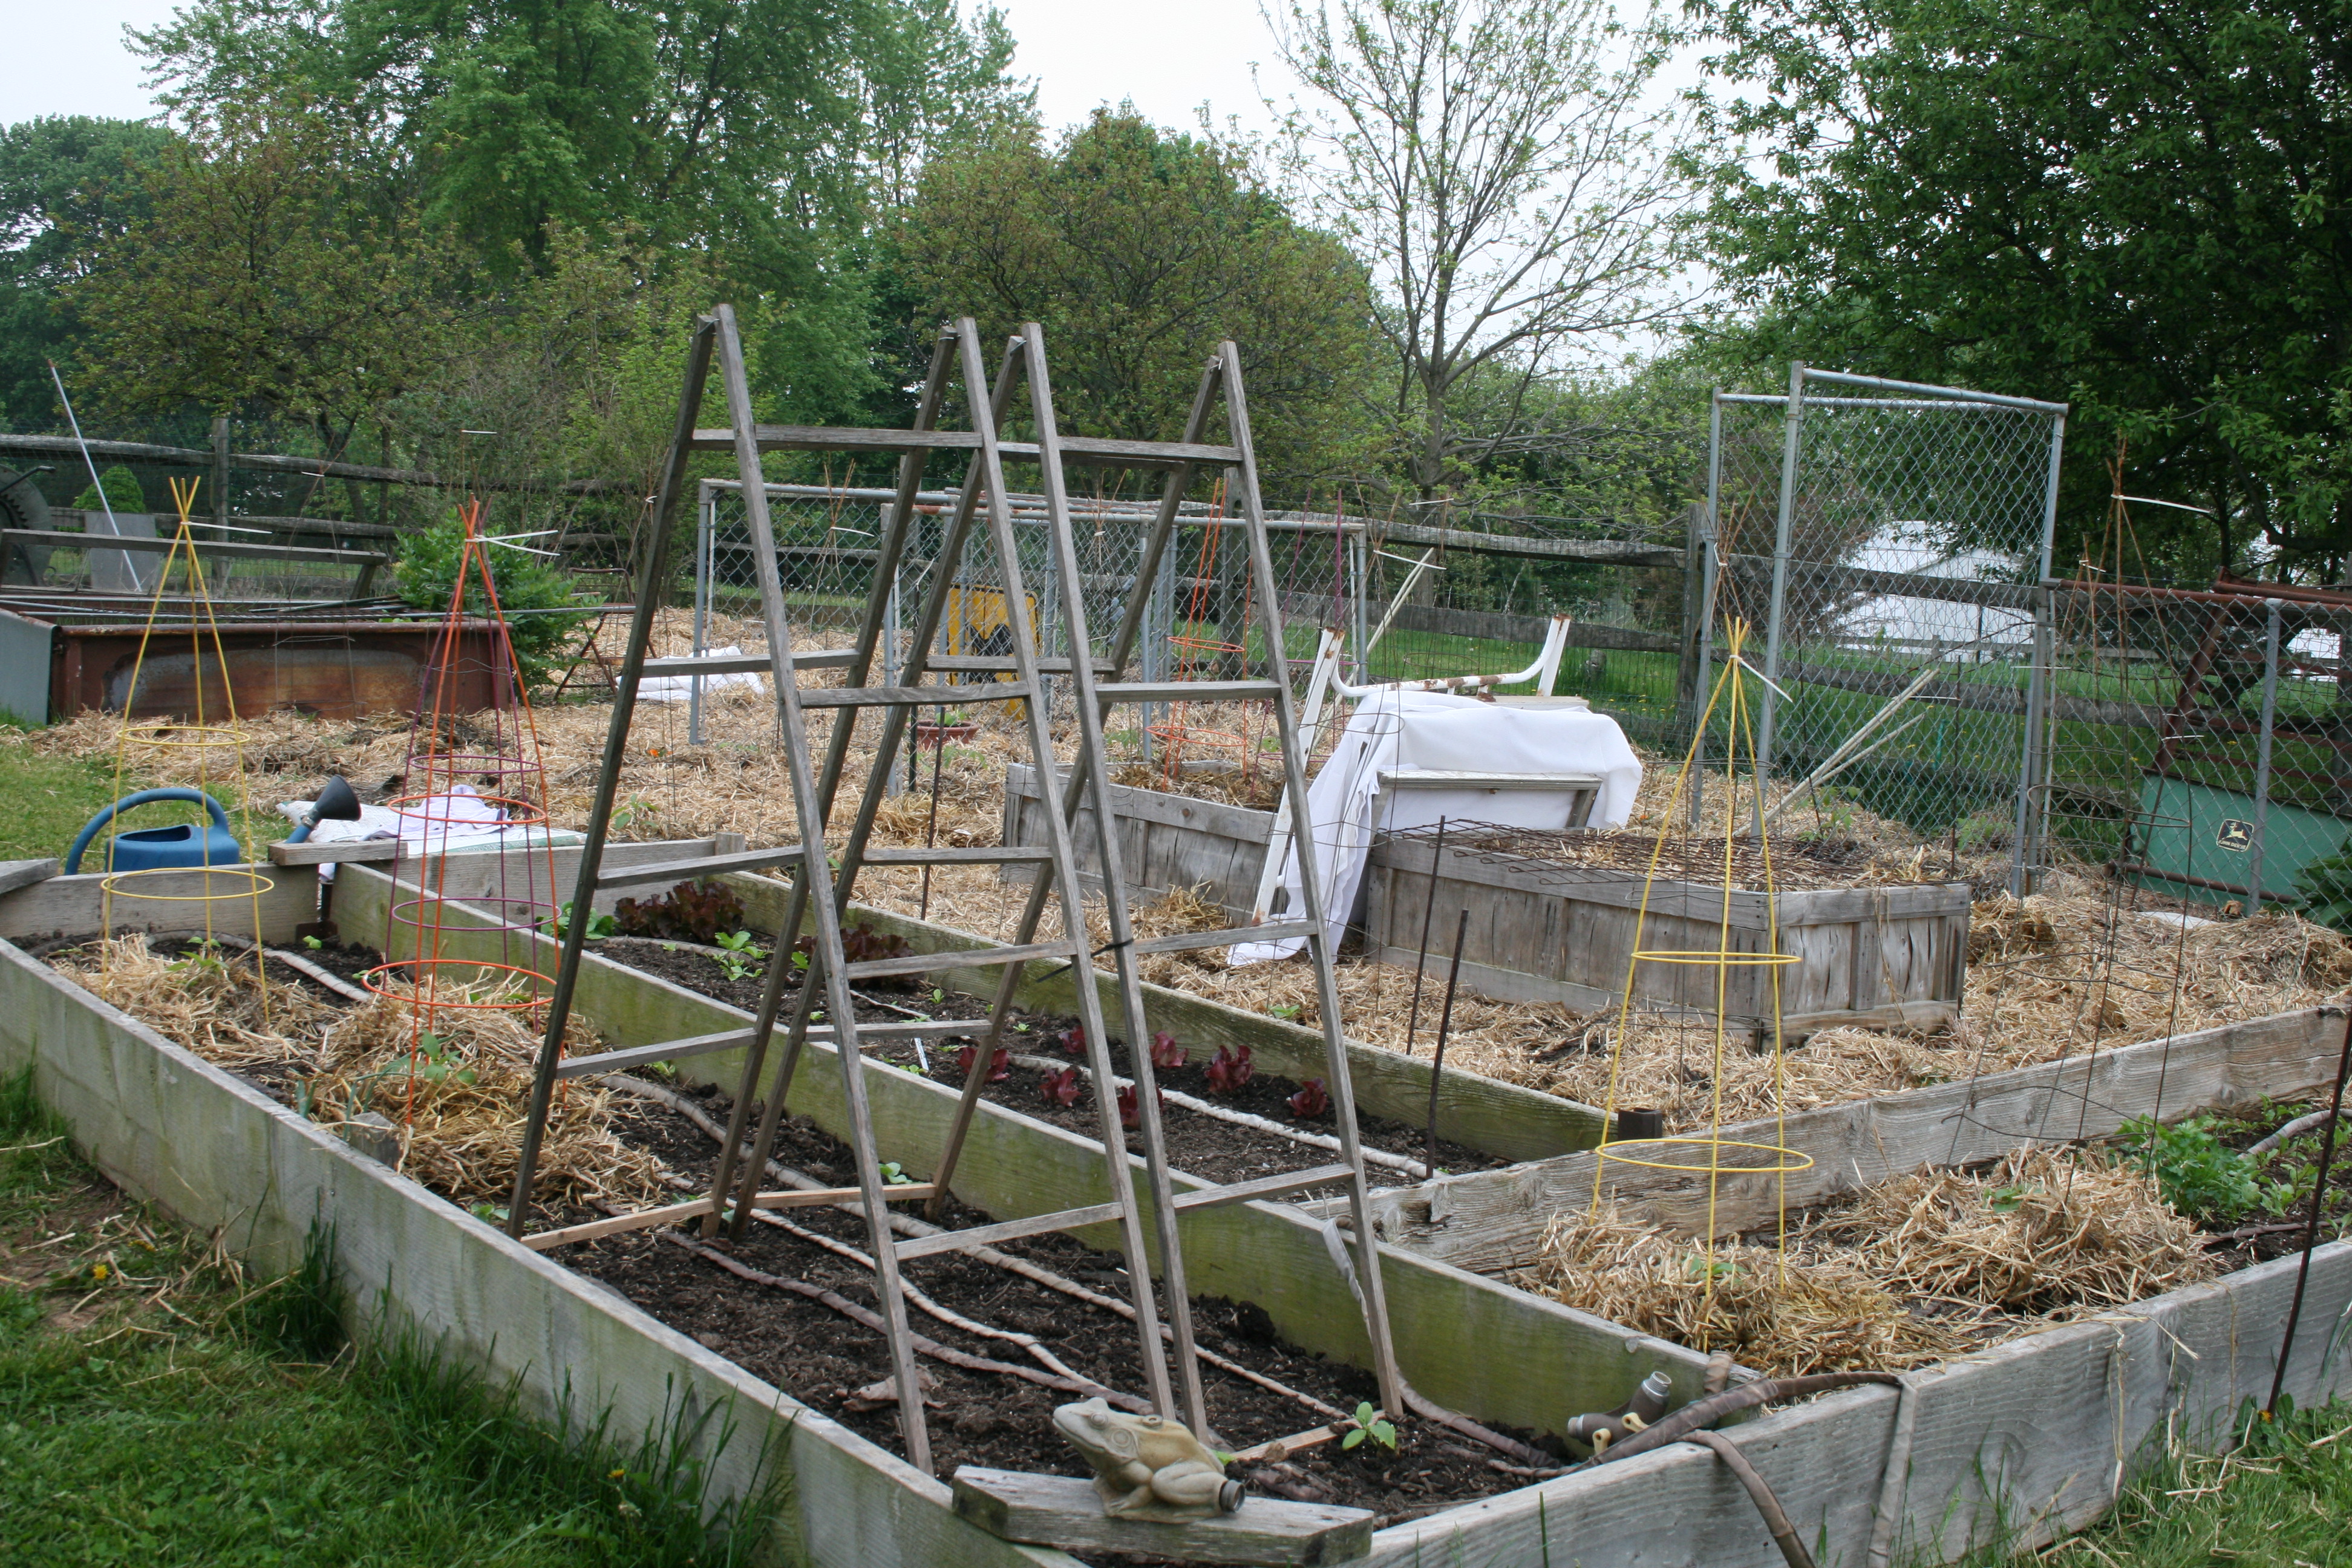
Raised beds – I make mine with 2 X 12s (NOT pressure treated) and plastic anchor joints from Home Depot.  They are so easy to do and won’t cost you $200, just a bit of sweat equity.

Raised beds are easy to make..

Raised beds are easy to make.

A kneeling pad – you can make one of these or buy one.  I’ve had my small green one for more than 15 years and it really, really saves your knees!

Gloves – I consider these nice to have because you really can dig in the dirt with your hands and suffer no ill effects.

But, in fact, I don’t use gloves because I love the feel of soil in my hands.

Two hand tools – both of mine are Fiskars because of the grip, the design and the lifetime guarantee — the big grip knife and the hand trowel.

A pitch fork – used to move the straw back from the fence sections a couple of weeks before planting so the soil can warm a bit.

A watering can – very nice to have if you want to hand water fresh transplants.

Fish fertilizer – I use Neptune’s Harvest hydrolyzed fish but am currently “brewing” my own using fish heads and bones that a friend of a friend got me for free, a 55 gallon drum and water!

Beneficial insects – there are quite a few beneficials and you can buy them.

Trichogramma wasp eggs on cutworm

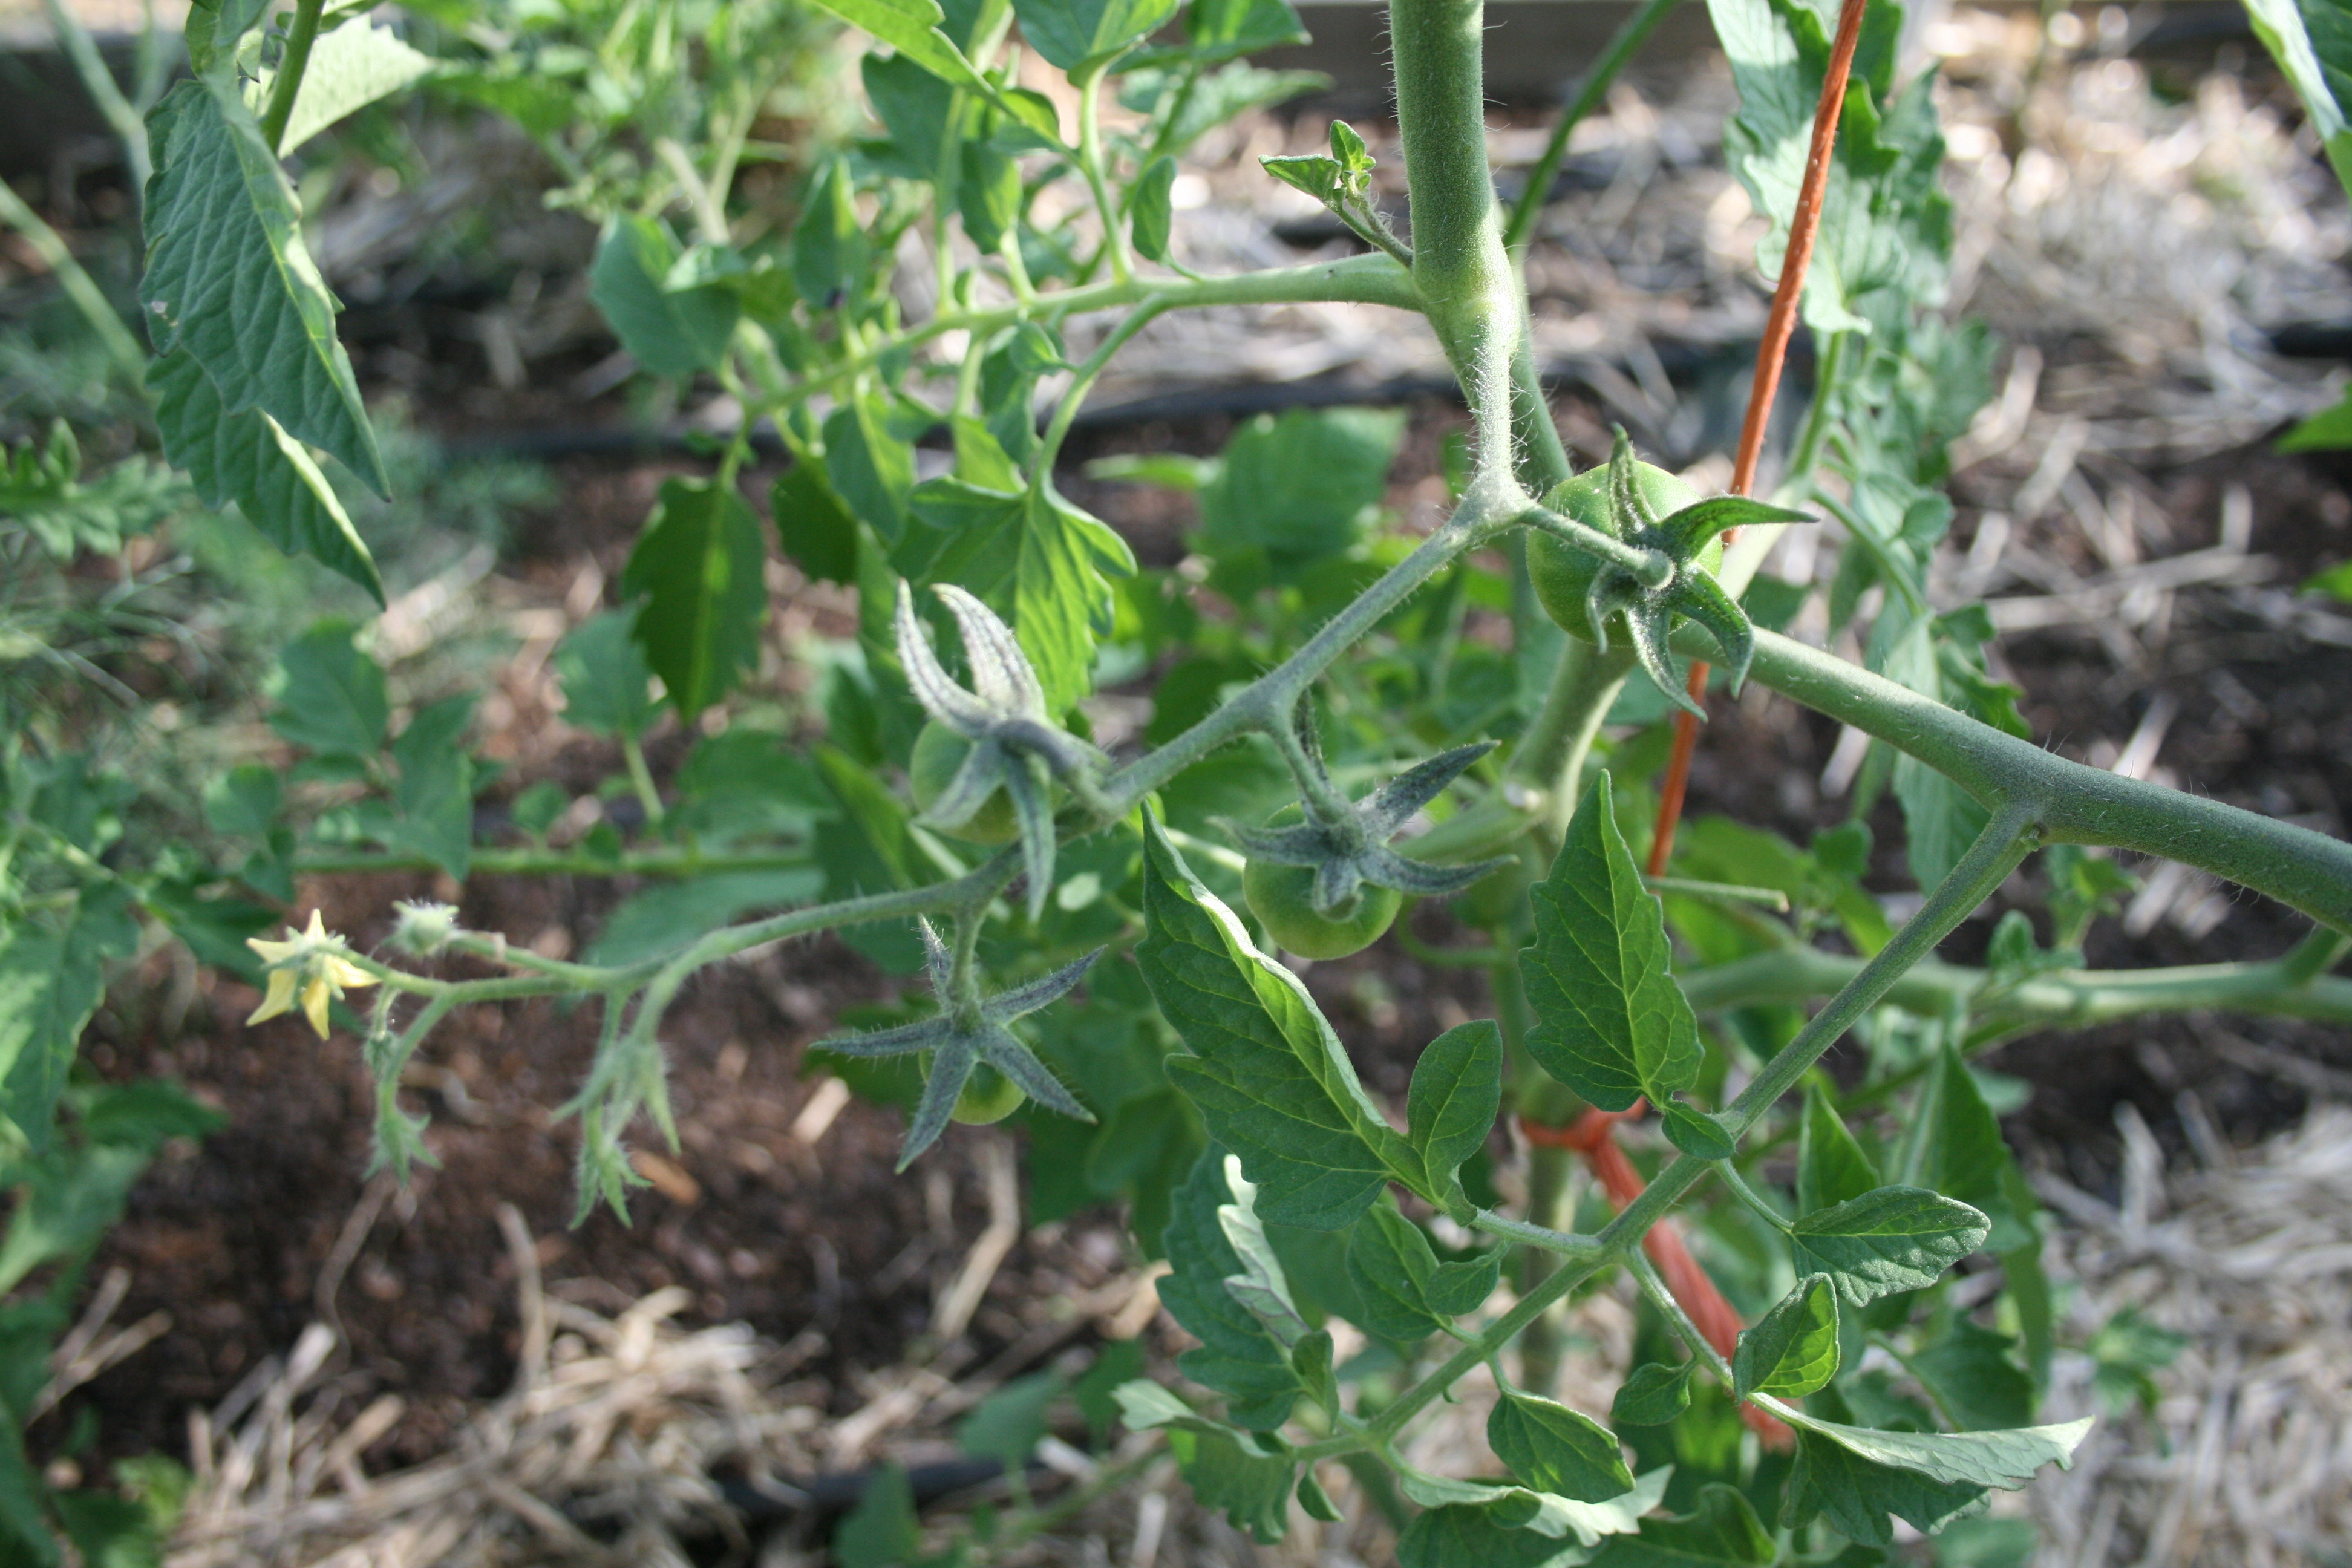
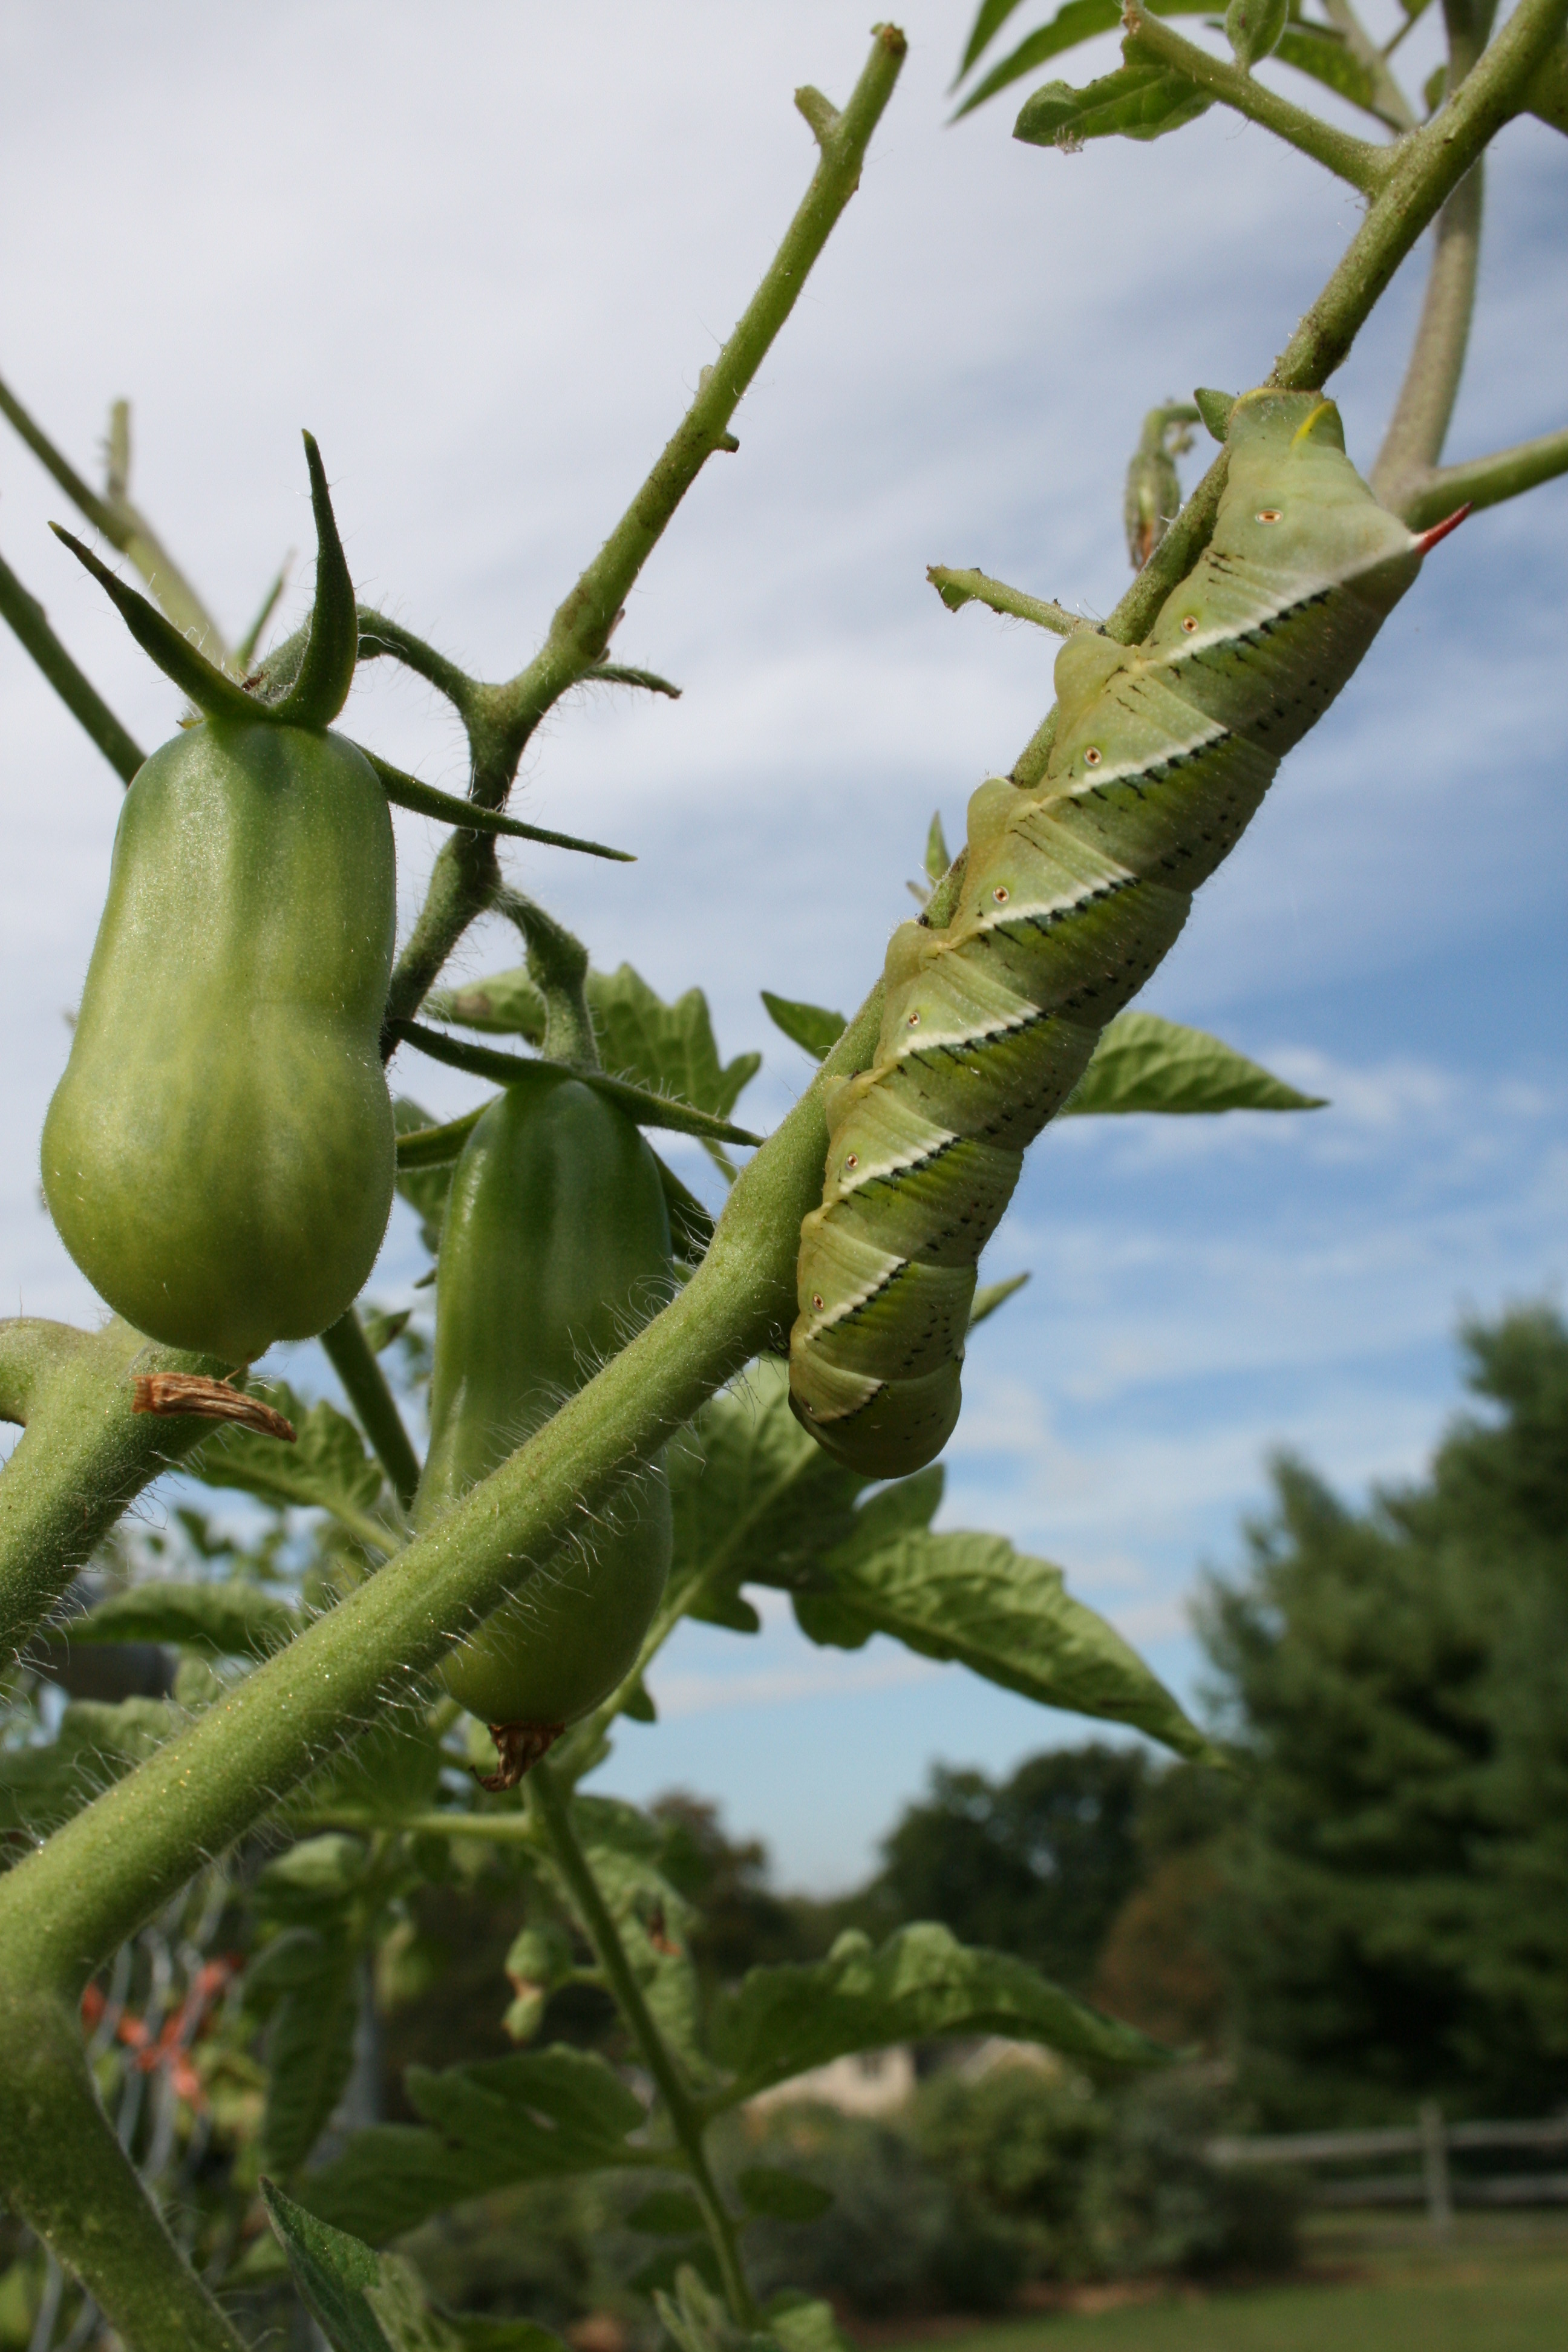
Wasp eggs on cutworm

They may seem pricey, at first, but you don’t have to buy them often and you will truly be glad you did the first time you see a tomato cut worm trussed up like Gulliver and covered with small, white egg casings of the trichogamma wasp.

I bought nematodes and wasps 2 or 3 times when first establishing my garden but no longer need to buy them.  They live and work in my backyard.

A good pair of secateurs – hand held clippers that can cut through a 1” branch like it was butter.  These let you trim inside the bush not hack off the outer branches.

A garden club in your neighborhood.  Membership dues are usually low, ours is just $25 a year but you might enjoy some ideas and tips from your gardening neighbors. WARNING:  not everyone is organic so pick and choose who you listen to and what you are going to do.

If you decide you like gardening and want to get into it, here’s are a few more items I’ve learned to keep on hand to help make my gardening go a little easier:

A good bug book – this could be one of your larger expenses but, believe me, you will be grateful for putting out the cash.  Why?  There are a whole lot of good bugs in the garden that will do battle with the bad ones without you lifting a finger.  If you don’t know the good from the bad, you could be killing your soldiers and giving the enemy a chance to overrun the battlefield, i.e. your garden.

White vinegar and a big box of salt – it does not have to be iodized.  You’re just going to mix them together and use them to kill ants or a persistent weed like poison ivy or both.

A small propane torch – the handheld kind – I use this to burn tent caterpillars off my cherry trees.  It’s a bit brutal but it burns the nest and the caterpillars before they can strip my trees.

An old knife or pair of scissors nicked from the kitchen – nice to have on hand to cut baling twine and cut off produce rather than try to pull it off.  Having lost several battles with eggplant and peppers, I tend to keep a knife in my garden basket and use it with malice aforethought.

As I mentioned before, there are a couple of online resources that might also make it cheap and easy to get basic gardening equipment so before you buy, you might want to visit these sites:

www.craigslist.org – people are always selling fence sections, hand tools and possible trellis material at incredibly low prices.  Check the ads out before you lay down good money for a tool someone else bought but no longer wants or needs.

www.freecycle.org – I find this site painful but you will find free stuff on it so it’s almost worth it.  You have to be a member to see the posts.  And navigation is not just basic; it’s irritating.  But you will be able to pick up a lot of the “nice to haves” on Freecycle for…free.


Free Organic Gardening Book

If you ever wanted to learn all about organic gardening, the good, the bad and the ugly…just sign up for this blog and sit back.

Every week or so, I am going to upload a chapter of my organic gardening book which you can read for free!

Today, I am starting at the beginning…that would be Chapters 1 & 2 (the chapters are short) of Grow So Easy; Organic Gardening for the Rest of Us. Enjoy!

Chapter I – Why This Book

Organic gardening is easy, practical and cheap!

My all organic, backyard garden.

Remember when you decided you wanted to start a garden?  You told a friend, spouse, garden center guy and then got bombarded with miscellaneous stories of gardening disaster.  All that support really made you want to go out and start tilling the soil, right?

I hate it when I hear someone telling another would be gardener how hard it is to get things to grow or how easy it is to kill this vegetable or that one.  Why?  Because, instead of gardening, you probably wanted to run home, mix up your favorite drink and sit down with the remote control.

Too many people in the gardening business write or talk about how hard organic gardening is or how complicated it is.  Sometimes that’s all it takes to make people who read their articles or buy their books put down the shovel or rake and walk back into the house.

They’re lying!  Organic gardening is easy!  It’s cheaper than going the chemical route and it’s fun!

Organic gardening is so easy the lettuce practically grows itself.

Organic lettuce is easy to grow.

The truth is gardening can be as easy as you want to make it.  It’s all about what you want to grow.  Figure out what you want to plant, how many plants you want to put in, how large a garden space you want and what works in your planting zone.

One tip from someone whose motto is, “If it’s worth doing, it’s worth overdoing.”

Start small and only plant those crops you want.  Lettuce is so easy to grow that it practically raises itself! It’s a cool weather crop that loves early spring and late fall. And it helps save you $5.00 for organic greens in the store!

Think about it. Stores sell spring greens mix for $5.00 for 12 ounces.  Fifty two weeks of buying greens comes to just under $300.  You can raise enough for you and your significant other for less than $3.00 a year.

Some seeds, some dirt and some water, a little kindness and a lot of sunlight and you are on your way to creating your own organic garden.  So, dig in!

Reading This Book

Organic gardening tips

Organic gardening is so easy.

This book is designed so you can pick it up, look up a specific plant or bush and read about the good, the bad and the ugly for just that one selection.  Or you can read it cover to cover – starting at the back if you want to and working forward.

Why?

Because a lot of us gardeners aren’t very linear.  And many of us would rather “give it a go” than sit down and read about gardening.  So I tried to give you what you need, when you need it.

Want to raise blueberries?  Interested in saving your own seeds?  Want to get a handle

Organic gardening is easy.

Organic gardening is all about getting your hands dirty!

on techniques like composting, using organic fertilizers or even doing battle with Japanese beetles?  Check the Table of Contents and flip to the right page.

Want the back stories?  The pain of losing a loved one to Verticillium Wilt?

Make a cup of herbal tea, start here and just drift through the book, laughing, learning and, I hope, getting a powerful yen to get out there and get dirty.


PS – if you can’t find it in my book, I didn’t kill it.


Tips for Fall Garden Clean Up

Green and organic garden in summer.

My garden in July, 2016.

T.S. Eliot got it wrong. April isn’t the cruelest month; it’s September. It’s the time of year when your garden goes from lush, green, verdant…

Tips for cleaning up your garden

Garden clean up in progress

To brown and gold broken up only by beets, Swiss chard, kale and lettuce.

Not only is the growing season drawing to a close for many of us…but it’s time to clean up!

I used to hate cleaning up my garden in the fall. When I  looked out my kitchen window and  saw more brown than green, I would grimace and think, “…next weekend.”  Inevitably, clean up kept getting pushed back by other, more pleasing events like the Brewfest in Kennett Square or the Hagley Car Show .
But not anymore.

Tomato horn worm eating tomatoes.

A tomato horn worm in my garden.

I’ve discovered that cleaning up is the perfect time to find unwanted visitors like the varmint that was eating my tomatoes. This fat and happy tomato horn worm is enjoying his last meal.

While tearing down my tomato trellises, I found a dozen of these beautiful but sinister worms as I cleaned up the tomato bed. But I also learned that all but 2 were covered with trichogramma wasp eggs, like the little fellow below.

Trichogramma wasp eggs on hornworm

Wasp eggs on hornworm

Fall cleaning, removing leaves, vines and stems, raking up fallen bits and pieces of this year’s green bean and tomato plants, all these activities help me get a jump-start on my garden next spring.

Garden Clean Up Tips
Anyone who has gardened for a few years has come up with their own tips and tricks for making garden clean up a bit easier.  Having 30 years of experience behind the hoe, I have discovered a few things that might make life easier for any organic gardener.

My first bit of advice? Be prepared.  When I go out to clean up, I always bring the tools I’ll need to make it easier.  So my tool bag (actually my wheel barrow) contains:

  1. Scissors – the knots you used to tie up tomatoes will be real tight after a summer of rain and heat.  Trying to pull them off just frustrates the gardener.
  2. Secateurs – if you try to cut back blackberries or blueberries without them, the chances are you’ll do more damage than good.  These small, sharp sheers can cut through up to an inch of stalk or wood and are always in my bag of tricks.
  3. Baling Twine – picked up at the stable and used to bundle all the leggy tomato, pepper and eggplant carcasses.
  4. A shovel – I sometimes need to coax some of the plants from the ground.  Eggplant and tomatoes get stems more than an inch in diameter and their roots can extend up to 10 feet from the base of the plant.  So, a bit of shovel power comes in handy.
  5. A rake – I prefer the good, old-fashioned garden rake because it’s heavier than a leaf rake and the tines won’t work against me as I rake up fallen tomatoes and peppers.
  6. A bucket – I use an empty kitty litter container and I use it to pick up all the green or rotten produce that hits the ground at the end of the season.
  7. Garden gloves – I consider these optional.  I always start out wearing them but, inevitably, rip them off about 30 minutes into clean up.  I like the way the dirt feels on my hands.  But the manicure does suffer so it’s up to you whether you wear them or not.
  8. Large trash bags – I didn’t use to bag any of my garden waste but I learned that trying to compost vines from tomatoes, zukes, cukes and even green beans meant giving diseases like wilt a head start next spring. It also meant providing warm, cozy homes for Mexican Bean beetles and cucumber and squash beetles among others.

Clearing The Ground
This is always the worst step for me.  I really hate pulling off tomato cages, cutting vines out of my fence sections and tearing up the roots of the dying plants.  But once I get started, I actually enjoy it!

Bag garden waste

My dogs helping me to bag .

I pull all plants (except perennials), shove the waste into bags and stack them on the edge of the garden. I know some people put their plant bodies in the compost but I don’t. Why not?

If you’re a slow composter like me, letting nature and God do the work for you, you probably shouldn’t put your garden detritus in the bins, either.  Seeds will germinate.  Diseases will survive.  When you spread your compost next year to welcome your new seedlings, you may be welcoming some very unwanted visitors.

One last task remains before you can move from clearing to covering.  If you grew tomatoes, grab a bucket and pick up all of the fallen tomatoes off the ground.  If you don’t you will have a whole lot of baby tomatoes to pull up next year.  This is a gooey task but well worth the effort.

Once the ground is cleared, it’s time to cover it. I use straw and a lot of it. It mulches the ground, protects perennials and annuals like garlic and beets and sets me up for weed free gardening in the spring.

I use about 40 bales of straw  to cover everything including the blueberry and blackberry patches, the vegetable garden, raised beds and asparagus.  That may sound like a lot but by next spring, the 18 inches of straw I lay down now will have settled and started to break down.

Bug Control – A Pre-emptive Strike
I offer one last bit of advice for wrapping up the growing season and getting ready for your garden next spring.

During the growing and harvesting season, I don’t use any bug control except what I detailed in Getting Bugged.  However, if it’s been a very bad year for Mexican bean beetles, Asian Beetles, Japanese Beetles and Stink Bugs, just before I cover my garden, I do spray the straw remaining from last year and the ground in my raised beds.

Before you gasp, click unsubscribe and cry, “…traitor,”  know that I use only one product — Pyola.    The active ingredient is pyrethrin which comes from chrysanthemums and is mixed with canola oil.  I use Pyola to control next year’s bugs by killing the larva that are now safely snuggled into my garden ground.

NOTE:  Pyrethrin is a contact poison which quickly penetrates the nervous system of the insect.  It will affect bees and some  beneficials so I wait until I have had two hard frosts to use it. I want to make sure there is no insect activity in the garden.   Also, pyrethrin is harmful to fish so if you have a pond or your garden borders on a stream, don’t use it at all.

Cornell University’s post on its ExToxNet provides a very thorough idea of what pyrethrin is, how it works and what it might do in the environment.  Read it before you use it so you’ll know if it will work in your garden.  And don’t use it if you don’t have to.

So that’s my version of garden clean up.  Clean up really isn’t that hard but I avoid it because it signals the end of the growing season and the approach of cold winds and falling leaves.    It also means time for dreaming and planning next year’s garden…


When To Plant Veggies

It’s that time of year…finally!

I think I can actually start planning on putting out some of my home-grown plants. Weather in zone 6B has finally moderated. No more wild extremes like 81 degrees on Monday and 27 degrees on Friday night!

We’ve been on a roller coaster ride for temperatures and high (and constant) winds in the Mid-Atlantic states. The weather has made gardening more like a series of fits and starts than planning and planting.

Cold temperatures and high winds stunted the garlic.

Garlic stunted by cold and wind.

My lettuce and kale got burned almost to the ground in spite of having been covered by a tunnel of plastic! Wind swept under one end of the tunnel and flipped it off on night. I didn’t catch it until the next morning and by then, the damage was done. Even my garlic took a hit and that’s hard to do.

But now, it looks like we are getting to the time when something other than kale, beets, lettuce, onions and garlic can be put in the ground so here are some tips for getting your babies and their new “digs” ready.

Prep your soil!

If your garden soil has been covered during the winter, uncover it. I pull straw back about 12 inches from the fences I use to support my plants so the soil can warm up.

If you’re going to amend your soil, adding worm castings or compost (or both), now is the time to turn it and add the amendments. I use 1-year-old horse manure so I have to dig down, put manure in the trench, and cover the manure with about 8 inches of soil. I want to feed my babies, not burn their new roots.

Lay down your soaker hoses. It’s so much easier to put soaker hoses on the ground before you put your veggie plants in so take an afternoon to organize and lay them out especially where you’re going to plant tomatoes, which you don’t really want to spray with water.

Harden them off!

Hardening off your plants does NOT involve tools or torture.  It just means that you have to introduce your transplants to the outdoors, gradually.

Five or six days before you want to put them in the garden, start setting them outside for a an hour a day for 2 days, 2 to 3 hours a day for 2 to 3 days, 8 hours a day for 3 days and only then (and only if it’s not hailing or very windy) do they get their first overnight! Keep an eye on them.  Make sure they have water and are not staked out in high sun or high wind.

NOTE:  when hardening off, stop fertilizing.  If the plants have small flowers or fruit on them, pinch both off.  You want to help transplants direct all of their energy to rooting in the soil before trying to set flowers or fruit.

Plant When It’s Warm!

I also used to hurry and plant my babies by May 7th or 8th. Frequently, the ground was too cold for warm weather crops like tomatoes and peppers and they simply stopped growing for a couple of weeks (or forever in some cases).  Putting plants in the ground too early can be deadly so give the soil a chance to warm while you get your plants ready for the great outdoors.

Remember, plants that I call “Mediterranean”like tomatoes, peppers and eggplant like warm earth and warm air. The optimal air temperature for them to go into the ground is 75 to 85 degrees. In my neck of the woods, that means these warm weather babies are typically transplanted the last week of May, especially if the weather is dicey.

So, even though it’s not quite time to start putting your plants in the ground, you can go out and play in the dirt, yourself. Get your garden ready for the big day! Your babies will thank you.

How Easy Is Organic Gardening? Very!

Organic gardening is easy.

Organic gardening is easy to do.

I wrote Grow So Easy; Organic Gardening for the Rest of Us for a young woman who wanted to go organic but was sure it was just too hard to do.

I also wrote it because I remember being in exactly that same place almost 40 years ago.

Organic gardening was hard and organic gardeners were weirdos, people who lived on the fringe of “real” life.  But I was intrigued so I decided I needed more information. When I wanted to learn about organic gardening, all those years ago, there was no Internet (hard to believe, right?).

I’d never heard of Ruth Stout or Jerome I. Rodale.  Euell Gibbons wasn’t touting Grape Nuts, yet and Adele Davis had already been dismissed as a “nutrition nut.”  Jim Crockett (Crockett’s Victory Garden on PBS) hadn’t even shown up on television (yes, Virginia, we did have television back then)!

So, I had to start my search the old-fashioned way.  I got on my bike and went to the library.

Using the Reader’s Guide to Periodical Literature (oh god…I am a dinosaur), I searched for magazines to help me get started.  There weren’t many — a handful really — but I did find information and people to help pave my path to becoming an organic gardener.

Today, it’s a lot easier to find organic gardening resources.  Connect to the Internet, search for those terms and you will get more than 4 million links to sites that offer everything from tips to tools.

But beware, many of these so-called “resources” just want to sell you something. I think I had it easier (back in the stone age), to find one or two clear voices, crying in the gardening wilderness!

I learned a lot from these “old guys and gurus” of organic gardening. I want to share what I learned and launch your gardening careers fast and easy.  So, I’m going to start with this basic truth:

…organic gardening is as easy as you want to make it.  It’s all about what you want to grow.

Start by figuring out what you want to plant, how many plants you want to put in (based on how large your garden space is) and what works in your planting zone.

If you just want to get out there and get started…here are two staples in my garden that are easy to grow and don’t have many bugs that “bug” them.

I always have tomatoes – they’re a great vegetable to grow in a pot (if you don’t have enough room to garden or your dirt’s not ready yet) or a plot.  If you’re just starting, try to buy compact or “bush” plants.  They’re easier to handle and don’t grow nearly as tall as indeterminate varieties like Brandywine or Early Girl.

I always plant lettuce, too.  A bag of spring greens  in my grocery store costs $5.00 for 12 ounces.  Fifty two weeks of buying greens comes to just under $300.  You can raise enough for you and your significant other for less than $3.00 a year.  

You can buy seed and follow the directions on the packet to plant it.  Or your can buy small starts or plants and toss them in your dirt (in a pot or a plot).  All lettuce needs is dirt, water and a little sun.

And when it gets a bit too warm for lettuce and it starts to bolt (get tall and taste bitter), if you let it go to seed, you can plant a new crop in the fall for free!

One tip from someone whose motto is, “If it’s worth doing, it’s worth overdoing.” Start small and only plant those crops you want.

Since it’s already planting season just about everywhere in the United States, I want you to gather up your courage, grab your car keys and head out to a nursery near you to buy your first plants (time enough for seed starting next spring).

Dig a hole, water your transplants in and sit back and watch mother nature take over.  Need more help? Download my e-book. Free for Prime members and only $2.99….for everyone else.


2015 Organic Garden in the Ground!

I got all of my plants in the ground – wrapping up planting today.  All organic seed, all raised by me in my basement and all hand-planted.

Granted, the garden doesn’t look like much right now but give it a few weeks and the size and shape of every plant will change as they fill in their spaces!

My garden is all planted.

All my plants are in the garden and ready to grow.

Here’s the inventory!  And, instead of talking about them, here are pictures of the newly transplanted, beautiful babies.

Eggplant baby.

Eggplant transplant just in the ground.

I put in 4 different types of tomatoes – 12 plants – Golden Slicer, Fir, Fox Cherry & San Marzano

Sweet Italian Peppers – 14 plants

Organic Italian sweet peppers

Inverted tomato cages help support my Italian sweet pepper plants.

Eggplants – 5 plants – Dusky and Melanzana Prosperosa

Zukes – 3 plants – saved seeds from last year’s Italian Zuchetta

Cukes – Saber F1 from Seeds of Change and Cetriolo from Grow Italian.

Kale – 10 plants – Curly, Russian, Dino & some unknowns from Adaptiv Seeds

Beets – lots and lots of plants – Cylindra and Early Wonder

Lettuce – Butterhead, Red Oak & a mix of saved seeds from last year and

Organic red leaf lettuce

Organic red leaf lettuce grows quickly and tastes sweet by itself or in salads.

Onions – 100 plants which I did not raise. I got these from an Amish friend.

Oh, and my thornless blackberries are growing and greening up!  And right below them, my gorgeous blueberries are covered with flowers.  Planted once, harvest every year for 20 years+ – organic gardening really is easy!

Thornless blackberries

My Doyle thornless blackberry bushes getting ready for summer.

Blueberry bushes laden with flowers.

Every flower on every blueberry bush becomes a blueberry — 60 quarts every summer.