Category Archives: Gardening Tips

Bees Susceptible to Neonics Used on Seeds & Seedlings

Bee on sunflower.

A bee visits one of my sunflowers.

If you’re an organic gardener, you don’t use neonics which we know are killing bees and damaging the environment. Or so you think.

But, if you are not buying organic seeds and organic plants, you very well may be poisoning bees right in your own back yard.

Eartheasy shares the latest information on neonics and on how these deadly herbicides and pesticides have slipped into just about every aspect of the farming and gardening world and the result is devastating.

For example, Marta Spivak, an entomologist and Distinguished McKnight University Professor at the University of Minnesota, suggests that  this could be the foundation for “…the problem of the Varroa destructor mite, which spread widely in the 1990’s. If a bee’s immune system is already compromised by even a low dose of neonics (for example, the concentration found if only the seed of a plant is treated) it can make it all the more difficult for the bee to recover when it encounters the dreaded mite.”

Eartheasy provides more information and more insights on their site. Check it out and find out how we might just be undermining the health and well-being of our bee friends and not even know it!


Planting Elderberries in the Meadow

Grassy meadow in my backyard.

Our meadow grows great grass!

We call this our meadow. Honestly, it’s really just half an acre of ground we
didn’t want to mow any more.

Lemon balm likes the meadow

Lemon balm took over the old firewood pile.

The idea started when I transplanted some of my mom’s Lemon Balm in an area that had been the firewood pile.                    Lemon balm grows fast and this took off and created an oval that’s about 6 feet wide and 12 feet long. Then milkweed dropped by for a visit and decided to stay, creating a ring around half of the lemon balm bed. The only plants that have tried to interfere were two invasives – Mile A Minute (it grows that fast) and every surface including the back of the leaves has stickers) and Bittersweet Vine.

The rest of the half acre is “naturalized.”

Okay, it looks pretty seedy but I have been working on this for a couple of years with little or no success. The grass is MONSTER and its rhizomes are about 1/2″ thick!

I’ve planted 18 perennials out in the meadow…black-eyed susans, shasta daisies, perennial flox, and cone flowers — all supposed to be hardy, to love the sun and to return, year after year. Most of them packed up in the dead of night and moved to the neighbors.

So, now my new approach is to plant bushes.

Transplanted elderberry growing in the meadow.

The first elderberry goes into the meadow.

Of course, the bushes have to produce so, I am putting 3 elderberry bushes in and 2 Goji Berry bushes. Just for fun, I picked up a Hazelnut tree at Sugar Bush Nursery and am adding it to the mix.

Luckily, we had dragged branches out to the meadow over the last 2 years, piled them up and left them. Occasionally we would look at each other, look at the pile and say, “We need to clean that up.” That didn’t happen until today.

Sticks moved so I could plant elderberries.

I call this sticks with ticks.

And when I started moving the pile from one bit of the meadow to another, I found absolutely beautiful, grass-free soil and a nice place to plant my berry bushes! (I also found 6 ticks on my neck, arms and head — I’m still itching.)

I dug holes for the elderberries, making them about 30 inches deep. Too deep for this bush which is shallow-rooted. But I knew my enemy — the soil.

Freshly dug, properly prepped holes for my bushes.

Freshly dug, properly prepped holes for my bushes.

It grows absolutely fabulous witch grass  and not much else. It would not be good for these berry bushes.

I broke up and added about 3 inches of twigs and branches – jumping on them once they were in the hole to break them even further.

Why branches?  In soil this hard, twigs help with drainage and keep these new bushes from drowning. They also break down slowly, adding nutrients to the soil that will feed the elderberries over time.

This hole is ready for its bush!

This hole is ready for its bush!

I topped the branches with  composted matter that included grass, straw, some well-composted manure and egg shells. On top of that, I put a 2 inch layer of soil. Now the holes are only about 8 inches deep.

The new baby bushes will be tucked in with some worm castings and some of the native dirt from the hole. They will also have ground cover and topped with grass clippings that will act as mulch and food.

Here’s hoping my new plan works and the meadow gives up a little real estate for these new baby elderberries and the Goji berries.

By the way, here’s the view of my garden and house from the meadow – what the bushes get to see when they look at home!

The view from the meadow.

Our house and garden from the meadow.


When To Plant Veggies

It’s that time of year…finally!

I think I can actually start planning on putting out some of my home-grown plants. Weather in zone 6B has finally moderated. No more wild extremes like 81 degrees on Monday and 27 degrees on Friday night!

We’ve been on a roller coaster ride for temperatures and high (and constant) winds in the Mid-Atlantic states. The weather has made gardening more like a series of fits and starts than planning and planting.

Cold temperatures and high winds stunted the garlic.

Garlic stunted by cold and wind.

My lettuce and kale got burned almost to the ground in spite of having been covered by a tunnel of plastic! Wind swept under one end of the tunnel and flipped it off on night. I didn’t catch it until the next morning and by then, the damage was done. Even my garlic took a hit and that’s hard to do.

But now, it looks like we are getting to the time when something other than kale, beets, lettuce, onions and garlic can be put in the ground so here are some tips for getting your babies and their new “digs” ready.

Prep your soil!

If your garden soil has been covered during the winter, uncover it. I pull straw back about 12 inches from the fences I use to support my plants so the soil can warm up.

If you’re going to amend your soil, adding worm castings or compost (or both), now is the time to turn it and add the amendments. I use 1-year-old horse manure so I have to dig down, put manure in the trench, and cover the manure with about 8 inches of soil. I want to feed my babies, not burn their new roots.

Lay down your soaker hoses. It’s so much easier to put soaker hoses on the ground before you put your veggie plants in so take an afternoon to organize and lay them out especially where you’re going to plant tomatoes, which you don’t really want to spray with water.

Harden them off!

Hardening off your plants does NOT involve tools or torture.  It just means that you have to introduce your transplants to the outdoors, gradually.

Five or six days before you want to put them in the garden, start setting them outside for a an hour a day for 2 days, 2 to 3 hours a day for 2 to 3 days, 8 hours a day for 3 days and only then (and only if it’s not hailing or very windy) do they get their first overnight! Keep an eye on them.  Make sure they have water and are not staked out in high sun or high wind.

NOTE:  when hardening off, stop fertilizing.  If the plants have small flowers or fruit on them, pinch both off.  You want to help transplants direct all of their energy to rooting in the soil before trying to set flowers or fruit.

Plant When It’s Warm!

I also used to hurry and plant my babies by May 7th or 8th. Frequently, the ground was too cold for warm weather crops like tomatoes and peppers and they simply stopped growing for a couple of weeks (or forever in some cases).  Putting plants in the ground too early can be deadly so give the soil a chance to warm while you get your plants ready for the great outdoors.

Remember, plants that I call “Mediterranean”like tomatoes, peppers and eggplant like warm earth and warm air. The optimal air temperature for them to go into the ground is 75 to 85 degrees. In my neck of the woods, that means these warm weather babies are typically transplanted the last week of May, especially if the weather is dicey.

So, even though it’s not quite time to start putting your plants in the ground, you can go out and play in the dirt, yourself. Get your garden ready for the big day! Your babies will thank you.

Growing Bradford Watermelons

I am super excited this year because I am going to try to grow watermelons this summer.  Not just any watermelons…Bradford watermelons.

So, what’s the big deal with Bradford Watermelons?

These are supposedly the sweetest watermelons available on the market today. Their Brix is over 12. Their sweetness is one reason this type of watermelon fell into disfavor with growers and disappeared from the marketplace for almost 100 years.

The watermelons were so sweet that they couldn’t be shipped very far before they began to rot. Hardier watermelons with thicker skins were developed just for distribution and the Bradford watermelon faded from public memory.

So, their sweetness attracted me but I think the reason these watermelons are so special is the back story about their revival.  I love the farm, and the way the great, great, great, great, great, great grandson (also named Nat) took up the mantle and brought this legacy watermelon back to life. (Or it could be the watermelon brandy that Bradford is now selling!)

In any case, I going to try growing a few but a couple of things make this new venture a bit tricky for me.

  1. Taste: I tried raising cantaloupe one year. I successfully grew beautiful plants were covered with large melons…that tasted like dirt! No joke, they were virtually inedible. So, I’m thinking perhaps my soil is not suited to raising melons.
  2. Real estate: watermelon like room to grow. They need real estate. I have room in the backyard but I also have a husband who is not all that thrilled by all the new holes I put in the ground every spring and summer.
  3. The seeds come with fairly long, very detailed planting instructions. I never read instructions. Perhaps I should…

I am going to direct sow these seeds – I got 10 for $10 and gave half away – in late May and will provide updates and pictures – good, bad or ugly – as my watermelon adventure gets off the ground!

Beekeeping: Getting Started!

The buzz about beekeeping seems to be getting louder or maybe I am just listening a bit better.Bee-apis

Margaret Roach’s podcast this week is with Olivia Carroll, author of The Bees in Your Backyard.

The April-May issue of National Wildlife offers a special issue focused on gardening for wildlife and offering a feature article on nurturing native bees.

Bee on sunflower.

A bee visits one of my sunflowers.

Jacqueline Freeman, natural beekeeper and author, was one of the stars of the recent Food Summit.

Bees have always been something I always dreamed about having in my backyard and this spring, my dream is coming true!

I am taking part in a research project involving “ruburbian”dwellers – not quite a suburbanite and not quite a rube. And I will be getting a hive placed in my back yard, lessons on beekeeping and a chance to care for them all summer long.

And I am trying to win a hive all for myself via Margaret Roach! Bees are her latest giveaway. And I could really use them.

Cherry, apple, pear, and pluot trees share space with 13 blueberry bushes and about as many thornless blackberry canes in my backyard. This spring, I am adding elderberry bushes to my meadow. And I’m currently growing chamomile, fennel and marshmallow in my basement to sow around the new additions and keep the lemon balm, milkweed and sunflowers that are already growing there, company.

Add my very big, totally organic veggie and herb garden and it’s clear that I could use all the pollinating help I can get!

I just completed the Chester County Beekeeping Association’s Beginning Beekeeping so I could make a plan for getting my own bees. And now, I am doing research, reading and getting really excited about getting bees!

I would LOVE to provide a happy, safe, pesticide free home on my 2.3 acre “farmden.”

If you want to get an up close look at bees, visit the National Geographic feature with photographs by Sam Droege and his team who are populating a database using data collected by backyarders around the country.

How Easy Is Organic Gardening? Very!

Organic gardening is easy.

Organic gardening is easy to do.

I wrote Grow So Easy; Organic Gardening for the Rest of Us for a young woman who wanted to go organic but was sure it was just too hard to do.

I also wrote it because I remember being in exactly that same place almost 40 years ago.

Organic gardening was hard and organic gardeners were weirdos, people who lived on the fringe of “real” life.  But I was intrigued so I decided I needed more information. When I wanted to learn about organic gardening, all those years ago, there was no Internet (hard to believe, right?).

I’d never heard of Ruth Stout or Jerome I. Rodale.  Euell Gibbons wasn’t touting Grape Nuts, yet and Adele Davis had already been dismissed as a “nutrition nut.”  Jim Crockett (Crockett’s Victory Garden on PBS) hadn’t even shown up on television (yes, Virginia, we did have television back then)!

So, I had to start my search the old-fashioned way.  I got on my bike and went to the library.

Using the Reader’s Guide to Periodical Literature (oh god…I am a dinosaur), I searched for magazines to help me get started.  There weren’t many — a handful really — but I did find information and people to help pave my path to becoming an organic gardener.

Today, it’s a lot easier to find organic gardening resources.  Connect to the Internet, search for those terms and you will get more than 4 million links to sites that offer everything from tips to tools.

But beware, many of these so-called “resources” just want to sell you something. I think I had it easier (back in the stone age), to find one or two clear voices, crying in the gardening wilderness!

I learned a lot from these “old guys and gurus” of organic gardening. I want to share what I learned and launch your gardening careers fast and easy.  So, I’m going to start with this basic truth:

…organic gardening is as easy as you want to make it.  It’s all about what you want to grow.

Start by figuring out what you want to plant, how many plants you want to put in (based on how large your garden space is) and what works in your planting zone.

If you just want to get out there and get started…here are two staples in my garden that are easy to grow and don’t have many bugs that “bug” them.

I always have tomatoes – they’re a great vegetable to grow in a pot (if you don’t have enough room to garden or your dirt’s not ready yet) or a plot.  If you’re just starting, try to buy compact or “bush” plants.  They’re easier to handle and don’t grow nearly as tall as indeterminate varieties like Brandywine or Early Girl.

I always plant lettuce, too.  A bag of spring greens  in my grocery store costs $5.00 for 12 ounces.  Fifty two weeks of buying greens comes to just under $300.  You can raise enough for you and your significant other for less than $3.00 a year.  

You can buy seed and follow the directions on the packet to plant it.  Or your can buy small starts or plants and toss them in your dirt (in a pot or a plot).  All lettuce needs is dirt, water and a little sun.

And when it gets a bit too warm for lettuce and it starts to bolt (get tall and taste bitter), if you let it go to seed, you can plant a new crop in the fall for free!

One tip from someone whose motto is, “If it’s worth doing, it’s worth overdoing.” Start small and only plant those crops you want.

Since it’s already planting season just about everywhere in the United States, I want you to gather up your courage, grab your car keys and head out to a nursery near you to buy your first plants (time enough for seed starting next spring).

Dig a hole, water your transplants in and sit back and watch mother nature take over.  Need more help? Download my e-book. Free for Prime members and only $2.99….for everyone else.


How To Grow The Sweetest Peppers

The only pepper I saw in my mother’s garden was the green, bell pepper.  And I never liked them.  The taste was too strong, bitter, almost biting.  So I never planted peppers until I found red and yellow bells.

Assorted bell pepper fruits from Mexico

Discovering peppers of color led to what is now my favorite pepper of all time, the Italian sweet pepper.

Italian sweet peppers are at the heart of any great sausage and pepper sandwich you’ve ever had.  And Italian sweet peppers add flavor to any recipe including my scallopini (recipes below the “bugs that bug” peppers).

Italian Sweet peppers have a rich green color that gradually turns brilliant red.  The flesh of the pepper is medium thick. The fruit is slightly curved, tapering to a pointed end.

Italian sweet peppers

Italian sweet peppers are a staple in my garden.

Today, Italian sweet peppers are the only peppers I grow.

Starting From Seed
Peppers are a warm weather plant so, like tomatoes and eggplant, I always start them from seed.  And I always start peppers 2 to 3 weeks earlier than the date specified on the seed packets.  Why?

In my zone, peppers that are started 8 weeks before my last frost (around May 15th) just aren’t big enough or strong enough to set fruit before the middle to end of July.  As a result, if I started them when the seed packet said to, I’d only get a few peppers from each one. If I start the plants indoors and early, my plants are larger and more vigorous and I get a glorious crop from every one!

I use 24-cell APS starter kits from Gardener’s Supply and I highly recommend them.  Funny thing is, I’ve been using cells for seed starting for years and now, recent research revealed that growing peppers in larger tray cell sizes or containers will produce larger transplants.

The kits ensure that your seeds and seedlings get just the right amount of water while sprouting and growing.  Not too much – not too little. The capillary mats in the cell system take advantage of osmosis.  Because of the system design, I never have to contend with damping off.

I fill the cells with Gardener’s Supply germinating mix, place 4 seeds in each cell…two in opposite corners.  Then I cover each cell with a bit of sphagnum moss, put on the plastic top and set the tray on two ceramic tile that sit directly on the heat mats. I fill the tray with water and then check 4 or 5 days to see if the seeds have sprouted.

NOTE:  You have to check your seed trays every day to make sure there is enough water in them.  Because I sit them almost directly on the heat mat, the water evaporates pretty fast.  If the seeds dry out at any time during the sprouting or early growing stages, the plants will either die, outright, or just malinger – no grow very much at all.

As soon as the seeds sprout, I lift off the clear cover and drop the light to within 1 inch of the cells.  As the plants grow, I keep the trays watered and I keep the light as close to the seedlings as I can without touching them.  If the light touches them, even a fluorescent light, it will burn the baby’s leaves and slow the plant’s growth.

When the seedlings have two full sets of leaves, I give the plants a very mild fertilizer called Plant Health Care for Seedlings, also from Gardener’s Supply,

Once the plants are 3 to 4 weeks old, I transplant them into 2 inch peat pots.  NOTE:  If all the seeds sprout, either separate the seedlings and put one in each peat pot or clip the smaller of the seedlings off with nail scissors so the remaining seedling has more room to grow.

Transplanting Peppers To The Garden
Before you put your pepper plants in the ground, make sure you are NOT planting them in the same area where you had tomatoes, eggplant or potatoes last year.

Peppers are in the Solanaceae plant family and are botanically related to these popular garden vegetables.  Because they are related, peppers can share the same spectrum of pest problems and should not be rotated into soil recently lived in by their kissing cousins.

Also, whether you’re growing from seed or using transplants (unless they were outside when you bought them), you have to “harden off” your plants before you stick them in the garden.

Hardening off does NOT involve tools or torture.  It just means that you have to introduce your transplants to the outdoors, gradually.

Five or six days before you want to put them in the garden, start setting them outside for a couple of hours the first 2 days and keep an eye on them.  Make sure they have water and are not staked out in high sun or high wind.  Then leave them out all day for 2 days then overnight for one night.

NOTE:  also, when hardening off, stop fertilizing.  If the plants have small flowers or fruit on them, pinch both off.  You want to help the transplant direct all of its energy to rooting in the soil before it tries to set flowers or fruit.

Remember, peppers like warm earth and warm air – even warmer than tomatoes.  So the optimal temperature for them to go into the ground is 75 to 85 degrees. Peppers are typically transplanted about two weeks later than tomatoes, for me that’s early June.

Peppers can be planted in single rows or twin (double) rows on a raised bed. Space the pepper plants 12 to 24 inches apart and space rows about 4 feet apart. If you decide to use a double row, make the rows about 18 inches apart on the bed and put the plants in the ground in a zigzag pattern.

By the way, peppers and tomatoes don’t work and play well together so don’t plant tomatoes on one side of your trellis or fence and peppers on the other.  The pepper plants will grow but will be stunted and the peppers themselves will be small and prone to rotting.

Feeding The Peppers
If you don’t want to use fertilizer on your transplants, here’s a little trick I learned from a farmer friend.  Crush up eggshells and put about ½ of a cup of them in the bottom of the hole. Toss a bit of soil on top of the crushed shells before you put the pepper plant in so the baby roots (cilia) are not cut.

Crushed egg shells are slow to break down but will feed the plants.  And they are free so I love using them as my fertilizer.  By the way, you can also use crushed egg shells to stop slugs…just by sprinkling them around the base of your plants.

Peppers have shallow roots so water them when they need it and don’t hoe too close.  Also, stake peppers so that when fruit loads are heavy, the plants don’t topple from weight or high winds.  I use old, inverted tomato cages as you can see below.

Staking sweet peppers with tomato cages

Sweet peppers need staking.

That sounds odd but the cages work better than anything else I have tried.

I put the tomato cage over the plant with the wide ring on the ground and fasten the ring down with ground staples.  Then I gather up the tips of the cage and secure them with a wire tie.  The pepper plant stays inside the cage, grows up straight and is supported even in the heaviest wind or thunderstorm.  And I don’t have to tie the pepper plants up.

How to Grow Peppers is excerpted from my Kindle organic gardening book Grow So Easy; Organic Gardening for the Rest of Us and is available on Amazon.

How To Grow Beets

Baby beets grown indoors from seed.

Beets started indoors can be transplanted outdoors as soon as you can work the soil — if you protect them from frost.

Beets are known as cool season crops.  They really like cool temperatures and can be seeded as soon as you can work the soil.  And beets are one vegetable that should be organically grown.

My mom raised the absolute best beets I have ever eaten.  Every time I drove to her farm in the far end of Virginia, she would somehow know exactly when I was arriving.  There, on the table, steam rising, butter melting, would be a big bowl of sliced beets, just for me.

But I never planted beets in my own garden, not before she died, not after she died.  Then, one day, while browsing through GrowItalian.com, I saw Chioggia beets.

Beautiful, round and ruby-red on the outside but when you cut them open, there are concentric white bands all the way through each slice. I fell in love with beets, again.

Beets Are Easy Peasy
I’ve had beets in my garden now for the last 5 years and think they are among the easiest plants to grow.  But if you Google “growing beets,” you will literally get more than 1 million entries.

Don’t be scared!

There are only a couple of things you need to know to raise not just 1 but at least 2 crops of beets every year. (That’s how many I can grow in Zone 6b.)  WARNING: if you ignore what you are about to read, you will get red marbles…that will not cook or eat easy.  I know.  My first crop was used in a game of ringer.
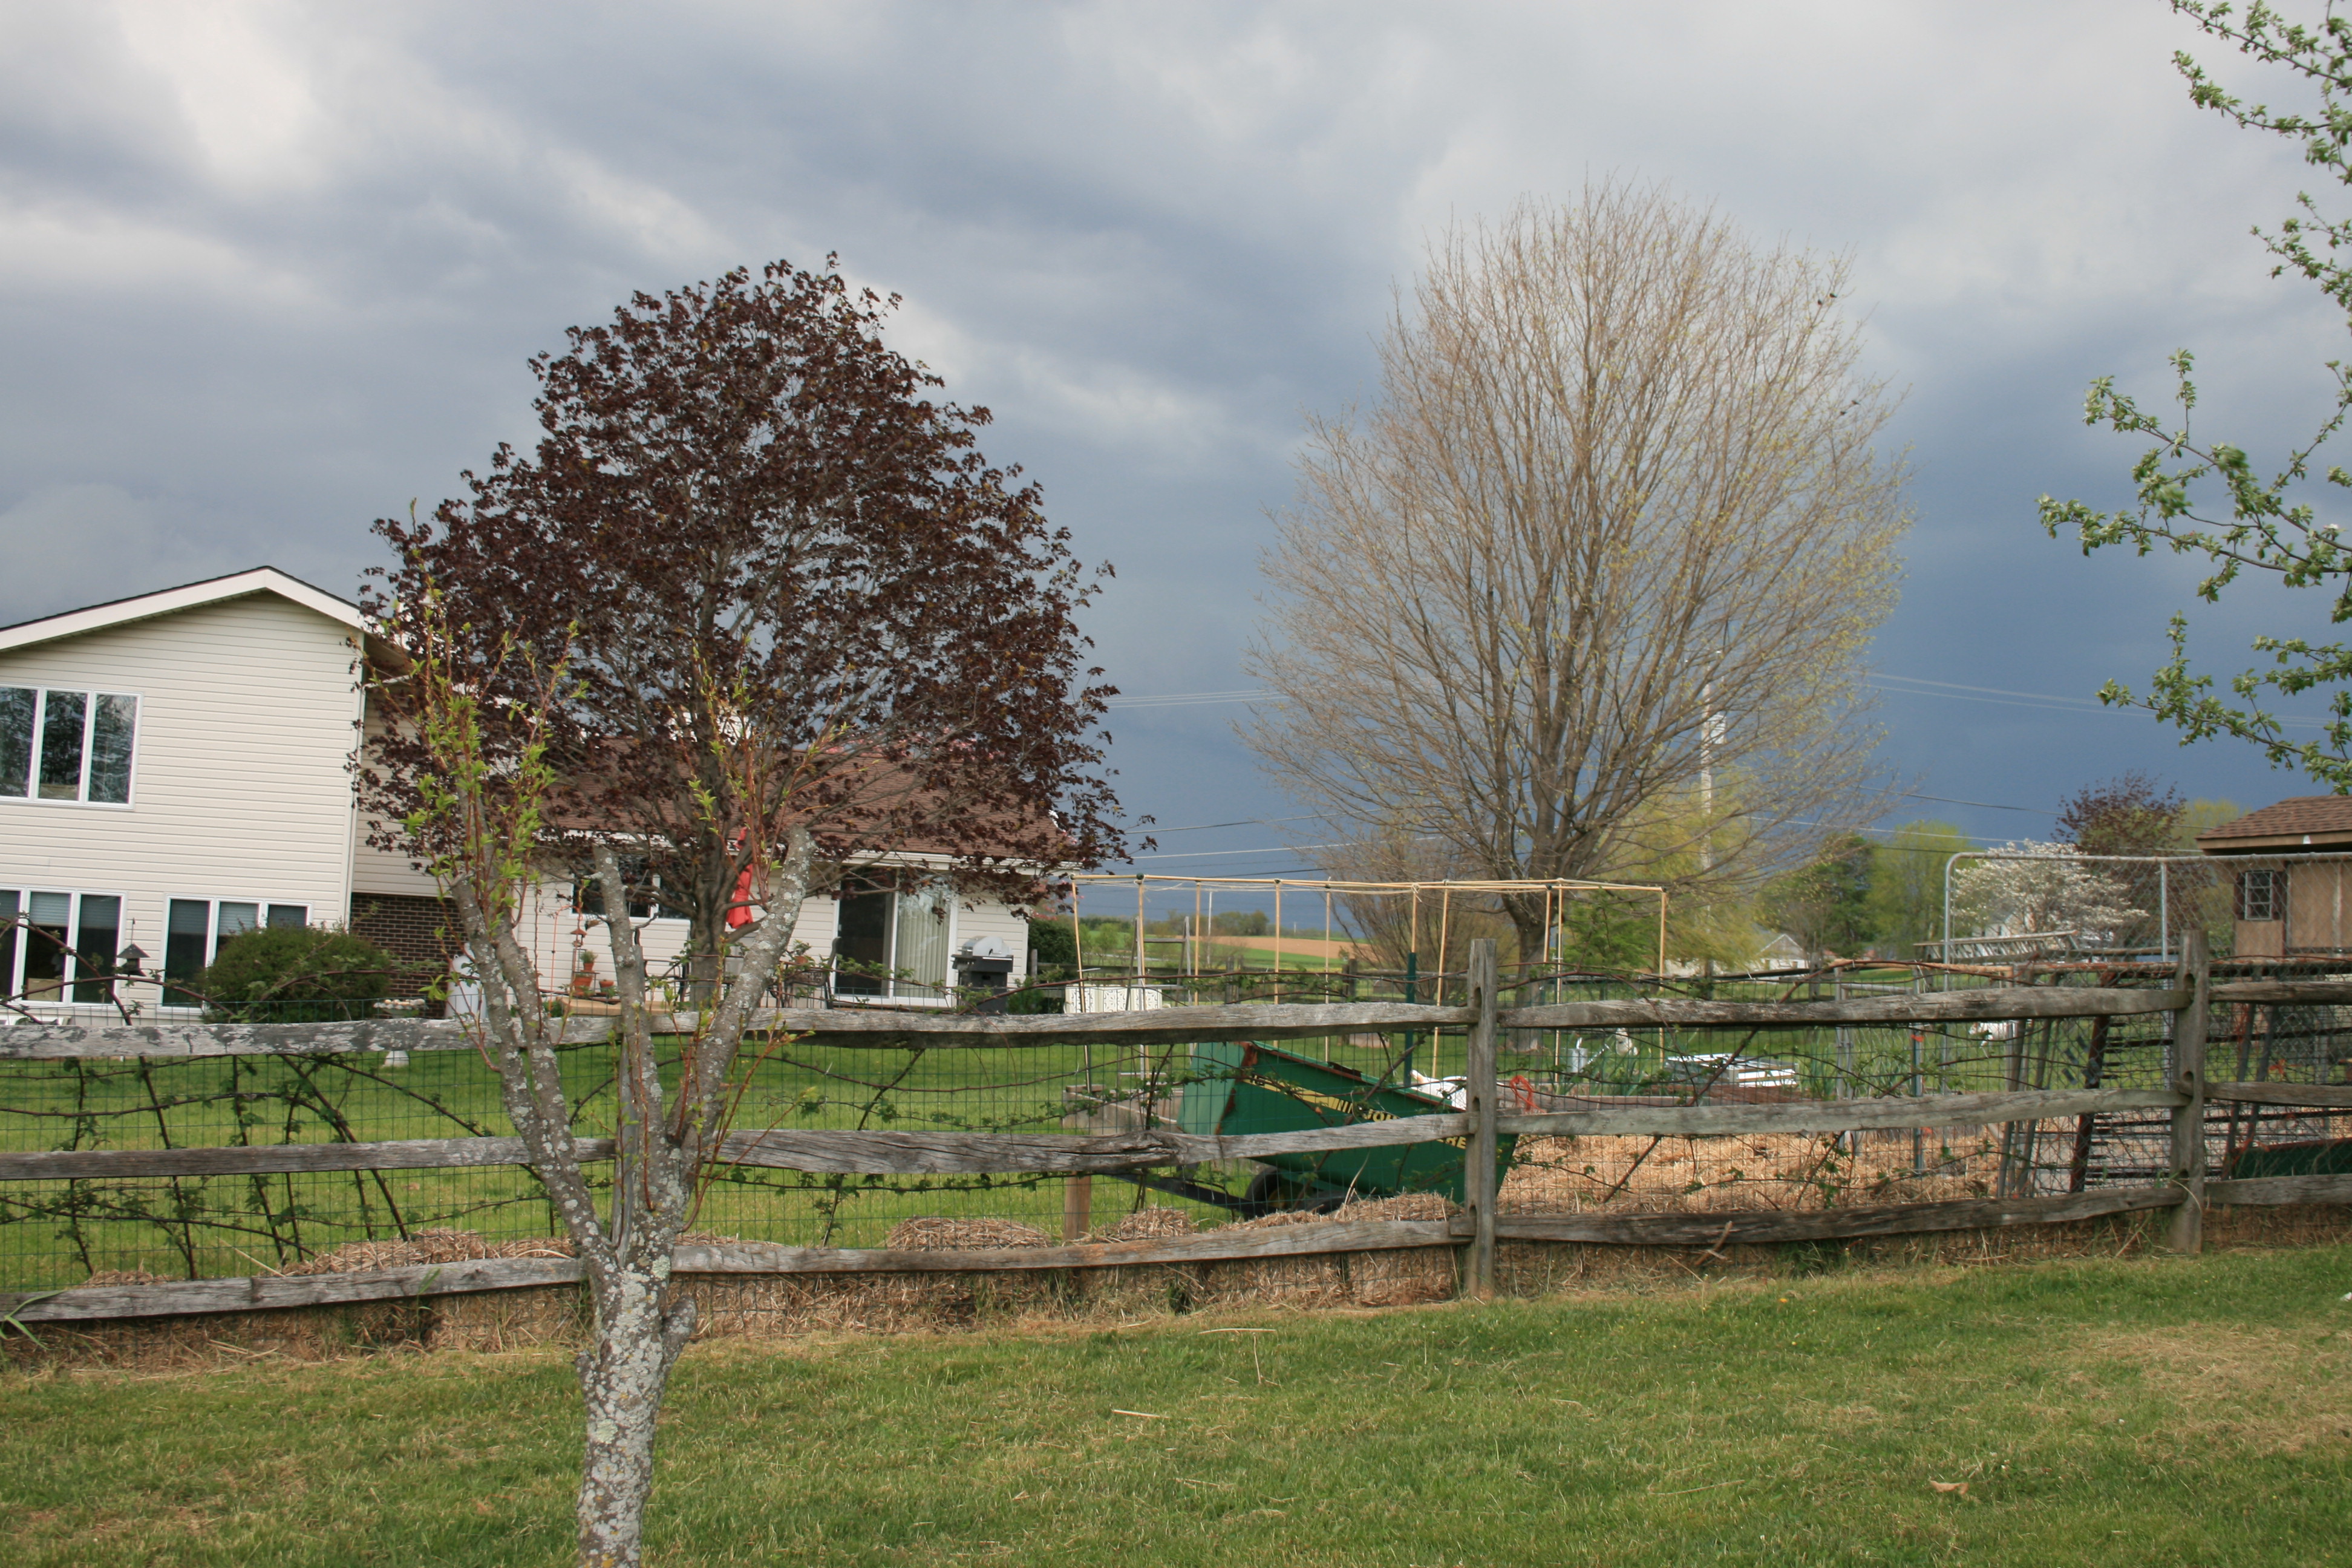
The Dirt
This is almost one of the only requirements of beets and it’s one of the most important.  It’s also the bit of information I didn’t have when I raised my first crop of red marbles.  Beets really, really like loose, well-drained soil. They will put up with a wide range of conditions but won’t grow as big or as beautiful.

So do a bit of soil prep if you can. It may take a bit of time and effort but it’s worth it; I know.  And if you get the soil right, it’s smooth sailing to harvest time.

Remove stones since they will hinder growth.  If you’re growing in clay, add compost to loosen the soil and keep the soil from crusting after watering or rainfall.  And make sure your soil is acidic – beets like a pH range of 6.2 to 6.8.

When To Plant
Don’t plant in the middle of your summer season.  Beets won’t like it.  They are a perfect cool weather crop.  Although they can live through the heat (like the rest of us), they prefer a temperatures of 60 to 65 F and bright sunny days but they can also survive cold weather as long as they don’t get caught in a freeze.  So, beets are a great, “long-season” crop.

How To Plant
You can (and I do) start beets indoors but beet seeds are outdoor babies from the get go.  As soon as your soil can be worked in the spring, you can plant them.  The seeds aren’t really just one seed – each of these little jewels contains a couple of beet seeds.  Sow the seeds 1/2-inch deep and I drop each seed about 3 inches away from the other seeds.  I also plant in rows about 12 inches apart.

Beets seeds are pretty slow to germinate so make sure you keep the bed moist until you see their little heads peeking out of the soil.  I usually water a bit, every day.  Once they start to pop up through the soil, I keep watering but usually every other day.

Once they are established, just make sure that you don’t let them dry out.  But don’t over water either.  Too dry or too wet and your beets will not be happy.

Transplanting
TIP:  I don’t thin; I transplant.
Most advice online and in books says you have to thin beets rather than transplant.  Wrong!

Despite what people will tell you, you can transplant beet seedlings and almost double your crop. And it’s easy to do.

I wait until the leaves on the plants are about 2 inches long before I try transplanting.  The night before the big move, I water the bed thoroughly.  Then, early in the morning, armed with a #2 pencil, I head to the raised bed where my beets live.

I look for beet plants that are too close together. Because I’m not be most patient person when dropping seeds in soil, I can usually find 3 or 4 beet babies clumped together.

DON’T PULL THEM OUT ONE BY ONE!
Once I’ve found the baby beet clump I want to move, using a tablespoon or serving spoon, I gently dig around the whole clump and bring up a spoon full of soil with the beet roots intact.  Then I push my pencil into the ground, making holes spaced about 3 inches apart, for each of the babies.

Teasing the roots apart, gently, (a trick I learned from my Amish neighbors) I drop each beet baby into its own hole, pack dirt gently around it and move on to the next clump.

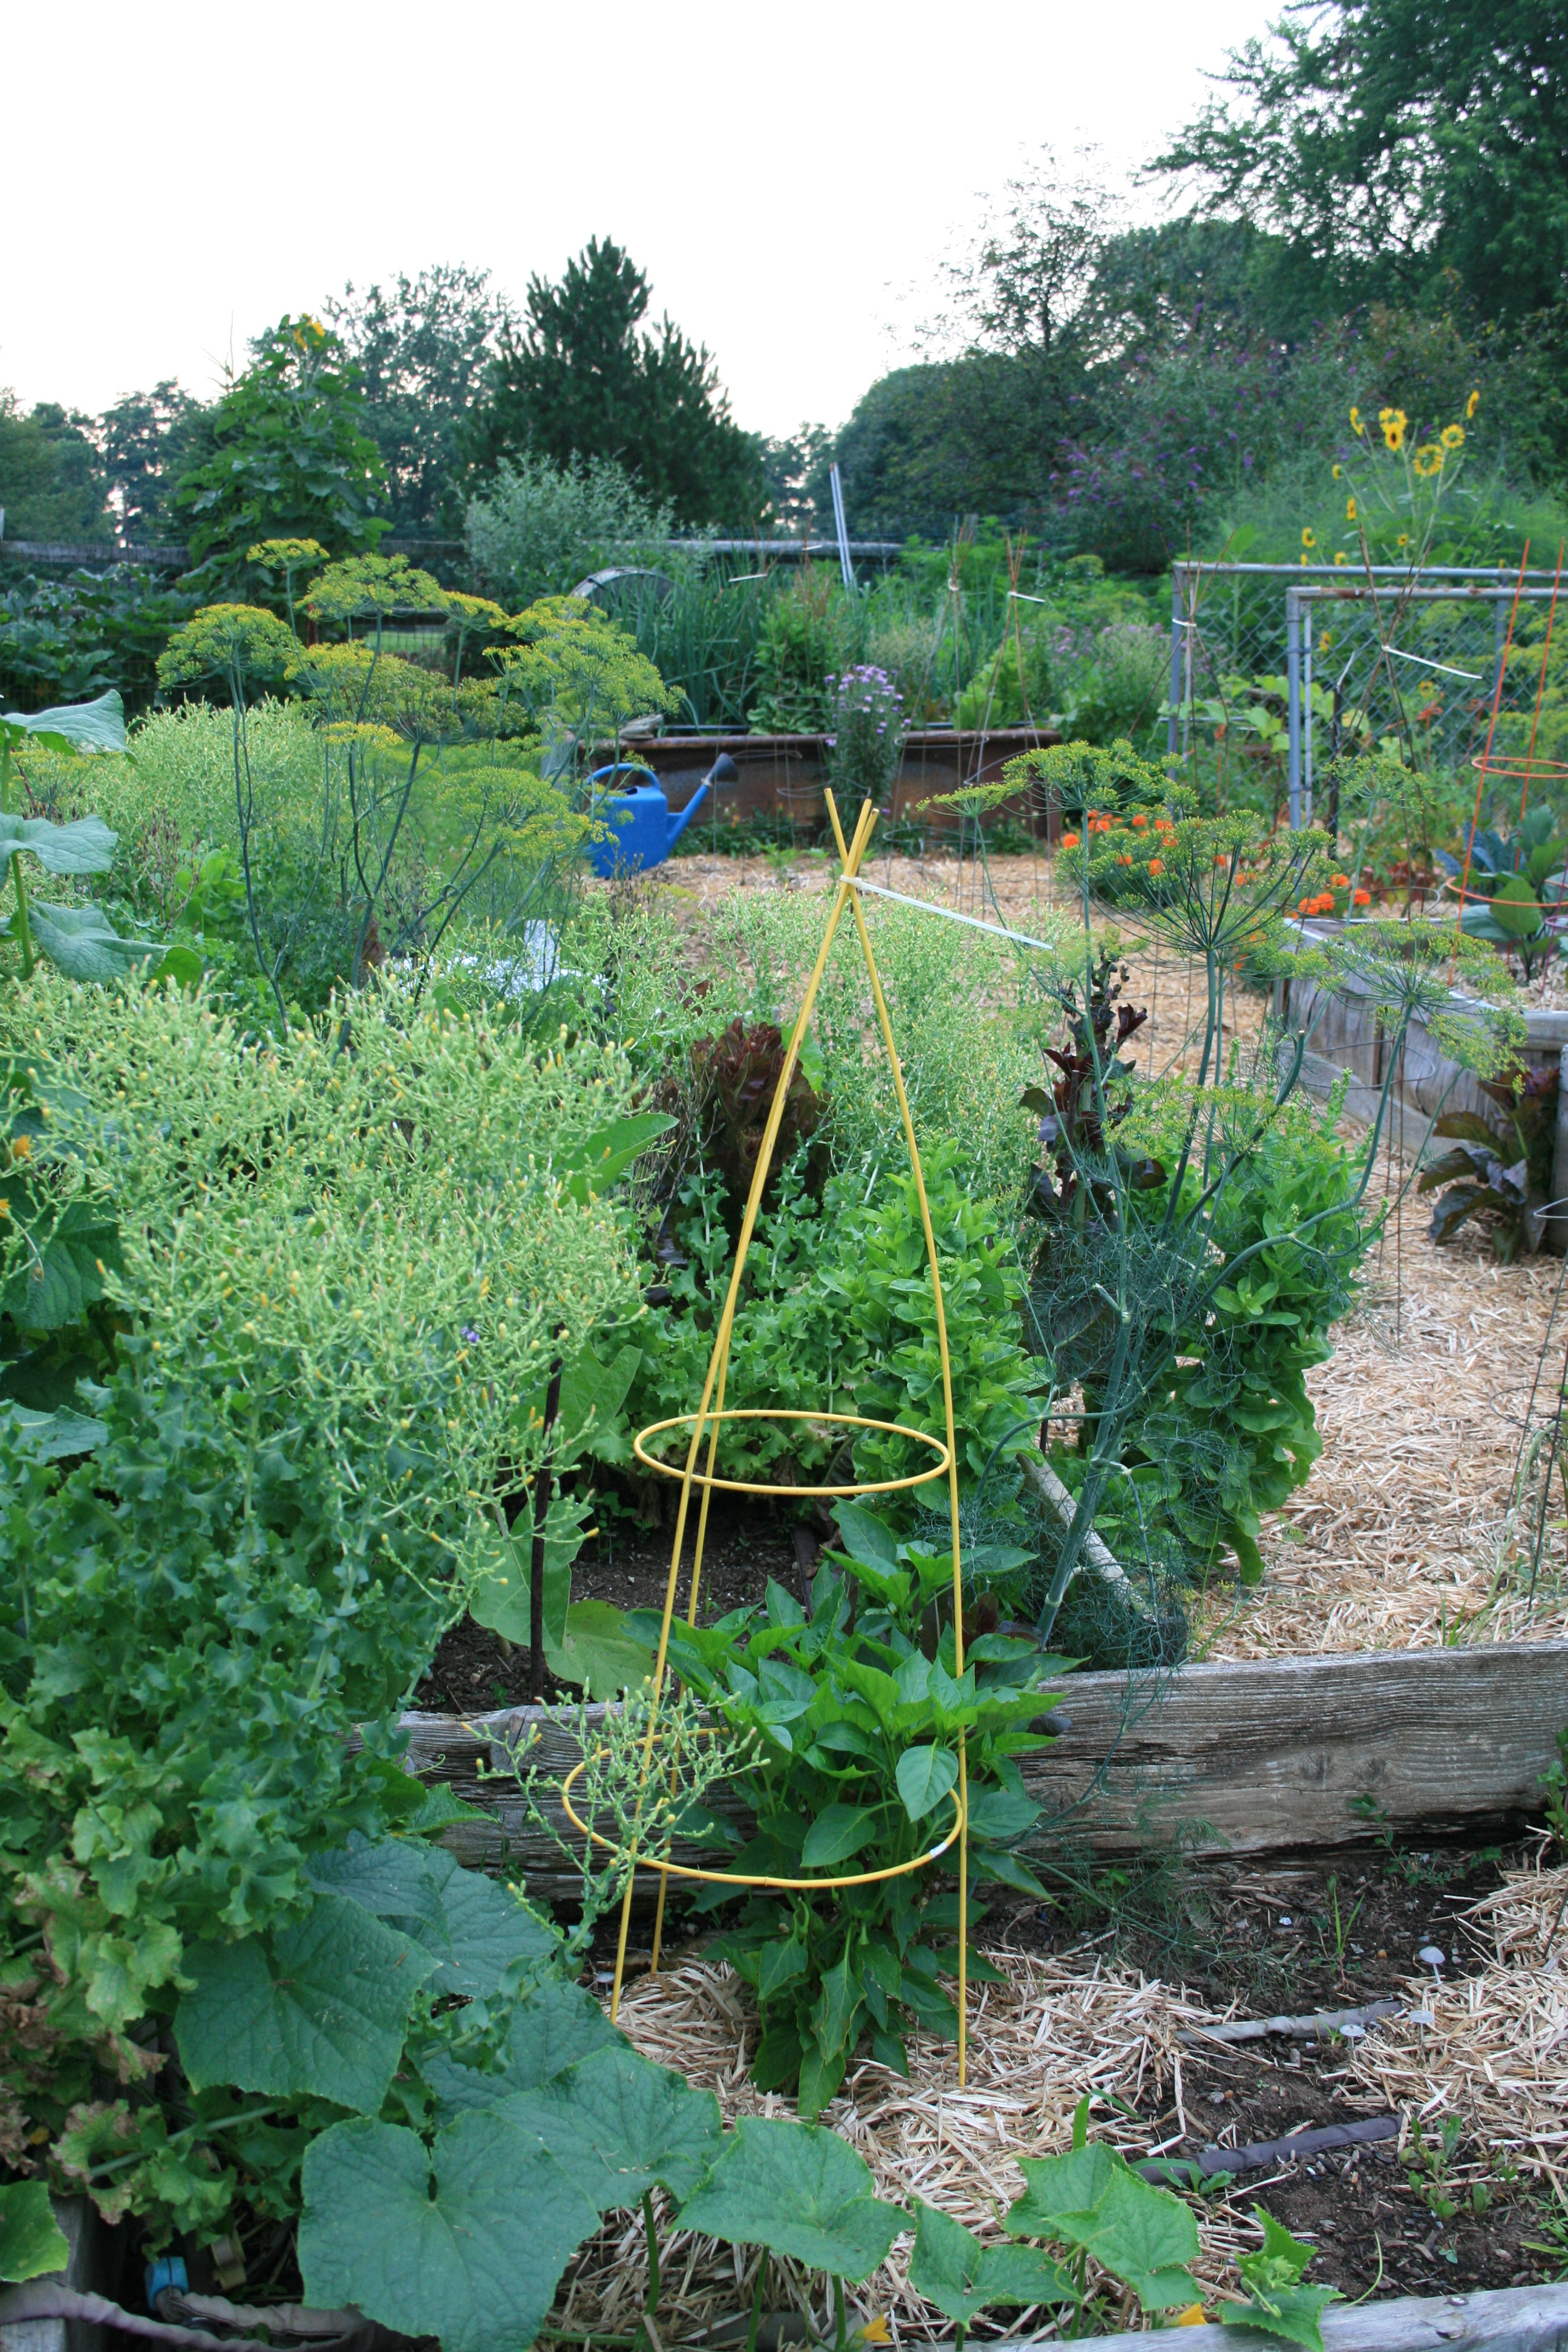
I have not lost one beet baby using this method and I practically double my yield.  Oh, and beets are a twofer in my garden – I also eat beet greens in salads.  Wait until the leaves are 3 to 4 inches high, then cut a couple off each beet plant.  The beets will keep growing and you’ll have some truly delicious greens for lunch or dinner.

Care & Feeding
Like I said, beets are easy peasy.

I have never fertilized my beets and they grow like champions.  It could be because I enrich my raised beds with a bit of compost every spring.  I do put a bit of mulch – straw – down around the plants once I divide and transplant them.  It helps hold moisture during the hotter, summer days.

Keep The Beets Coming
I plant in March, April, May then hold off until early August when I start putting in seeds, again.  I do that to avoid asking the beet seeds to germinate when the daytime temperature is above 80 degrees.  They don’t like it.  Plant in early August and within 55 to 70 days, you should have your next crop.

Nowadays there are so many varieties of beet to choose from — Early Wonder, Detroit Dark Red, and Red Ace.  You can even add some color to your beet dishes with the lovely striped Chioggia (which started me on my life of beet crime) or Burpee Golden and Albino White

No matter how you slice them…beets are a great addition to any garden.

By the way, one of my favorite resources when I am trying to get solid, basic growing information is colleges like Cornell, which posted a nice guide to growing beets.

Buy butter from grass-fed, organic cows and dig in to one of my favorite dishes.

If you want fast access to all my gardening tips and tricks, you will find them in my Kindle book, Grow So Easy; Organic Gardening for the Rest of Us.

How To Grow Potatoes

Most of you know that I have had my ups and downs trying to grow potatoes.
The outcome was not very good.  I couldn’t get a straight answer on where or how to plant. Once the potato eyes were in the ground, Wireworms and Colorado Potato Beetles joined together to make for tiny tubers and a potato growing nightmare.

So,when I read High Mowing Seeds post on growing potatoes 101 I knew I had to share.

I also think that Margaret Roach of A Way To Garden fame has a good tutorial fro growing your own spuds, too.

If you dream of growing your own spuds or want to be able to walk into your back yard and dig a few potatoes for the dinner table, High Mowing Seeds and Margaret Roach can help you get it done.

Remember, potatoes love being planted when it’s cool out so early spring is a great time to give this American favorite a try.

If you are successful, try dicing a few into this fabulous fish chowder – buttery rich and tasty. I married an Italian but my maiden name was Duffy.  If I know anything, I know some great recipes for cooking potatoes!

Fish Chowder

INGREDIENTS:
2 boneless fish fillets
2 thick cut bacon slices
2 T butter
1 leek, minced
1 stalk celery, minced
½ tsp dry mustard
1 lb potatoes, peeled & cubed
4 sprigs thyme
¼ c heavy cream
1 T minced chives

DIRECTIONS:
Place fish fillets and bacon slices in large pot and cover with 4 cups cold water.

Bring to simmer over medium high heat then reduce heat to medium and simmer for 5 minutes or until fish is cooked.

Transfer fish to plate and let it cool then remove skin and flake into large pieces.

Continue to simmer bacon in broth until stock is reduced by half (2 cups).

Strain, discard bacon, add 2 to 3 cups of water and reserve poaching liquid.

Melt butter in large pot, add leeks and celery and cook 15 minutes until translucent.


Tick Control & Lyme Disease Treatment

It’s been a very warm and wet winter here….perfect for a lot of pests to grow and breed and lay their plans of total destruction. One of the worst pests, in my opinion, is the deer tick – the one that carries Lyme disease or Lyme borrelliosis,

Deer ticks carry Lyme disease.

Deer ticks carry Lyme.

just two of the many devastating diseases carried by ticks.

One major problem is that Lyme is easily and frequently misdiagnosed.  The bad news is that physical consequences of a tick-borne illness like Lyme are horrendous and can be slow to show up,arriving years after exposure.

Prevention is your friend.  You don’t want to play host to one of these nasty arachnids but chances are you, one of your kids, your significant other or your dog is going to get bitten.  Here are some ideas for fighting back, preventing bites and treating bites when it’s too late.

Think about buying Martin S Permethrin Sfr Termiticide/Insecticide

I get it on Amazon at a concentration of 38% – that’s more than 5 times the strength of the Pyola you would buy from someplace like Gardens Alive and it’s cheaper.

You may be screaming, “Hey, that’s not organic! Permethrin is actually a synthetic compound that mimics pyrethrin found in chrysanthemums. We use it sparingly and only when needed to spray the perimeter of our fenced in yard. It usually only takes one soaking spray to do the trick.  NOTE: I spray before beneficials and buds show up.  As an organic gardener, I hate to spray but hate the prospect of Lyme disease or borelliosis even more

Buy some permethrin-treated clothing – it might help prevent bites but be aware of the pros/cons per the Environmental Protection Agency (EPA). Clothing is available at REI and Sawyer or you can spray your own clothing to prevent tick bites.   Keep in mind the precautions recommended for skin or eye contact.

Read up about your enemy. My favorite book (illuminating and terrifying) is by Stephen Harold Buhner. I read the 2005 version but Buhner just released a version in 2015 – Healing Lyme : natural prevention and treatment of Lyme borreliosis and its coinfections / Stephen Harrod Buhner.

If you are unlucky enough to be a tick host, Buhner advises you not to wait. Begin a treatment protocol right away!  Even if your doctor says you aren’t positive for Lyme!!

Anyone who owns or a horse or hangs out with the horsy set knows that the most frequently prescribed treatment is Doxycycline.   I only mention this because some physicians refuse to order doxy if the Lyme titres aren’t there.  If you have a horse or know a horse owner, you might be able to find what you’re looking for at the barn.

Whether or not you get doxy, the man who wrote the book on Lyme also has some herbal alternatives you can try, too.

Buhner’s web site has a wealth of information on treating Lyme.  If you go there and click on Prime protocol, you will find a list of recommended herbs and sources for herbal treatments. Note that all of these herbs are also available through Amazon, I think, but beware who makes them.  You want pure and healthful.

Buhner’s Core Protocol
1. Japanese knotweed (Polygonum cuspidatum) (Green Dragon Botanicals) – 1-4 tablets 3-4x daily for 8-12 months;
2. Cat’s claw (Uncaria tomentosa)(Green Dragon Botanicals) – 1-4 tablets 3-4x daily for 2-3 months, then 2-3 capsules 3x daily;
3. Eleuthero (Eleutherococcus senticosus) (HerbPharm tincture) – 1/2 to 1 tsp upon rising and at lunch;
4. Astragalus (Astragalus membranaceus) – 1,000mg daily (not to be used in chronic lyme)

You can also source these from other sites but after reading Buhner’s book, I think I might start with his recommended sources to begin with.

There are few natural or wild things that scare me but ticks are a source of real terror for me. I will prevent them from being in my garden or house if I can. If I can’t, I will make sure I am vigilant, check for ticks on myself and my dogs every day and follow Buhner’s protocol if I find an attached tick.

By the way, you can have any tick tested for $50 at U Mass Amherst. It’s better to know your enemy and be able to show your doctor just what your tick was carrying!

Want more tips on preventing problems with ticks? The Illinois Department of Health offers some straight up ideas for making your summers safer and healthier.

Safe and happy gardening.