Tag Archives: Beets

What Will I Grow in 2019

One sunny day in 14 days

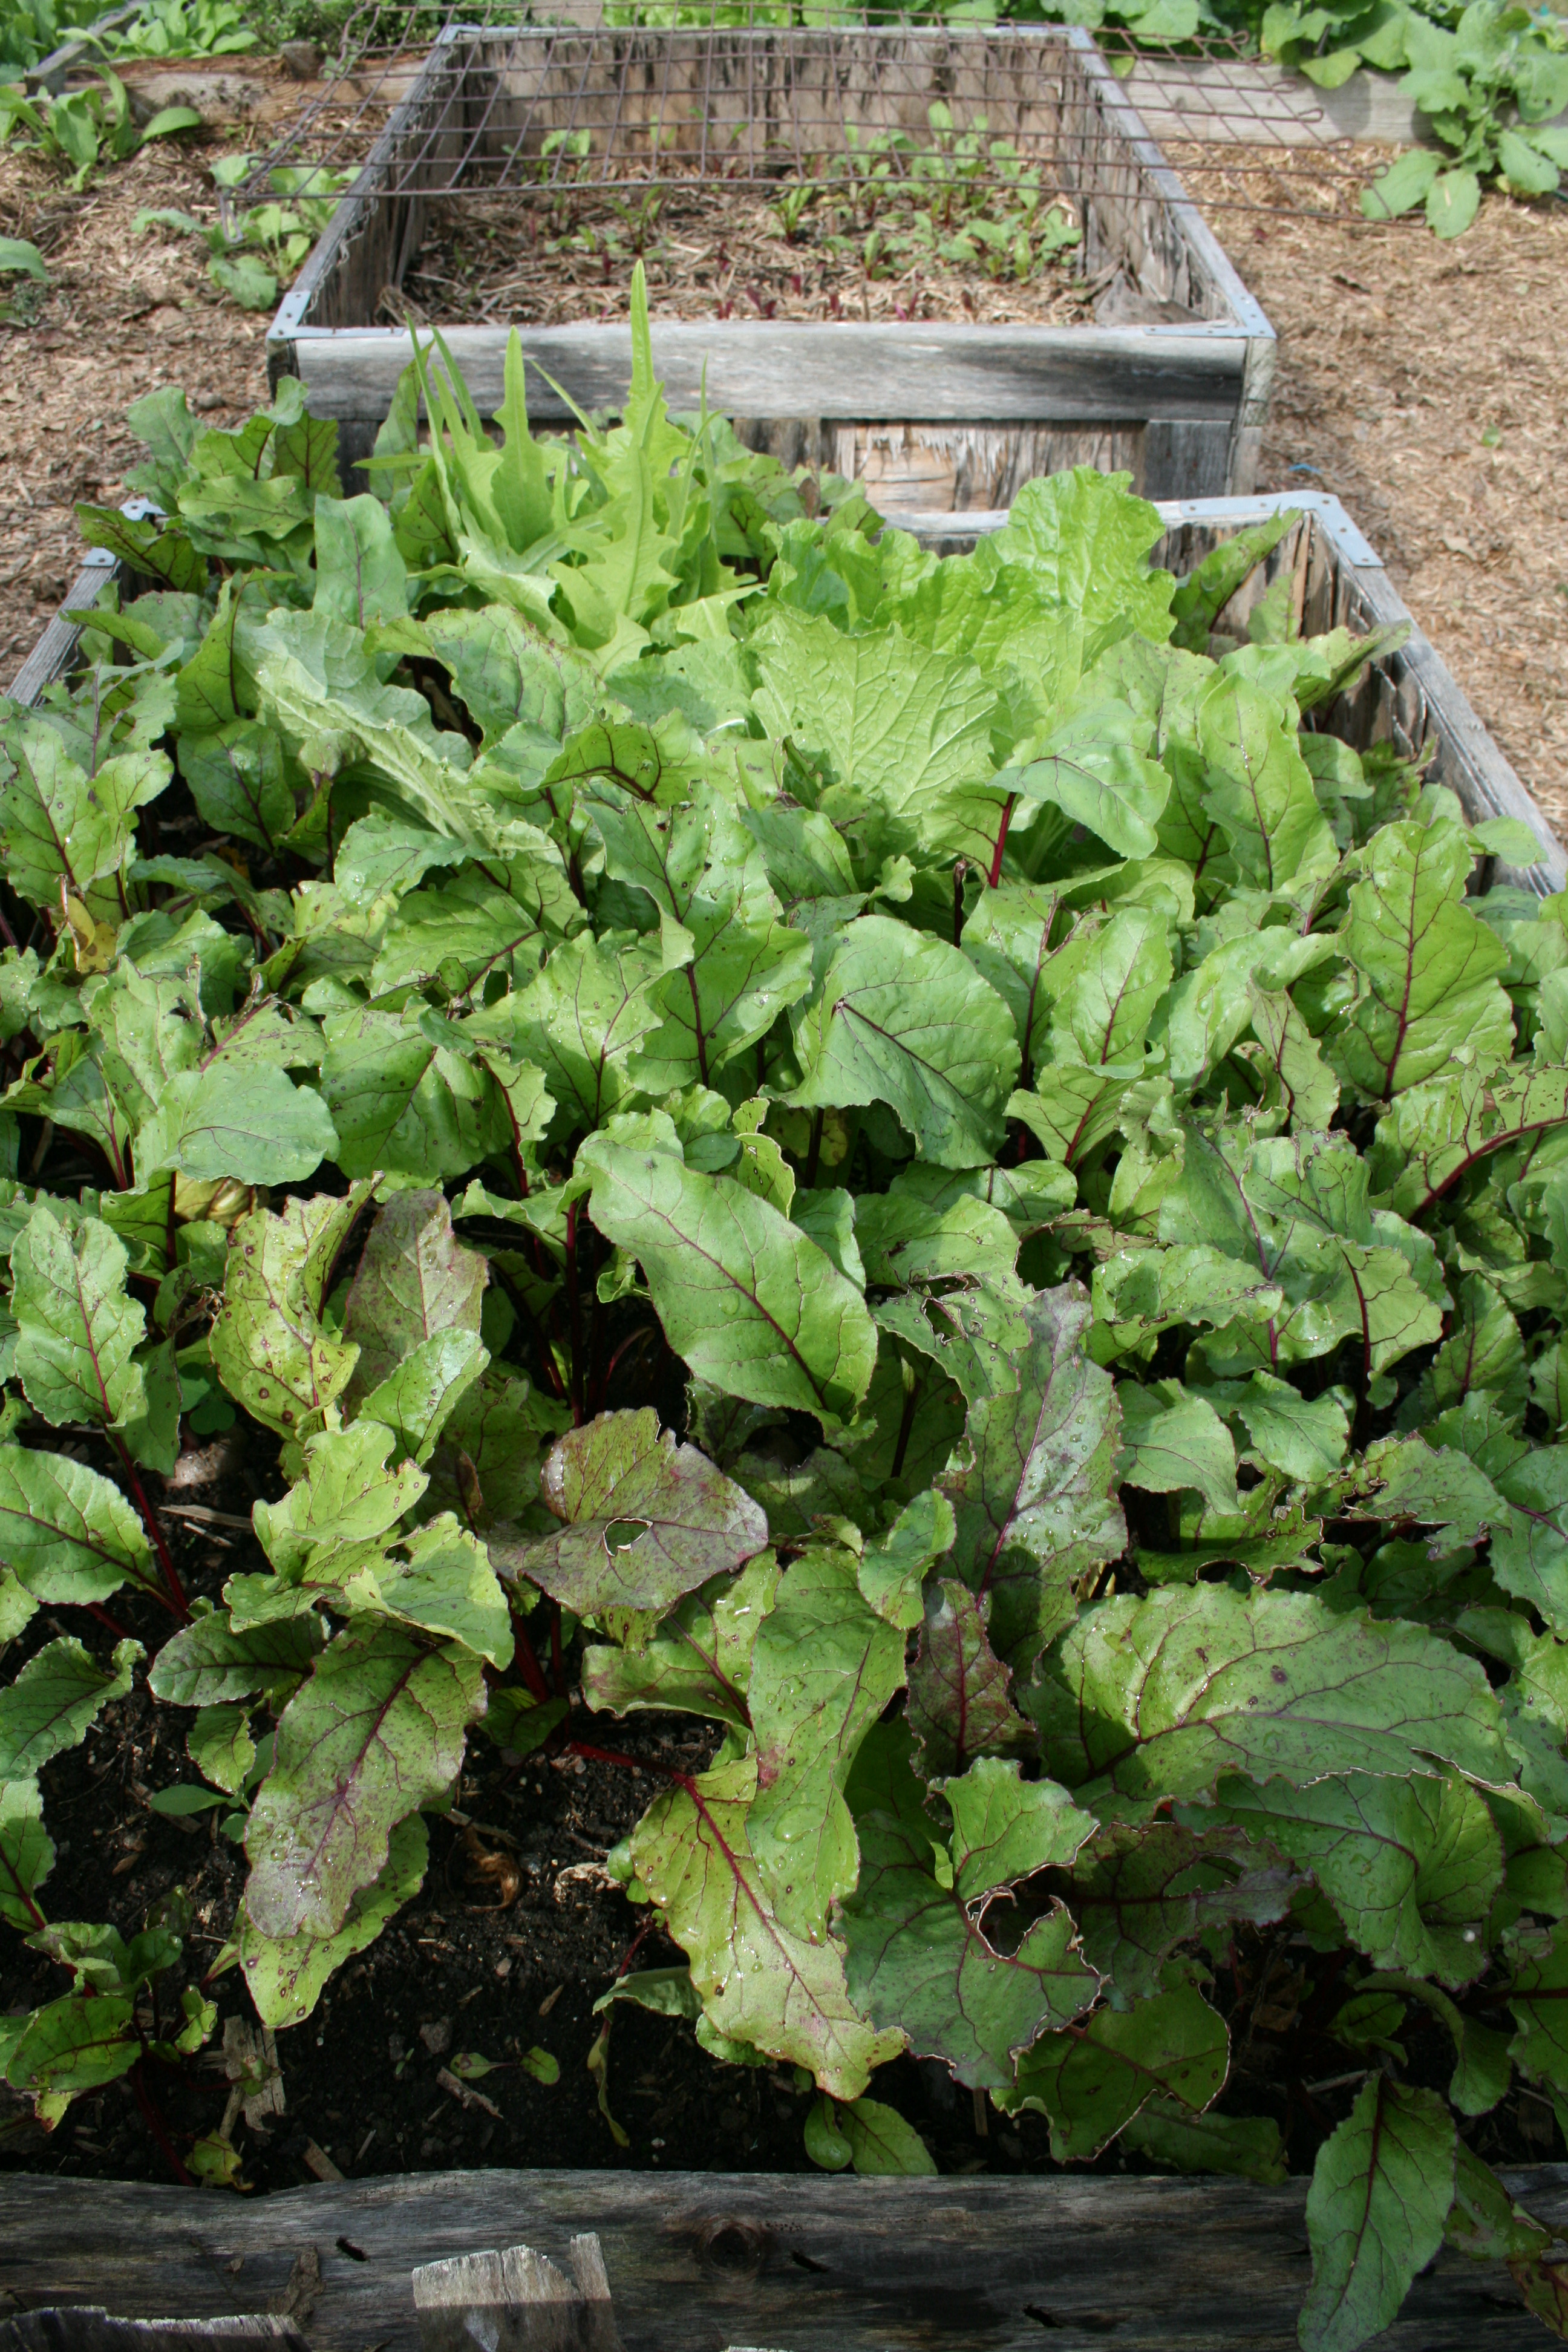
Planted in sun…then the floods!

Okay, so it’s a bit early to be planning the 2019 garden! I just barely finished planting this year’s garden!! But I needed a lift.

I’m a bit depressed. It has rained for 13 of the last 14 days. It will be raining for the next 3 days, at least. My rain gauge – the wheelbarrow – is full, again. All I can think of is how soggy the roots of all my beautiful, raised from seed plants are.

And I am also thinking that the 20 asparagus crowns I put in just a little over 3 weeks ago are rotting below their lovingly applied layers of compost, soil and straw.

Rain is bad enough but the temperatures are not helping, either. Our highs are in the low to mid-60’s; our lows are in the mid 50’s. Today, we will hit the low 80’s then drop to 51 degrees with…thunder storms.

So, I did what any self-respecting, home bound gardener does; I went seed shopping and here is what I got from Territorial Seed:

Autumn Harvest Beet Blend –  this is a new and what Territorial calls a, ” distinctive blend of Red  Ace, Boldor and White Albino. This blend will let me

Beet blend from Territorial Seed

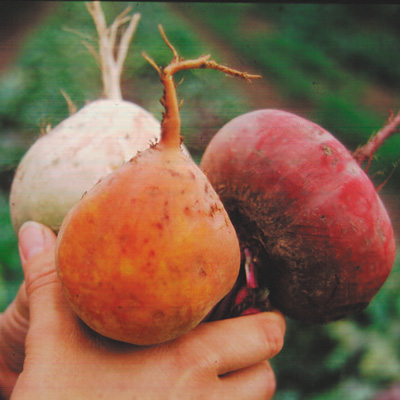
Territorial Seed knows beets!

grow a range of colors that will make great ferments and relishes and will be stunning to look at, served fresh with butter.

Kalettes make great chips

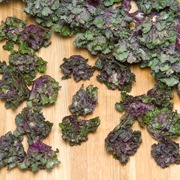
Bite-sized kale ready for chips!.

Five Color Silverbeet Swiss Chard Organic – blending 5 varieties of chard,  Australian heirloom boasts a, “…day-glow mix of red, orange, yellow, pink and white.” Upright growth and juicy, tender stalks and succulent leaves, just what you want in Swiss chard!

Autumn Star Kalettes® –  Bite-sized, loose heads of frilly kale growing on brussel sprout-like stalks, the leaves are green and purple. These are new for this year and I for one will enjoy making kale chips with them!

Palco Spinach Organic – from seed to salad in 38 days, Territorial calls this spinach, “…adaptable to planting in both cool and warm seasons, versatile for harvest as young, baby greens or full-sized, and bolt and disease resistant.” What’s not to like?

Music & Purple Glazer Garlic –  both hard neck and both mid-season.

Territorial Seed has garlic

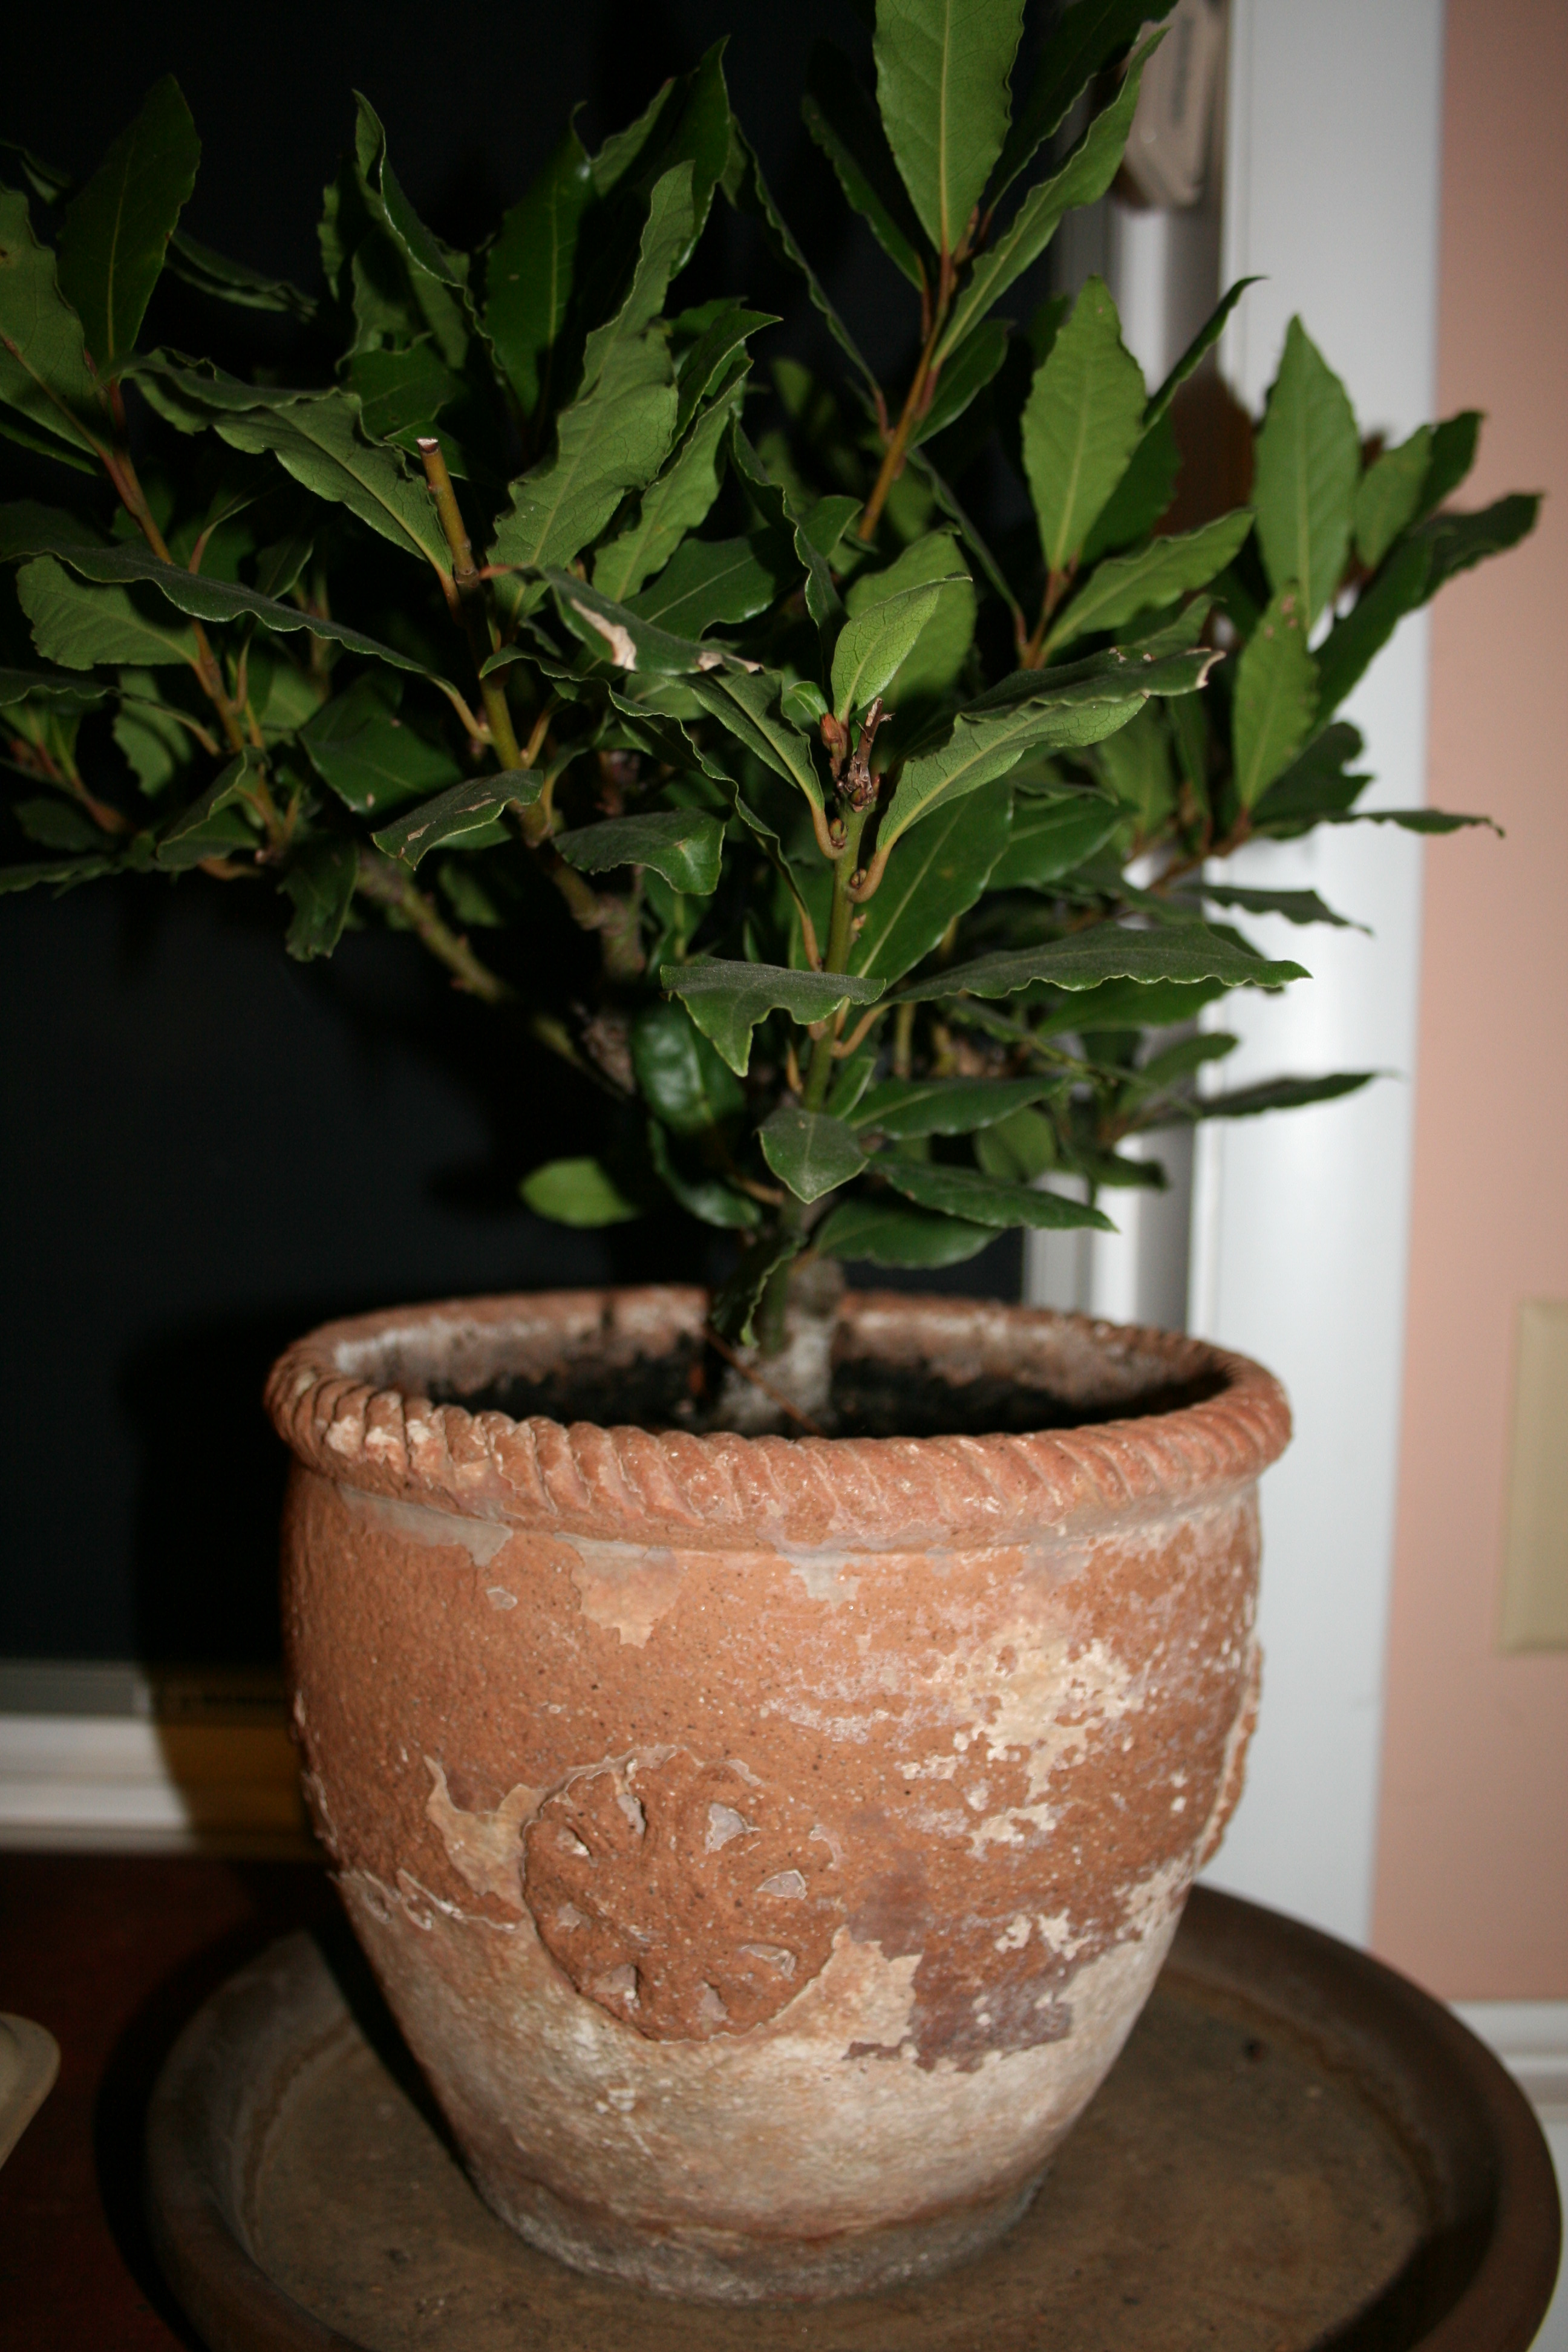
Hard neck garlic I love!

I love these garlics for their reliability in the ground and amazing flavor. And I love that they keep for months so I can enjoy homegrown, organic garlic all the way through the winter!

I complemented my order from Territorial Seed Company with some seeds from another favorite organic source, Baker Creek Heirloom Seeds.

Here is what I ordered from Baker Creek to lift my spirits:

Blauhilde Bean – my all time favorite pole bean with a great growth habit and prolific production of the tastiest green beans on the planet…which are actually deep purple pods! In any case, I have not planted any other pole bean or green bean since I met Blauhilde.

Prosperosa eggplant

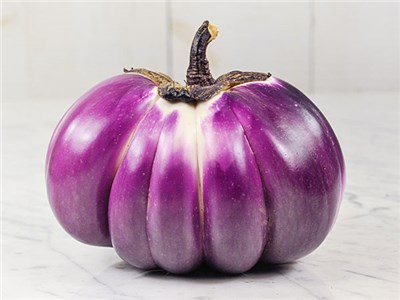
Prosperosa eggplant from Baker  Creek

Prosperosa Eggplant – straight out of Tuscany by way of Baker Seeds, this beautiful eggplant is round to slightly teardrop shaped, and sometimes very slightly ribbed.

The deep purple exterior holds the mild, tender white flesh that’s  as good as the fruit looks. The Prosperosa and the Bianca Rosa are my favorite eggplants.

German Lunchbox Tomato – The fruits of this tomato are supposedly the size of a small egg. Pink and sugar sweet, Baker Creek Heirlooms say they are begging to be eaten. Perfectly sized for salads or putting in the lunchbox and my “new” tomato for 2019.

Tendergreen Burpless Cucumber – I have developed a liking for cukes that don’t disrupt my digestion, hence the burpless variety I ordered this year.  Medium-dark green, 7-12 inches long and prolific, I also bought these because, per the description, they tolerate cool soil and excessive moisture better than many. Welcome to my world!

Queen of the May butterhead lettuce

Queen of the May butterhead lettuce from Baker Creek

May Queen Lettuce – I am a sucker for butterhead lettuce….

This one is called the crown jewel of the heirloom garden. “Tender, yellow hearts are gently blushed rose, and the leaves are ethereally soft with the buttery sweet flavor.” Yum.  And good for planting in early in Spring or in Fall.

BTW now is the best time to get your heirloom, non-GMO, organic seeds from companies like Territorial Seed Company and Baker Creek Heirloom seeds. Wait too long, especially for garlic, and they will all be gone!

There will be more seeds in my 2019 garden plan and probably replacement asparagus crowns (now that the trenches are already dug). But just knowing that these are on the way is making me smile on yet, another gray day!

Advertisement

Free Organic Gardening Book – How to Grow Beets

One season gardening used to be all I did.  Put in the plants in the spring, harvest in July, August and sometimes in September and clean up in October.  Then the price of organic produce shot through the roof and I started thinking that there had to be a way to get more out of my dirt than tomatoes, cukes, peppers and eggplant. My adventure with growing more and longer began a bit late in my gardening life but I’m glad it did.

Beets ready for transplant

Beets are easy to grow.

Truthfully, I probably will never get as far as master gardeners like Eliot Coleman of Four Season Harvest fame but I am enjoying cool weather crops like fresh lettuce, spinach and beets from March through October.

My mom raised the absolute best beets I have ever eaten.  Every time I drove to her farm in the far end of Virginia, she would somehow know exactly when I was arriving.  There, on the table, steam rising, butter melting, would be a big bowl of sliced beets, just for me.

But I never planted beets in my own garden.  Not before she died, not after she died.  Then, one day, while browsing through GrowItalian.com, I saw Chioggia beets.  Beautiful, round and ruby red on the outside but when you cut them open, there are concentric white bands all the way through each slice.

I was in love with beets, again especially since I know how easy it is to grow them.

Baby beets grown indoors from seed.

Starting beets indoors is easy

I’ve had beets in my garden now for the last 10 years and think they are among the easiest plants to grow.  But if you Google “growing beets,” you will literally get more than 11 million entries.

Don’t be scared!

There are only a couple of things you need to know to raise not just 1 but at least 2 crops of beets every year. (That’s how many I can grow in Zone 6.)  WARNING: if you ignore what you are about to read, you will get red marbles…that will not cook or eat easy.  I know.  My first crop was used in a game of ringer.

The Dirt
This is one of the most important requirements of beets.  It’s also the bit of information I didn’t have when I raised my first crop of red marbles.  Beets really, really like loose, well-drained soil. They will put up with soil that’s not rich but it has to be loose.

So do some soil prep if you can. It may take a bit of time and effort but it’s worth it; I know.  And if you get the soil right, it’s smooth sailing to harvest time.

Remove stones since they will hinder growth.  If you’re growing in clay, add compost to loosen the soil and keep the soil from crusting after watering or rainfall.  And make sure your soil is acidic – beets like a pH range of 6.2 to 6.8.

Climatic Requirements
Don’t plant in the middle of your summer season.  Beets won’t like it.  They are a perfect cool weather crop.  Although they can live through the heat (like the rest of us), they prefer a temperatures of 60 to 65 F and bright sunny days. They can also survive cold weather as long as they don’t get caught in a freeze.  So, beets are a great, “long-season” crop.

Planting the Seeds
Beet seeds are outdoor babies from the get go.  As soon as your soil can be worked in the spring, you can plant them.  The seeds aren’t really just one seed – each of these little jewels contains a couple of beet seeds.

Sow the seeds 1/2-inch deep and I drop each seed about 3 inches away from the other seeds.  I also plant in rows about 12 inches apart.

Beet seeds are pretty slow to germinate so make sure you keep the bed moist until you see their little heads peeking out of the soil.  I usually water a bit, every day.  Once they start to pop up through the soil, I keep watering but usually every other day.

Once they are established, just make sure that you don’t let them dry out.  But don’t over water either.  Too dry or too wet and your beets will not be happy.

Transplanting
TIP:  I don’t thin; I transplant.

Most advice online and in books says you have to thin beets rather than transplant. Wrong! Despite what people will tell you, you can transplant beet seedlings and almost double your crop. And it’s easy to do. Just wait until the leaves on the plants are about 2 inches long before transplanting.

Beets and lettuce are cool weather crops

Baby beets ready to grow.

The night before the big move, I water the bed thoroughly.  Then, early in the morning, armed with a #2 pencil, I head to the raised bed where my beets live.

I look for beet plants that are too close together. Because I’m not be most patient person when dropping seeds in soil, I usually find 3 or 4 beet babies clumped together.

DON’T PULL THEM OUT ONE BY ONE!

Once I’ve found the baby beet clump I want to move, I gently dig around the whole clump and bring up a shovel full of soil with the beet roots intact.  Then I push my pencil into the ground, making holes spaced about 3 inches apart, for each of the babies.

Teasing the roots apart, gently, (a trick I learned from my Amish neighbors) I drop each beet baby into its own hole, pack dirt gently around it and move on to the next clump.

I have not lost one beet baby using this method and I practically double my yield.  Oh, and beets are a twofer in my garden – I also eat beet greens in salads.  Wait until the leaves are 3 to 4 inches high, then cut a couple off each beet plant.  The beets will keep growing and you’ll have some truly delicious greens for lunch or dinner.

Care & Feeding
Like I said, beets are easy peasy.

I have never fertilized my beets and they grow like champions.  It could be because I enrich my raised beds with a bit of compost every spring.  I do put a bit of mulch – straw – down around the plants once I divide and transplant them.  It helps hold moisture during the hotter, summer days.

Keep The Beets Coming
I plant in March, April, May then hold off until early August when I start putting in seeds, again.  I do that to avoid asking the beet seeds to germinate when the daytime temperature is above 80 degrees.  They don’t like it.  Plant in early August and within 55 to 70 days, you should have your next crop.

Nowadays there are so many varieties of beet to choose from — Early Wonder, Detroit Dark Red, and Red Ace.  You can even add some color to your beet dishes with the lovely striped Choggia (which started me on my life of beet crime) or Burpee Golden and Albino White

By the way, one of my favorite resources when I am trying to get solid, informed, basic growing information is the so-called “land grant” colleges like Penn State and Ohio State.  They usually offer fact sheets like the one on beets that was posted by Ohio State. http://ohioline.osu.edu/hyg-fact/1000/1604.html

Try beets. No matter how you slice them…they’re a great addition to any garden.


Tips for Getting Your Beets Started Early

Baby beets grown indoors from seed.

Transplant beets started indoors outdoors as soon as you can work the soil.

Want to get a jump start on your garden? Get your beet babies started, indoors!

Beets are known as cool season crops.  They really like cool temperatures and can be seeded as soon as you can work the soil.  They can also be started indoors and February is the month to get going.

My mom raised the absolute best beets I have ever eaten.  Every time I drove to her farm in the far end of Virginia, she would somehow know exactly when I was arriving.  There, on the table, steam rising, butter melting, would be a big bowl of sliced beets, just for me.

But I never planted beets in my own garden, not before she died, not after she died.  Then, one day, while browsing through GrowItalian.com, I saw Chioggia beets.

Beautiful, round and ruby-red on the outside but when you cut them open, there are concentric white bands all the way through each slice. I fell in love with beets, again.

Beets Are Easy Peasy
I’ve had beets in my garden now for the last 5 years and think they are among the easiest plants to grow.  But if you Google “growing beets,” you will literally get more than 1 million entries.

Don’t be scared!

There are only a couple of things you need to know to raise not just 1 but at least 2 crops of beets every year. (That’s how many I can grow in Zone 6a.)  WARNING: if you ignore what you are about to read, you will get red marbles…that will not cook or eat easy.  I know.  My first crop was used in a game of ringer.

The Dirt
This is almost one of the only requirements of beets and it’s one of the most important.  It’s also the bit of information I didn’t have when I raised my first crop of red marbles.  Beets really, really like loose, well-drained soil. They will put up with a wide range of conditions but won’t grow as big or as beautiful.

So do a bit of soil prep if you can. It may take a bit of time and effort but it’s worth it; I know.  And if you get the soil right, it’s smooth sailing to harvest time.

Remove stones since they will hinder growth.  If you’re growing in clay, add compost to loosen the soil and keep the soil from crusting after watering or rainfall.  And make sure your soil is acidic – beets like a pH range of 6.2 to 6.8.

When To Plant
Don’t plant in the middle of your summer season.  Beets won’t like it.  They are a perfect cool weather crop.  Although they can live through the heat (like the rest of us), they prefer a temperatures of 60 to 65 F and bright sunny days but they can also survive cold weather as long as they don’t get caught in a freeze.  So, beets are a great, “long-season” crop.

How To Plant
You can (and I do) start beets indoors but beet seeds are also outdoor babies from the get go.  As soon as your soil can be worked in the spring, you can plant them.  The seeds aren’t really just one seed – each of these little jewels contains a couple of beet seeds.  Sow the seeds 1/2-inch deep and I drop each seed about 3 inches away from the other seeds.  I also plant in rows about 12 inches apart.

Beets seeds are pretty slow to germinate so make sure you keep the bed moist until you see their little heads peeking out of the soil.  I usually water a bit, every day.  Once they start to pop up through the soil, I keep watering but usually every other day.

Once they are established, just make sure that you don’t let them dry out.  But don’t over water either.  Too dry or too wet and your beets will not be happy.

Transplanting
TIP:  I don’t thin; I transplant.
Most advice online and in books says you have to thin beets rather than transplant.  Wrong! Despite what people will tell you, you can transplant beet seedlings and almost double your crop. And it’s easy to do.

I wait until the leaves on the plants are about 2 inches long before I try transplanting.  The night before the big move, I water the bed thoroughly.  Then, early in the morning, armed with a #2 pencil, I head to the raised bed where my beets live.

I look for beet plants that are too close together. Because I’m not be most patient person when dropping seeds in soil, I can usually find 3 or 4 beet babies clumped together.

DON’T PULL THEM OUT ONE BY ONE! Once I’ve found the baby beet clump I want to move, using a tablespoon or serving spoon, I gently dig around the whole clump and bring up a spoon full of soil with the beet roots intact.  Then I push my pencil into the ground, making holes spaced about 3 inches apart, for each of the babies.

Teasing the roots apart, gently, (a trick I learned from my Amish neighbors) I drop each beet baby into its own hole, pack dirt gently around it and move on to the next clump.

I have not lost one beet baby using this method and I practically double my yield.  Oh, and beets are a twofer in my garden – I also eat beet greens in salads.  Wait until the leaves are 3 to 4 inches high, then cut a couple off each beet plant.  The beets will keep growing and you’ll have some truly delicious greens for lunch or dinner.

Care & Feeding
Like I said, beets are easy peasy.

I have never fertilized my beets and they grow like champions.  It could be because I enrich my raised beds with a bit of compost every spring.  I do put a bit of mulch – straw – down around the plants once I divide and transplant them.  It helps hold moisture during the hotter, summer days.

Keep The Beets Coming
I plant in March, April, May then hold off until early August when I start putting in seeds, again.  I do that to avoid asking the beet seeds to germinate when the daytime temperature is above 80 degrees.  They don’t like it.  Plant in early August and within 55 to 70 days, you should have your next crop.

Nowadays there are so many varieties of beet to choose from — Early Wonder, Detroit Dark Red, and Red Ace.  You can even add some color to your beet dishes with the lovely striped Chioggia (which started me on my life of beet crime) or Burpee Golden and Albino White

No matter how you slice them…beets are a great addition to any garden.

By the way, one of my favorite resources when I am trying to get solid, basic growing information is colleges like Cornell, which posted a nice guide to growing beets.

Buy butter from grass-fed, organic cows and dig in to one of my favorite dishes. Happy Valentine’s Day, every body!

If you want fast access to all my gardening tips and tricks, you will find them in my Kindle book, Grow So Easy; Organic Gardening for the Rest of Us.

How To Grow Beets

Baby beets grown indoors from seed.

Beets started indoors can be transplanted outdoors as soon as you can work the soil — if you protect them from frost.

Beets are known as cool season crops.  They really like cool temperatures and can be seeded as soon as you can work the soil.  And beets are one vegetable that should be organically grown.

My mom raised the absolute best beets I have ever eaten.  Every time I drove to her farm in the far end of Virginia, she would somehow know exactly when I was arriving.  There, on the table, steam rising, butter melting, would be a big bowl of sliced beets, just for me.

But I never planted beets in my own garden, not before she died, not after she died.  Then, one day, while browsing through GrowItalian.com, I saw Chioggia beets.

Beautiful, round and ruby-red on the outside but when you cut them open, there are concentric white bands all the way through each slice. I fell in love with beets, again.

Beets Are Easy Peasy
I’ve had beets in my garden now for the last 5 years and think they are among the easiest plants to grow.  But if you Google “growing beets,” you will literally get more than 1 million entries.

Don’t be scared!

There are only a couple of things you need to know to raise not just 1 but at least 2 crops of beets every year. (That’s how many I can grow in Zone 6b.)  WARNING: if you ignore what you are about to read, you will get red marbles…that will not cook or eat easy.  I know.  My first crop was used in a game of ringer.

The Dirt
This is almost one of the only requirements of beets and it’s one of the most important.  It’s also the bit of information I didn’t have when I raised my first crop of red marbles.  Beets really, really like loose, well-drained soil. They will put up with a wide range of conditions but won’t grow as big or as beautiful.

So do a bit of soil prep if you can. It may take a bit of time and effort but it’s worth it; I know.  And if you get the soil right, it’s smooth sailing to harvest time.

Remove stones since they will hinder growth.  If you’re growing in clay, add compost to loosen the soil and keep the soil from crusting after watering or rainfall.  And make sure your soil is acidic – beets like a pH range of 6.2 to 6.8.

When To Plant
Don’t plant in the middle of your summer season.  Beets won’t like it.  They are a perfect cool weather crop.  Although they can live through the heat (like the rest of us), they prefer a temperatures of 60 to 65 F and bright sunny days but they can also survive cold weather as long as they don’t get caught in a freeze.  So, beets are a great, “long-season” crop.

How To Plant
You can (and I do) start beets indoors but beet seeds are outdoor babies from the get go.  As soon as your soil can be worked in the spring, you can plant them.  The seeds aren’t really just one seed – each of these little jewels contains a couple of beet seeds.  Sow the seeds 1/2-inch deep and I drop each seed about 3 inches away from the other seeds.  I also plant in rows about 12 inches apart.

Beets seeds are pretty slow to germinate so make sure you keep the bed moist until you see their little heads peeking out of the soil.  I usually water a bit, every day.  Once they start to pop up through the soil, I keep watering but usually every other day.

Once they are established, just make sure that you don’t let them dry out.  But don’t over water either.  Too dry or too wet and your beets will not be happy.

Transplanting
TIP:  I don’t thin; I transplant.
Most advice online and in books says you have to thin beets rather than transplant.  Wrong!

Despite what people will tell you, you can transplant beet seedlings and almost double your crop. And it’s easy to do.

I wait until the leaves on the plants are about 2 inches long before I try transplanting.  The night before the big move, I water the bed thoroughly.  Then, early in the morning, armed with a #2 pencil, I head to the raised bed where my beets live.

I look for beet plants that are too close together. Because I’m not be most patient person when dropping seeds in soil, I can usually find 3 or 4 beet babies clumped together.

DON’T PULL THEM OUT ONE BY ONE!
Once I’ve found the baby beet clump I want to move, using a tablespoon or serving spoon, I gently dig around the whole clump and bring up a spoon full of soil with the beet roots intact.  Then I push my pencil into the ground, making holes spaced about 3 inches apart, for each of the babies.

Teasing the roots apart, gently, (a trick I learned from my Amish neighbors) I drop each beet baby into its own hole, pack dirt gently around it and move on to the next clump.

I have not lost one beet baby using this method and I practically double my yield.  Oh, and beets are a twofer in my garden – I also eat beet greens in salads.  Wait until the leaves are 3 to 4 inches high, then cut a couple off each beet plant.  The beets will keep growing and you’ll have some truly delicious greens for lunch or dinner.

Care & Feeding
Like I said, beets are easy peasy.

I have never fertilized my beets and they grow like champions.  It could be because I enrich my raised beds with a bit of compost every spring.  I do put a bit of mulch – straw – down around the plants once I divide and transplant them.  It helps hold moisture during the hotter, summer days.

Keep The Beets Coming
I plant in March, April, May then hold off until early August when I start putting in seeds, again.  I do that to avoid asking the beet seeds to germinate when the daytime temperature is above 80 degrees.  They don’t like it.  Plant in early August and within 55 to 70 days, you should have your next crop.

Nowadays there are so many varieties of beet to choose from — Early Wonder, Detroit Dark Red, and Red Ace.  You can even add some color to your beet dishes with the lovely striped Chioggia (which started me on my life of beet crime) or Burpee Golden and Albino White

No matter how you slice them…beets are a great addition to any garden.

By the way, one of my favorite resources when I am trying to get solid, basic growing information is colleges like Cornell, which posted a nice guide to growing beets.

Buy butter from grass-fed, organic cows and dig in to one of my favorite dishes.

If you want fast access to all my gardening tips and tricks, you will find them in my Kindle book, Grow So Easy; Organic Gardening for the Rest of Us.

Protein From The Garden – from Garden Rant

If you struggle with the ethical issue of killing and eating animals, like I do, you have either become a vegetarian or are becoming one. I am on the cusp.  I eat fish – only wild caught and wild harvested.  Occasionally (maybe 10 times a year), I still eat poultry.

Eat vegetables for a protein rich, ethical diet.

My backyard garden is full of protein rich plants.

On average, 98% of the year, I am vegetarian, growing as much of my own food as I possibly can; buying the rest from local, organic farmers.

My choice opens me up for a lot of “advice” from well-intentioned people who love me and who think I simply don’t get enough protein.  As one of them quipped, not so long ago, “I’ll buy you a walker when your muscles break down.  You’re too old to cut out protein from your diet.”

The truth is, I haven’t cut out protein; I’ve just changed the source of my protein to foods that don’t cry, don’t make friends with each other, don’t lovingly care for their babies, don’t greet you in the field.  Up until this morning, I didn’t really have an argument that supported my food choices.

Garden Rant and Evelyn Hadden have provided me with knowledge I need to defend my choice!

Turns out that foods I grow (like kale and beets), foods I love (like sunflower and pumpkin seeds and cheese) and foods I buy locally from my organic farmer friends are packed with protein!

FYI – I can’t quite get my arms around eating insects – one of the protein sources Hadden cites. But I’m on board with all the rest and grateful for a chance to eat without any compromises.

So if you are just thinking about changing some animal protein to plant, or if someone is telling you you have to eat meat to maintain your health, check out Hadden’s article and consider the options she offers.

Oh, also courtesy of EvelynHadden, if you want to find out just how much protein the foods you’re eating have, check out the protein content at the USDA National Nutrient Database.


How To Grow Spring Crops

Encore blog: Today is the first day of Spring, 2016. It snowed here and more snow is predicted for tonight. As usual (see below) I tend to put cool weather crops like beets, lettuce and kale, in the ground early. My weather has been so unpredictable here in the Mid-Atlantic for the lasts couple of years but win, lose or draw, I usually just plant.

Some tips on getting cool weather crops started and some cheap tips on how to protect them when snow and frost return to their curtain calls.

Window frames protect plants from frost.

Old sheers stapled to old window frames.

It was gray and cool day, perfect weather for the baby plants that I put in the old ’55 Chevy truck bed!

Lettuce, spinach and onions growing in raised truck bed.

Cool weather and cool raised bed of a 55 Chevy truck making for happy lettuce, spinach and onions.

All of butterhead lettuce and the spinach slid right into the soil and the plants responded to the cloudy skies and low temperatures beautifully.

The oak leaf lettuce (lower left hand side of the picture) didn’t fare as well.  It got a bit battered by the wind which rose to 35 miles per hour the day after transplant.

Baby beets grown indoors from seed.

Beets started indoors can be transplanted outdoors as soon as you can work the soil — if you protect them from frost.

Next to go out, will be the baby beets I started in the basement from seed.

I used a 40 cell propagation tray and put 2 or 3 seeds in each cell. When I transplant the beets, I will separate them by gently teasing apart their tiny roots (cilia). Using a pencil, I will punch a hole in the ground and set each beet in, tamping gently around the stem.

The kale, which is a mixture of dinosaur, curly and seeds from Adaptiv which came from around the world, will go in on the same day as the beets.

And if another frost is in the forecast, it will be easy to protect all these small plants using materials I got for free. The old window frames came from a friend’s house.

Window frames and sheers protect baby plants

Free row covers from old window frames and sheers

The sheer curtains came from my own living room. Both were being replaced and could have been thrown out but I saw opportunity. I knocked out the glass and cleaned the frames up a bit. Then I stapled the curtains to the window frames. In 20 minutes I made half a dozen “raised bed” covers.

These covers can be used year after year and make protecting transplants easy.

Protect cool weather crops with window frames

Sheers stapled to window frames

Just make sure your raised beds are the same width as the length of the windows so you can use the sides of the beds to prop up your covers – just lay them across the raised bed and…instant coverage.

Are your transplants in the ground yet? Are you getting ready to harvest? Share the state of your garden and any tips you have for getting plants into the ground!

Happy gardening, everyone!

Growing Season Begins! Tips for Getting Ready

It’s time!

The weather is relenting; the cold retreating.  Birds are singing and trees are putting on their Spring buds.  It’s gardening season and I have some tips for you on how to make the most of the next two months.

Outside, it’s cool weather crop planting time in Zone 6A or 6B or whatever USDA is calling it now.  For me, that means putting in lettuce seeds in the old truck bed and sowing beet seeds.  I’ll keep both watered by hand (a hose would still freeze solid) for the next 2 to 3 weeks while their hard hulls soften, crack and start to reach for the sun.

Inside, I’ve transplanted the baby kale to small pots and given them a quick feed. IMG_2189They’ve been moved out of the basement to join the lettuce I started inside and I’m now hardening them off.  Both are starting to go outside for quick visits with the sun and the wind.

Meanwhile, back in the basement, the tomato and pepper seeds I started in cells just got transplanted into cow pots (which I got online at a great price).

Seedling tomatoes and sweet peppers

Transplanted tomatoes will live in the basement until early May.

Sweet Italian Pepper Transplants

These babies will stay in the basement, growing, being fanned and fed, until the first week of May when they will take their place in my office and begin their hardening off process.

NOTE:  I used to harden plants off haphazardly.  Dangerous! The seedlings you worked and worried over will quickly die if they are not properly introduced to the great outdoors – an hour a day for 2 days, 2 to 3 hours a day for 2 to 3 days, 8 hours a day for 3 days and only then (and only if it’s not hailing or very windy) do they get their first overnight!

DOUBLE NOTE:  I also used to hurry and plant my babies by May 7th or 8th. Frequently, the ground was too cold for warm weather crops like tomatoes and peppers and they simply stopped growing for a couple of weeks (or forever in some cases).  Putting plants in the ground too early can be deadly so give the soil a chance to warm while you get your plants ready for the great outdoors.

If you don’t want to start bedding plants from seed and you happen to live in Amish country or near some old, established nurseries, go check out their plants. Maple Shade Nursery in Kirkwood, PA is Amish run and you can watch the women tease baby plants apart and re-pot them right at the register.

In the Spring, I can get an early fix just by visiting and strolling through their greenhouses.   I supplement my seedlings with theirs and I buy herb plants from them like my Bay “bush”.

Bay plant, bay leaves, Amish nursery

“Bayby” is a bay plant I picked up at an Amish nursery 5 years ago.

“Bay-by” was in a 3 inch pot when I bought her but now, 5 years later, she graces my desk with her splendid inch wide trunk, stands a foot high and provides me with fresh, tasty bay leaves for my soups and stews.

I simply bring her in during the winter then set her out on the patio for late Spring, Summer and early Fall.

FYI – the reason I avoid big box stores when it comes to getting bedding plants is because I have NO idea where the seed came from (I want organic and no GMO) or what they’ve been fed.

Want to learn more about organic gardening?  Want to see just how easy it is to grow your own, healthy and organic food.  Take a look at my Kindle book – Grow So Easy; Organic Gardening for the Rest of Us.

Don’t Forget About Fall! Seed Now for Autumn Abundance

High Mowing Organic Seed’s post this week is just in time for those of us who live in zones with mid-October frost dates!

And I love how clearly this group describes the fall crops you can plant – carrots, cauliflower, cabbage, beets – and how to get a handle on when you should sew seeds to reap these beautiful crops in the fall.

The cover of my new book  published on Kindle in June.

The cover of my new book published on Kindle in June.

Enjoy their wonderful, well-written advice while I finish up with BookNook — the company formatting my Kindle book – Grow So Easy; Organic Gardening for the Rest of Us.  Should be online within a week!

Don’t Forget About Fall! Seeding Now for Autumn Abundance | High Mowing Organic Seeds’ Blog – The Seed Hopper.


Aside

This winter, according to Accuweather, my Mid-Atlantic zone is running about 10 degrees colder than normal.  I would say so! With wind chills, we have hit  negative numbers like -17 and -24 degrees. For a gardener, sitting inside, listening to … Continue reading

Grow So Easy – Planting Cool Weather Crops Like Beets

One season gardening used to be all I did.  Put in the plants in the spring, harvest in July, August and sometimes in September and clean up in October.  Then the prices of organic produce shot through the roof and I started thinking that there had to be a way to get more out of my dirt than tomatoes, cukes, peppers and eggplant.

My adventure with growing more and longer began a bit late in my gardening life but I’m glad it did.  Truthfully, I probably will never get as far as master gardeners like Eliot Coleman.   who authored a favorite book of mine, Four Season Harvest, but I am enjoying cool weather crops like fresh lettuce, spinach and beets from March through October.


Let’s start this trip with one of my all-time favorites – beets

Beets
My mom raised the absolute best beets I have ever eaten.  Every time I drove to her farm in the far end of Virginia, she would somehow know exactly when I was arriving.  There, on the table, steam rising, butter melting, would be a big bowl of sliced beets, just for me.

But I never planted beets in my own garden.  Not before she died, not after she died.  Then, one day, while browsing through GrowItalian.com, I saw Chioggia beets.  Beautiful, round and ruby-red on the outside but when you cut them open, there are concentric white bands all the way through each slice.

I was in love with beets, again.

Beets Are Easy Peasy
I’ve had beets in my garden now for the last 5 years and think they are among the easiest plants to grow.  But if you Google “growing beets,” you will literally get more than 3 million entries.

Don’t be scared!

There are only a couple of things you need to know to raise not just 1 but at least 2 crops of beets every year. (That’s how many I can grow in Zone 6.)  WARNING: if you ignore what you are about to read, you will get red marbles…that will not cook or eat easy.  I know.  My first crop was used in a game of ringer.

The Dirt
This is almost one of the only requirements of beets and it’s one of the most important.  It’s also the bit of information I didn’t have when I raised my first crop of red marbles.  Beets really, really like loose, well-drained soil. They will put up with a wide range but won’t grow as big or as beautifully.

So do a bit of soil prep if you can. It may take a bit of time and effort but it’s worth it; I know.  And if you get the soil right, it’s smooth sailing to harvest time.

Remove stones since they will hinder growth.  If you’re growing in clay, add compost to loosen the soil and keep the soil from crusting after watering or rainfall.  And make sure your soil is acidic – beets like a pH range of 6.2 to 6.8.

When To Plant
Don’t plant in the middle of your summer season.  Beets won’t like it.  They are a perfect cool weather crop.  Although they can live through the heat (like the rest of us), they prefer a temperatures of 60 to 65 F and bright sunny days but they can also survive cold weather as long as they don’t get caught in a freeze.  So, beets are a great, “long-season” crop.

How To Plant
Beet seeds are outdoor babies from the get go.  As soon as your soil can be worked in the spring, you can plant them.  The seeds aren’t really just one seed – each of these little jewels contains a couple of beet seeds.  Sow the seeds 1/2-inch deep and I drop each seed about 3 inches away from the other seeds.  I also plant in rows about 12 inches apart.

Beets seeds are pretty slow to germinate so make sure you keep the bed moist until you see their little heads peeking out of the soil.  I usually water a bit, every day.  Once they start to pop up through the soil, I keep watering but usually every other day.

Once they are established, just make sure that you don’t let them dry out.  But don’t overwater either.  Too dry or too wet and your beets will not be happy.

Transplanting
TIP:  I don’t thin; I transplant.

Most advice online and in books says you have to thin beets rather than transplant.  Wrong!

Despite what people will tell you, you can transplant beet seedlings and almost double your crop. And it’s easy to do.

I wait until the leaves on the plants are about 2 inches long before I try transplanting.  The night before the big move, I water the bed thoroughly.  Then, early in the morning, armed with a #2 pencil, I head to the raised bed where my beets live.

I look for beet plants that are too close together. Because I’m not be most patient person when dropping seeds in soil, I can usually find 3 or 4 beet babies clumped together.

DON’T PULL THEM OUT ONE BY ONE!

Once I’ve found the baby beet clump I want to move, I gently dig around the whole clump and bring up a shovel full of soil with the beet roots intact.  Then I push my pencil into the ground, making holes spaced about 3 inches apart, for each of the babies.

Teasing the roots apart, gently, (a trick I learned from my Amish neighbors) I drop each beet baby into its own hole, pack dirt gently around it and move on to the next clump.

I have not lost one beet baby using this method and I practically double my yield.  Oh, and beets are a twofer in my garden – I also eat beet greens in salads.  Wait until the leaves are 3 to 4 inches high, then cut a couple off each beet plant.  The beets will keep growing and you’ll have some truly delicious greens for lunch or dinner.

Care & Feeding
Like I said, beets are easy peasy.

I have never fertilized my beets and they grow like champions.  It could be because I enrich my raised beds with a bit of compost every spring.  I do put a bit of mulch – straw – down around the plants once I divide and transplant them.  It helps hold moisture during the hotter, summer days.

Keep The Beets Coming
I plant in March, April, May then hold off until early August when I start putting in seeds, again.  I do that to avoid asking the beet seeds to germinate when the daytime temperature is above 80 degrees.  They don’t like it.  Plant in early August and within 55 to 70 days, you should have your next crop.

Nowadays there are so many varieties of beet to choose from — Early Wonder, Detroit Dark Red, and Red Ace.  You can even add some color to your beet dishes with the lovely striped Chioggia (which started me on my life of beet crime) or Burpee Golden and Albino White

No matter how you slice them…beets are a great addition to any garden.

By the way, one of my favorite resources when I am trying to get solid, informed, basic growing information is the so-called “land grant” colleges like Penn State and Ohio State.  They usually offer fact sheets like the one on beets that was posted by Ohio State.

Next week, another favorite in my fall garden (and another easy one to grow) — lettuce!